Toyota Corolla (E120) 2002–2008 Repair Manual / Diagnostics / Audio system / Radio broadcast cannot be received (bad reception)
Toyota Corolla (E120): Radio broadcast cannot be received (bad reception)
Inspection procedure
1 Check if radio auto–search functions properly
- Check if the radio auto–search functions properly.
- Perform the auto–search of the radio and check that it functions
normally.
Standard: the radio auto–search functions properly.


2 Check optional component
- Check optional component (sun shade film, telephone antenna etc.).
- Check whether or not any optional component is installed, such as
the sunshade film and the
telephone antenna, is installed.
Standard: optional component is installed.


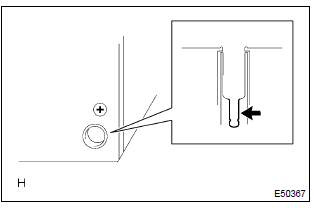
3 Check antenna for noise production
- Noise check with antenna
- with the ignition switch in acc, turn on the radio and choose the am mode.
- Place a tip of a screwdriver or the antenna of the antenna
assembly w/ holder and check that
the noise heard from the speaker.
Standard: noise occurs.


4 Inspect radio receiver assy(antenna)
- Preparation for check
- remove the antenna plug of the radio receiver assembly.
- noise check
- with the radio receiver assembly connector connected, turn the ignition switch to acc.
- Turn on the radio and choose the am mode.
- Place a flat–head screwdriver or a metal such as a
thin wire on the antenna jack of the radio receiver
assembly and check that the noise heard from the
speaker.
Standard: noise occurs.


Replace amplifier antenna assy


Other materials:
Listing the registered portable players
Select “List Audio” using .
The list of registered portable players will be displayed.
● Connecting the registered portable player to the audio system
1 Select the name of the portable player to be connected using
.
2 Select “Select” using .
● Deleting the registered ...
If your vehicle overheats
The following may indicate that your vehicle is overheating.
● Vehicles without a multi-information display: The high engine coolant temperature
warning light comes on or a loss of power is experienced.
Vehicles with a multi-information display: The engine coolant temperature gauge&n ...
Although system is powered,cd cannot be played
Wiring diagram
Inspection procedure
1 Check if a proper cd is inserted
Check that a proper cd is inserted.
Make sure that the cd is a normal audio cd, and that there is no
deformation, flaw, stain, burr
and other defects on the cd.
Standard: normal audio cd.
Reference:
...