Toyota Corolla (E210) 2019-2026 Owners Manual / Vehicle status information and indicators / Fuel consumption information
Toyota Corolla (E210): Fuel consumption information
Fuel consumption information can be displayed on the audio system screen.
System components
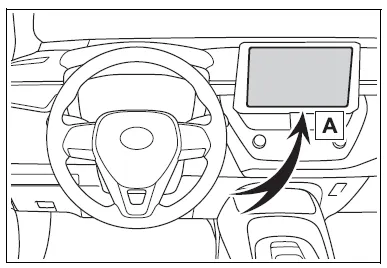
- Audio system screen
Consumption
■ Trip information
1. Select  on the main menu.
2. Select "Trip information".
If a screen other than "Current" is displayed, select "Current".
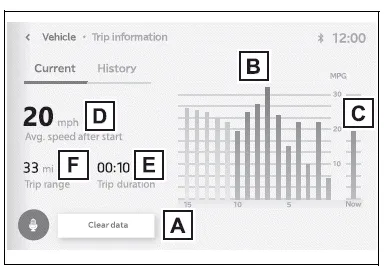
The image is an example only, and may vary slightly from actual conditions.
- Resetting the consumption data
- Fuel consumption in the past 15 minutes
- Current fuel consumption
- Average vehicle speed since the engine was started.
- Elapsed time since the engine was started.
- Cruising range
Average fuel consumption for the past 15 minutes is divided by color into past averages and averages attained since the engine switch was last turned to ON. Use the displayed average fuel consumption as a reference.
■ History
1. Select  on the main menu.
2. Select "Trip information".
If a screen other than "History" is displayed, select "History".
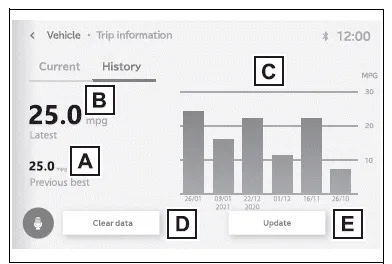
The image is an example only, and may vary slightly from actual conditions.
- Best recorded fuel consumption
- Latest fuel consumption
- Previous fuel consumption record
- Resetting the history data
- Updating the latest fuel consumption data
The average fuel consumption history is divided by color into past averages and the average fuel consumption since the last updated. Use the displayed average fuel consumption as a reference.
■Updating the history data
Update the latest fuel consumption by selecting "Update" to measure the current fuel consumption again.
■Resetting the data
The fuel consumption data can be deleted by selecting "Clear data".
■Cruising range
Displays the estimated maximum distance that can be driven with the quantity of fuel remaining.
This distance is computed based on your average fuel consumption.
As a result, the actual distance that can be driven may differ from that displayed.


Other materials:
Circuit description
The vehicle equipped with abs detects a vehicle speed using the stability
control ecu and wheel speed
sensor. This sensor monitors a wheel rotation speed and sends the signal to the
ecu.
The stability control ecu converts these wheel speed signals into a 4–pulse
signal and outputs it to ...
Keys
The following keys are provided
with the vehicle.
Type A
Keys (without a wireless
remote control function)
Key number plate
Type B
Keys (with a wireless remote
control function)
Operating the wireless remote control
function
Key number plate
Type C
Electronic keys
Operating the sm ...
Overhaul
1. Remove bench type rear seat cushion assy
Disengage the 2 clamps, and then remove the seat cushion.
2. Remove separate type rear seat back assy
lean the seat back forward.
remove the 2 clips.
remove the 2 bolts and seat back lh.
employ the same manner describ ...