Toyota Corolla (E210) 2019-2026 Owners Manual / Vehicle status information and indicators / Multi-information display (7-inch display) / Driving support system
information display
Toyota Corolla (E210): Driving support system information display
■ Driving support system information
Select to display the operational status of the following systems:
- Dynamic radar cruise control
- LTA (Lane Tracing Assist)
- LDA (Lane Departure Alert)
■ Navigation system-linked display (if equipped)
Select to display the following navigation system-linked information:
- Route guidance to destination
- Compass display (heading- up display)
Audio system-linked display
Select to enable selection of an audio source or track on the meter using the meter control switches.
This menu icon can be set to be
displayed/not displayed in .
.
Vehicle information display
■ Drive information
Displays drive information such as the following:
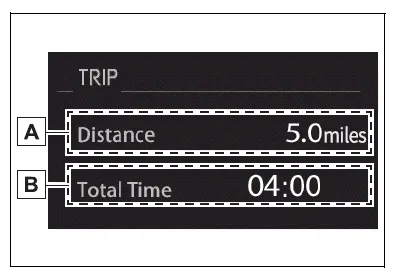
- Drive information 1
- Drive information 2
Displays the following depending
on which drive information
type and drive information items
were selected in .
.
- After start
- Distance: Displays the distance driven since engine start
- Elapsed time: Displays the elapsed time since engine start
- Average vehicle speed: Displays the average vehicle speed since engine start
- After reset
- Distance: Displays the distance driven since the display was reset*
- Elapsed time: Displays the elapsed time since the display was reset*
- Average vehicle speed: Displays the average vehicle speed since the display was reset*
*: To reset, display the desired item and press and hold the meter control switch.
Settings display
■ Meter display settings that can be changed
- Language
Select to change the language displayed. - Units
Select to change the units of measure displayed. - Meter Type
Select to change the meter type. - Dial Type
Select to change the display of the speedometer or tachometer. - Eco Driving Indicator Light Select to enable/disable the Eco Driving Indicator Light.

Fuel economy display
Select to change the average fuel consumption display to any of the following: trip average/total average/ tank average.

Select to display/not display the audio system linked display.

Select to change the displayed content of the following:
- Drive information type
Select to change the drive information type display between trip information/ total information.
- Drive information items
Select to set the first and second items of the drive information display to any of the following: average vehicle speed/distance/elapsed time.
- Pop-up display
Select to enable/disable pop-up displays for each relevant system.
- Multi-information display off
Select to turn the multi-information display off.
To turn the multi-information display on again, press any of the following meter control switches
.
- Default setting
Select to reset the meter display settings to the default setting.
■Suspension of the settings display
- Some settings cannot be changed while driving. When changing settings, park the vehicle in a safe place.
- If a warning message is displayed, operation of the settings display will be suspended.
WARNING
■Cautions during setting up the display
If the engine is running when changing the display settings, ensure that the vehicle is parked in a place with adequate ventilation.
In a closed area such as a garage, exhaust gases including harmful carbon monoxide (CO) may collect and enter the vehicle.
This may lead to death or a serious health hazard.
NOTICE
■During setting up the display
To prevent battery discharge, ensure that the engine is running while setting up the display features.

Other materials:
USB Port/AUX Port
Connect an iPod, USB memory device or portable audio player to the USB/AUX
port as indicated below. Select “iPod”, “USB” or “AUX” on the audio source selection
screen and the device can be operated via multimedia system.
Connecting using the USB/AUX port
■ iPod
Open the cove ...
How to check and change detailed Bluetooth® settings
1 Display the “Bluetooth* Setup” screen.
2 Select “System Settings”.
3 The following screen is displayed:
1 Bluetooth® Power on/off
You can change Bluetooth® function on/off
2 Bluetooth® Name
3 Change PIN-code
4 Bluetooth® Address
5 Display Phone Status
You can set the system ...
Supplemental restraint system
Preparation
Sst
Recomended tools
Equipment
...