Toyota Corolla (E210) 2019-2026 Owners Manual / Vehicle status information and indicators / Fuel consumption information
Toyota Corolla (E210): Fuel consumption information
Fuel consumption information can be displayed on the audio system screen.
System components
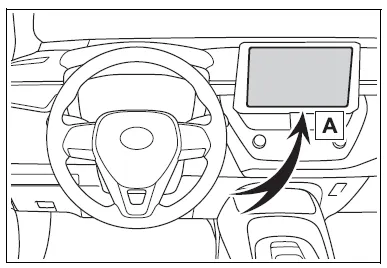
- Audio system screen
Consumption
■ Trip information
1. Select  on the main menu.
2. Select "Trip information".
If a screen other than "Current" is displayed, select "Current".
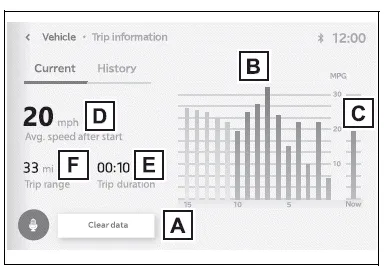
The image is an example only, and may vary slightly from actual conditions.
- Resetting the consumption data
- Fuel consumption in the past 15 minutes
- Current fuel consumption
- Average vehicle speed since the engine was started.
- Elapsed time since the engine was started.
- Cruising range
Average fuel consumption for the past 15 minutes is divided by color into past averages and averages attained since the engine switch was last turned to ON. Use the displayed average fuel consumption as a reference.
■ History
1. Select  on the main menu.
2. Select "Trip information".
If a screen other than "History" is displayed, select "History".
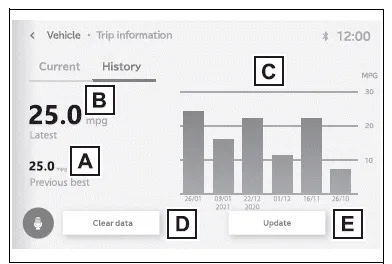
The image is an example only, and may vary slightly from actual conditions.
- Best recorded fuel consumption
- Latest fuel consumption
- Previous fuel consumption record
- Resetting the history data
- Updating the latest fuel consumption data
The average fuel consumption history is divided by color into past averages and the average fuel consumption since the last updated. Use the displayed average fuel consumption as a reference.
■Updating the history data
Update the latest fuel consumption by selecting "Update" to measure the current fuel consumption again.
■Resetting the data
The fuel consumption data can be deleted by selecting "Clear data".
■Cruising range
Displays the estimated maximum distance that can be driven with the quantity of fuel remaining.
This distance is computed based on your average fuel consumption.
As a result, the actual distance that can be driven may differ from that displayed.


Other materials:
Precaution
1. Handling precautions on srs airbag system
The vehicle is equipped with srs (supplemental restraint system) such as
the driver airbag and front
passenger airbag. Failure to carry out service operation in correct sequence
could cause the srs to
unexpectedly deploy during servicing, po ...
Replacement
Hint: components:
1. Discharge refrigerant from refrigeration system
sst 07110–58060 (07117–58080, 07117–58090, 07117–78050, 07117–88060,
07117–88070,
07117–88080)
2. Disconnect cooler refrigerant suction
hose no.1
Remove the bolt and disconnect the cooler refriger ...
Inspection procedure
Hand–held tester:
1 Check operation of stop light
Check if the stop lights go on and off normally when the brake pedal is
depressed and released.
2 Inspect stop light switch assy
Check the resistance between the terminals when the
switch is turned on and off.
Standard:
...