Toyota Corolla (E120) 2002–2008 Repair Manual / Audio & visual / Amplifier antenna assy
Toyota Corolla (E120): Amplifier antenna assy
Replacement
Hint
: components:
- Remove roof headlining assy
Notice
: do not bend the roof headlining assy.
Hint
:
- refer to the procedure from ”remove roof headlining assy” of roof headlining assy.
- Remove the related parts as long as the amplifier antenna assy can be removed.
2. Remove roof antenna pole sub–assy
3. Remove amplifier antenna assy
- Disconnect the connector and antenna cord plug.
- remove the clamp.
- remove the antenna nut and amplifier antenna assy.
4. Install amplifier antenna assy
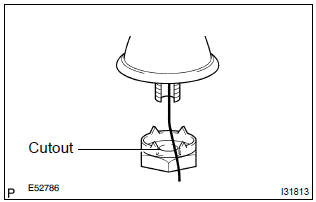
- Set the amplifier antenna assy to the hole on the roof, and place the antenna cord on the cutout of the antenna nut.
- install the amplifier antenna assy with the antenna nut.
Torque: 4.5 Nvm (46 kgfvcm, 40 in.Vlbf)
5. Install roof headlining assy
6. Install rear seat back assy (fixed type rear seat)
7. Install rear seat back assy (separated type rear seat)
8. Install bench type rear seat cushion assy


Other materials:
Pre–check
1. Srs warning light check
Turn the ignition switch to the on position and check that
the srs warning light lights up.
check that the srs warning light goes out after approx.
6 Seconds.
Hint:
when the ignition switch is at on and the srs warning
light remains on or flashes, the ...
Circuit description
The p/t squib (lh) circuit consists of the airbag sensor assy center and seat
belt pretensioner (lh).
It causes the srs to deploy when the srs deployment conditions are satisfied.
Dtc b0135/73 is recorded when a short is detected in the p/t squib (lh) circuit.
Wiring diagram
...
Replacement
Hint:
installation is in the reverse order of the removal. But the installation is
indicated only when it has a point.
1. Remove radiator grille sub–assy
Remove the 2 bolts and clip.
using a screwdriver, remove the radiator grille.
Hint:
tape the screwdriver tip before use. ...