Toyota Corolla (E120): Replacement
Hint
: components:
1. Remove radiator grille sub–assy
2. Remove front bumper cover
3. Remove lh headlamp assy
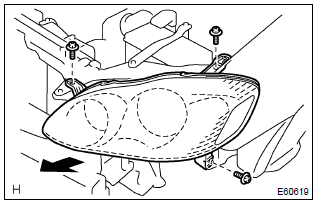
- Remove the 3 bolts.
- pull out the headlight assy lh forward, then disconnect the bracket of body side.
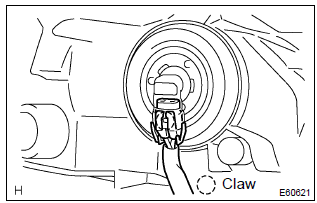
- Release the claws and disconnect the connectors as shown in the illustration, and remove the headlight assy lh.
4. Install retainer, headlamp protector, upr lh
Hint: when only the installation part of the headlight assy lh is damaged, it can be repaired inexpensively by using a headlight protector retainer upr lh. In this case, however, the headlight assy lh itself should not be damaged.
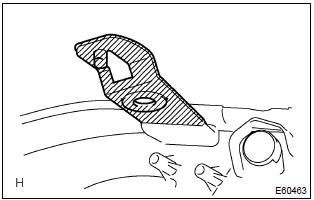
- Cut off the part shaded in the illustration and sand smooth with sandpaper.
Notice
: after cutting off the part roughly, place the headlight protector retainer upr lh against the bosses and gradually file any interfering part until the proper condition for installation is made.
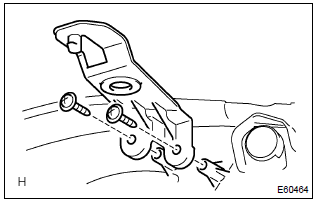
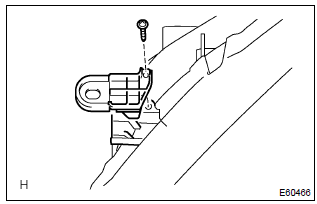
- Install the headlight protector retainer upr lh with 2 screws.
5. Install retainer, headlamp protector, lwr lh

- Cut off the part shaded in the illustration and sand smooth with sandpaper.
Notice
: after cutting off the part roughly, place the headlight protector retainer lwr lh against the bosses and gradually file any interfering part until the proper condition for installation is made.
- Install the headlight protector retainer lwr lh with a screw.
6. Put vehicle these conditions
7. Adjust fog light aim
8. Headlight aim only


Other materials:
Floor shift parking lock cable assy (atm)
Replacement
1. Precaution
2. Disconnect battery negative terminal
3. Place front wheels facing straight ahead
4. Remove horn button assy
5. Remove steering wheel assy
sst 09950–50013 (09951–05010, 09952–05010, 09953–05020, 09954–05021)
6. Remove steering column cover
7. Remove c ...
Disposal
1. Dispose shock absorber assy rear lh
Fully extend the shock absorber rod.
using a drill, make a hole in the cylinder as shown in the
illustration to discharge the gas inside.
Caution:
when drilling, chips may fly out, work carefully.
The gas is colorless, odorless and no ...
Overhaul
Notice: when installing, coat the parts indicated by the arrow with
power steering fluid or molybdenum disulfide lithium base grease.
1. Precaution
2. Disconnect battery negative terminal
3. Inspect center front wheel
4. Remove horn button assy
5. Remove steering wheel assy
sst 09950–50013 ...