Toyota Corolla (E210) 2019-2026 Owners Manual / Interior features / Other interior features / USB charging port (if
equipped)
Toyota Corolla (E210): USB charging port (if equipped)
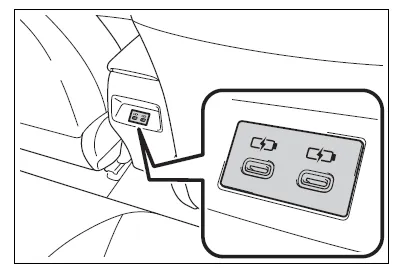
The USB charging port are used to supply 3.0 A of electricity at 5 V to external devices.
The USB charging port are for charging only. They are not designed for data transfer or other purposes.
Depending on the external device, it may not charge properly.
Refer to the manual included with the device before using a USB charging port.
■ Using the USB charging port
Front
Lift the lid while pulling up the knob.
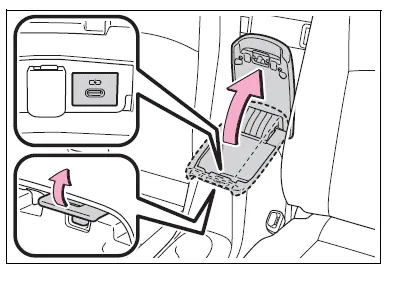
Rear (if equipped)
■The USB charging port can be used when
The engine switch is in ACC or ON.
■Situations in which the USB charging port may not operate correctly
- If a device which consumes more than 3.0 A at 5 V is connected
- If a device designed to communicate with a personal computer, such as a USB memory device, is connected
- If the connected external device is turned off (depending on device)
- If the temperature inside the vehicle is high, such as after the vehicle has been parked in the sun
■About connected external device
Depending on the connected external device, charging may occasionally be suspended and then start again. This is not a malfunction.
NOTICE
■To prevent damage to the USB charging port
- Do not insert foreign objects into the port.
- Do not spill water or other liquids into the port.
- Do not apply excessive force to or impact the USB charging port.
- Do not disassemble or modify the USB charging port.
■To prevent damage to external devices
- Do not leave external devices in the vehicle. The temperature inside the vehicle may become high, resulting in damage to an external device.
- Do not push down on or apply unnecessary force to an external device or the cable of an external device while it is connected.
■To prevent battery discharge
Do not use the USB charging port for a long period of time with the engine stopped.


Other materials:
Deleting a registered phone number
1 Select “Delete contacts” using .
2 Select the desired phone number using
and press
(YES).
To delete all of the registered phone numbers, select “All delete” using
and press
(YES). ...
Replacement
1. Remove console box sub–assy rear
2. Remove parking brake lever sub–assy
Disconnect the parking brake switch connector from the
parking brake switch.
remove the lock nut and adjusting nut from the parking
brake cable assy no.1.
Remove the 2 bolts.
Usin ...
Setting the tire pressure
(vehicles with a tire pressure
warning system)
In the following situations, it will
be necessary to perform the tire
inflation pressure setting procedure
of the tire pressure warning
system.
When the specified tire inflation
pressure has changed,
such as due to carried load,
etc.
When the tire inflation pressure
is changed such as
when t ...