Toyota Corolla (E120) 2002–2008 Repair Manual / Automatic transmission / trans / Front differential oil seal
Toyota Corolla (E120): Front differential oil seal
Replacement
1. Drain manual transaxle oil
torque: 39.2 Nvm (400 Kgf·cm, 29 ft·lbf)
2. Remove front wheels
3. Remove engine under cover lh
4. Remove engine under cover rh
5. Drain transaxle oil
6. Remove front drive shaft assy lh
sst 09520–01010, 09520–24010 (09520–32040)
7. Remove front drive shaft assy rh
sst 09520–01010, 09520–24010 (09520–32040)
8. Remove transaxle case oil seal
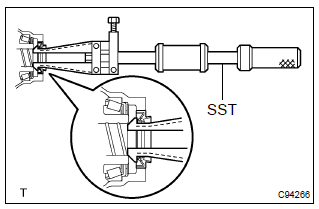
- Using sst, remove the transaxle case oil seal.
Sst 09308–00010
9. Remove transmission case oil seal
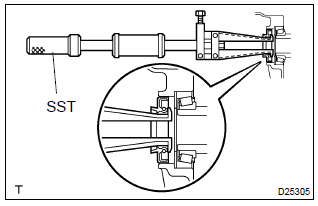
- Using sst, remove the transmission case oil seal.
Sst 09308–00010
10. Install transaxle case oil seal
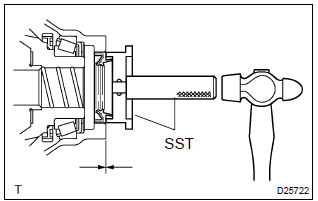
- Coat a new oil seal lip with mp grease.
- using sst and a hammer, install the transaxle case oil
seal.
Sst 09554–14010, 09950–70010 (09951–07200) drive in depth: 1.9 0.3 Mm (0.075 0.012 In.)
Notice
: be careful not to damage the oil seal lip.
11. Install transmission case oil seal
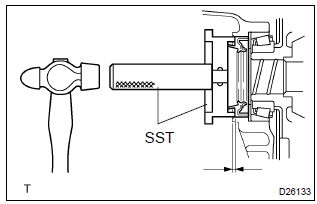
- Coat a new oil seal lip with mp grease.
- using sst and a hammer, install the transmission case
oil seal.
Sst 09554–14010, 09950–70010 (09951–07200) drive in depth: 9.9 0.3 Mm (0.390 0.012 In.) Notice
: be careful not to damage the oil seal lip.
- Install front drive shaft assy lh
- Install front drive shaft assy rh
- Install front wheels torque: 103 nvm (1,050 Kgf·cm, 76 ft·lbf)
- Add manual transaxle oil
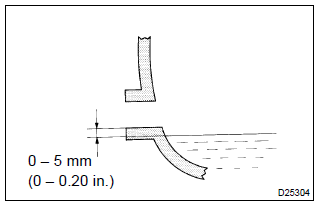
Oil grade: api gl–4 or gl–5
viscosity: sae 75 w–90
capacity:1.9 Liters (2.0 Us qts, 1.7 Lmp. Qts)
torque: 39.2 Nvm (400 Kgf·cm, 29 ft·lbf)
16. Inspect and adjust manual transaxle oil
17. Inspect and adjust front wheel alignment
18. Check abs speed sensor signal
Other materials:
Circuit description
The door key lock and unlock switch is built in the door lock motor.
Wiring diagram
Inspection procedure
1 Check door lock
2 Check wire harness (tvip ecu door lock)
Disconnect the tvip ecu and door lock connectors.
check the continuity between the terminals of the t ...
Floor shift cable transmission control select
Replacement
Hint: components:
1. Remove air conditioner unit assy
Hint:
refer to the instructions for removal of the air conditioner unit assy.
2. Separate air bag sensor assy center
remove the 3 bolts, separate the airbag sensor assy center.
3. Remove exhaust pipe assy
4. Remo ...
Adding a new phone number
Select “Add contacts” using . ●
Transferring all contacts from the cellular phone
Select “Overwrite all contacts” using
and press
(YES).
● Transferring one contact from the cellular phone
Select “Add one contact” using and
press (YES). ...


