Toyota Corolla (E120) 2002–2008 Repair Manual / Engine control system / Ecm (1zz–fe)
Toyota Corolla (E120): Ecm (1zz–fe)
Replacement
1. Disconnect battery negative terminal
2. Remove glove compartment door assy
3. Remove ecm

- Remove the 2 clips using a clip remover. Then, open the cover.
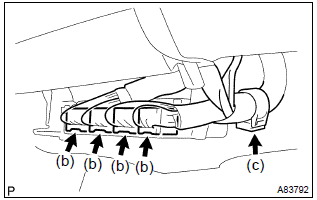
- Disconnect the 4 ecm connectors.
- remove the wire harness from the wire harness clamp.
- Remove the 2 bolts.
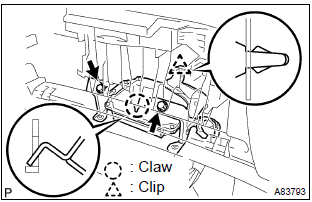
- unfasten the claw and clip, then remove the ecm.
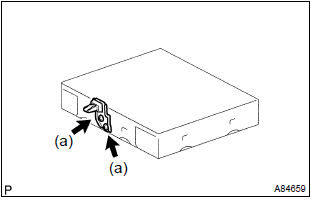
4. Remove ecm cover
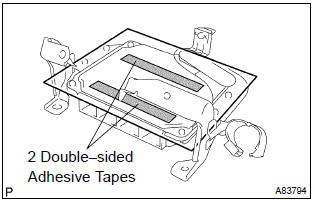
- Take the 2 double–sided adhesive tapes off the ecm, then remove the ecm cover.
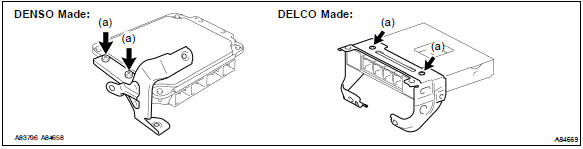
5. Remove ecm bracket no.2 (Denso made)
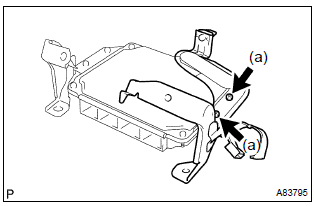
- Remove the 2 screws, then remove the ecm bracket no.
2.
6. Remove ecm bracket no.1
- Remove the 2 screws, then remove the ecm bracket no.
7. Remove ecm bracket no.3 (Delco made)
- Remove the 2 screws, then remove the ecm bracket no.
8. Install ecm bracket no.3 (Delco made) torque: 3.2 Nvm (33 kgfvcm, 28 in.Vlbf)
9. Install ecm bracket no.1 Torque: 3.2 Nvm (33 kgfvcm, 28 in.Vlbf)
10. Install ecm bracket no.2 (Denso made) torque: 3.2 Nvm (33 kgfvcm, 28 in.Vlbf)
11. Install ecm cover
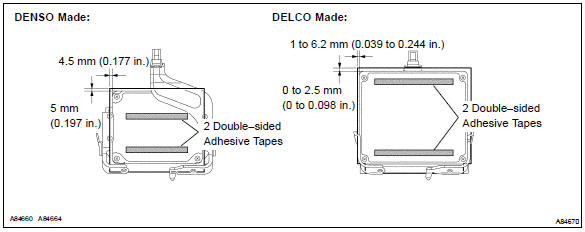
- Install a new ecm cover to the ecm as shown in the illustration.
12. Install ecm torque: 3.0 Nvm (31 kgfvcm, 27 in.Vlbf)
13. Install glove compartment door assy
14. Connect battery negative terminal torque: 5.4 Nvm (55 kgfvcm, 48 in.Vlbf)
15. Reset memory (a/t transaxle)
Caution
: perform the reset memory (at initialization) when replacing the ecm, engine assembly or automatic transaxle assembly.
- The hand–held tester only.
- Connect the hand–held tester to the dlc3.
- Turn the ignition switch on.
- Perform the reset memory procedure from the engine menu.
Caution
: after performing the reset memory, be sure to perform the road test as described earlier.


Other materials:
Maintenance requirements
To ensure safe and economical driving, day-to-day care and regular maintenance
are essential. It is the owner’s responsibility to perform regular checks. Toyota
recommends the following maintenance:
General maintenance
General maintenance should be performed on a daily basis. This can be don ...
For vehicles equipped with catalytic converter
Caution:
if large amount of unburned fuel flows into the converter, it may cause
overheating and a fire hazard.
To prevent this, observe the following precautions.
Use only unleaded gasoline.
avoid prolonged idling.
Avoid running the engine at idle speed for more than 20 minutes. ...
Circuit description
The seat position sensor circuit consists of the airbag sensor assy center
and seat position sensor.
Dtc b1153/25 is recorded when a malfunction is detected in the seat position
sensor circuit.
Wiring diagram
...