Toyota Corolla (E120) 2002–2008 Repair Manual / Diagnostics / Sfi system / Diagnostic trouble code chart
Toyota Corolla (E120): Diagnostic trouble code chart
Hint
: as for the vehicle for mexico, refer to repair manual 2003 corolla (pub. No. Rm938u).
Parameters listed in the chart may not be exactly the same as your readings due to the type of instrument or other factors.
If a malfunction code is displayed during the dtc check in the check mode, check the circuit for the codes listed in the table below. For details of each code, refer to the ’’’’ under the respective ’’dtc no.’’ In the dtc chart.
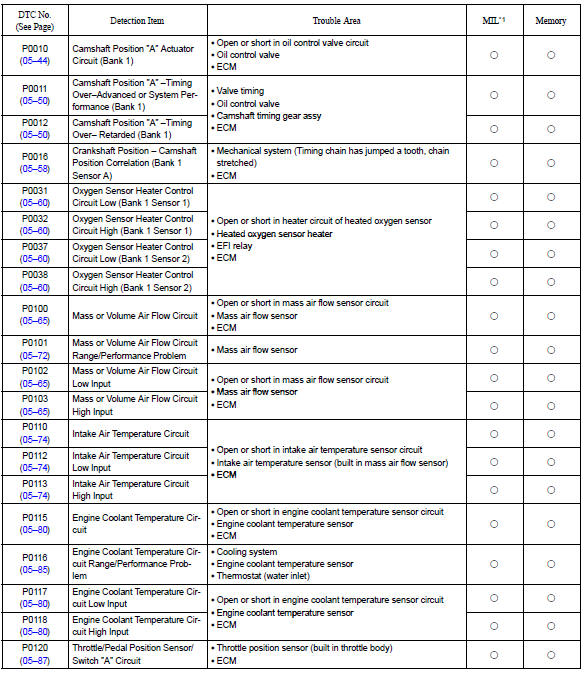
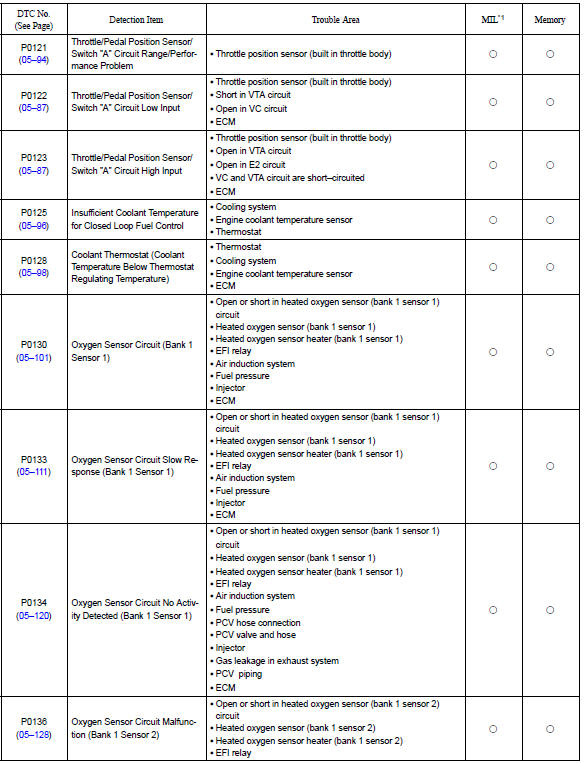
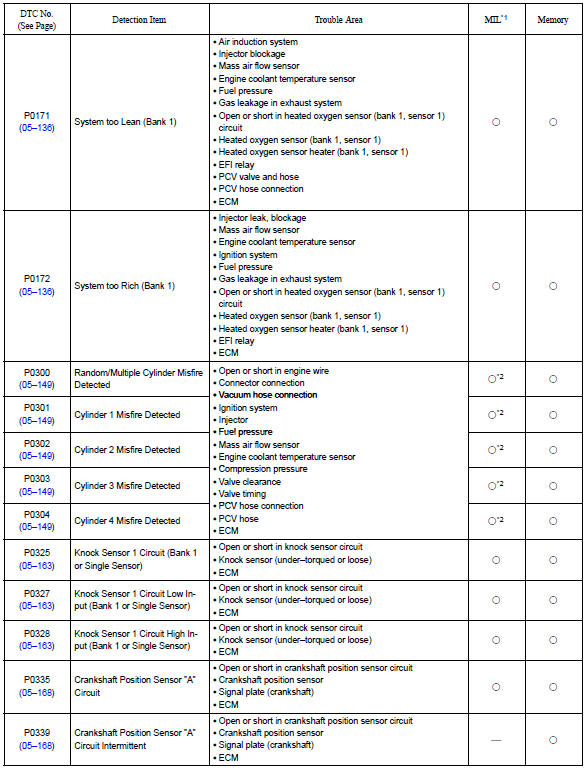
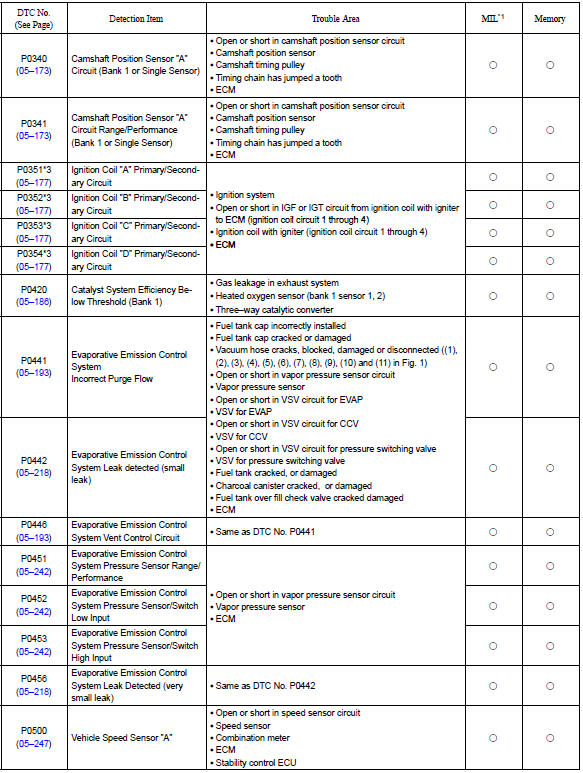
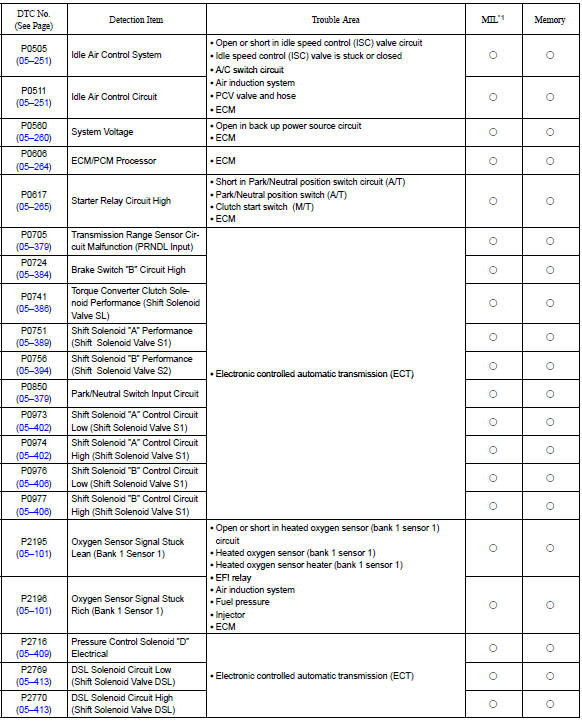
*1: ” ○” ... Mil is illuminated, ”—” ... Mil is not illuminated.
*2: Mil is illuminated or blinks *3: this dtc is indicate a malfunction related to primary circuit.


Other materials:
Deactivating or stopping the alarm
Do one of the following to deactivate or stop the alarm:
● Unlock the doors or open the trunk.
● Vehicles without a smart key system:
Turn the engine switch to the “ACC” or “ON” position, or start the engine. (The
alarm will be deactivated or stopped after a few seconds.)
& ...
Customizing vehicle features
It is possible to customize the language and Eco Driving Indicator Light settings
using the “DISP” switch.
When customizing vehicle features, ensure that the vehicle is parked in a safe
place with the shift the shift lever to P (continuously variable transmission) or
N (manual transmissio ...
Replacement
1. Remove instrument panel sub–assy lower
2. Remove clutch pedal spring
3. Remove clutch master cylinder push rod clevis w/hole pin
Remove the clip and hole pin.
4. Remove clutch pedal support sub–assy
W/ cruise control:
disconnect the clutch switch assy connector.
&nbs ...