Toyota Corolla (E120): Replacement
Hint
: components:
1. Remove floor shift shift lever knob sub–assy
2. Remove console panel upper
3. Remove parking brake hole cover sub–assy
4. Remove console box sub–assy rear
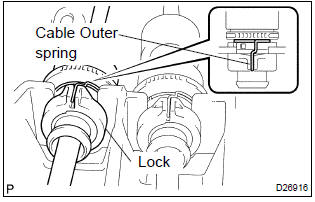
5. Separate floor shift cable transmission control shift
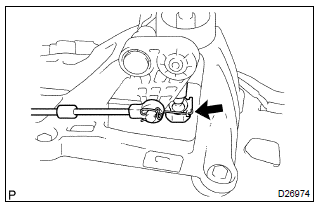
- Separate the end of the shift cable from the shift lever assy.
- Using a screwdriver, release the cable outer spring.
- turn the lock, separate the shift cable from the shift lever retainer.
6. Separate floor shift cable transmission control select
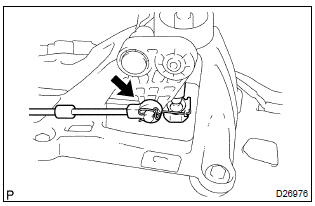
- Separate the end of the select cable from the shift lever assy.
- Using a screwdriver, release the cable outer spring.
- turn the lock, separate the select cable from the shift lever retainer.
7. Remove floor shift shift lever assy
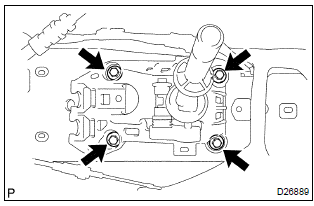
- Remove the 4 bolts and shift lever assy.
8. Install floor shift shift lever assy
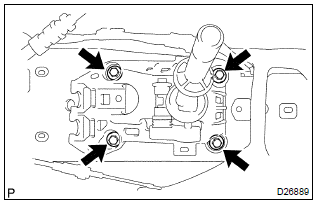
- Install the shift lever assy with the 4 bolts.
Torque: 12 nvm (120 Kgf·cm, 9 ft·lbf)
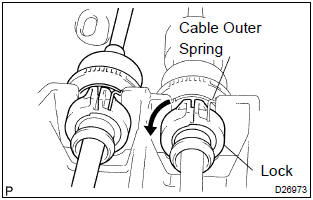
9. Connect floor shift cable transmission control shift
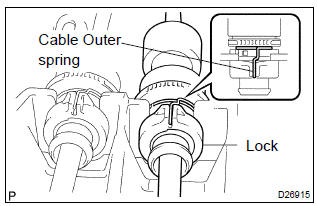
- Connect the shift cable to the retainer of shift lever assy,
turn the lock.
Notice
: the projecting part of the lock should face upward when the shift cable is installed.
- install the cable outer spring to the lock.
Notice
: make sure that after installation the cable outer spring is moved to the place shown in the illustration.
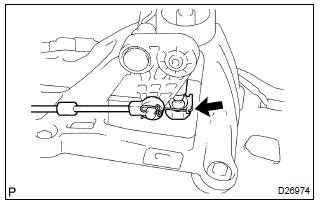
- Connect the end of the shift cable to the shift lever assy.
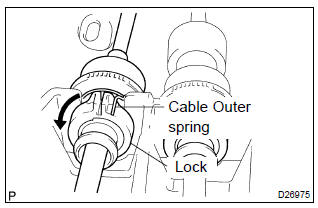
10. Connect floor shift cable transmission control select
- connect the select cable to the retainer of shift lever assy,
turn the lock.
Notice
: the projecting part of the lock should face upward when the select cable is installed.
- install the cable outer spring to the lock.
Notice
: make sure that after installation the cable outer spring is moved to the place shown in the illustration.
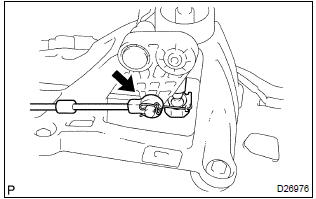
- Connect the end of the select cable to the shift lever assy.


Other materials:
Air conditioning controls
■ Adjusting the temperature setting
To adjust the temperature setting, turn
clockwise to increase the temperature
and turn counterclockwise to decrease
the temperature.
■ Fan speed setting
Press “>” on to increase the fan
speed.
Press “<” on to decrease the ...
Inspection procedure
1 Inspect skid control ecu connector(+bs terminal voltage)
Disconnect the skid control ecu connector.
measure the voltage between terminals +bs (2) and gnd
(1, 23) of skid control ecu harness side connector.
Voltage: 10 – 14 v
2 Reconfirm dtc
Check the dtc .
Ok :
...
SRS airbags
The SRS airbags inflate when the vehicle is subjected to certain
types of severe impacts that may cause significant injury
to the occupants. They work together with the seat belts to
help reduce the risk of death or serious injury.
SRS airbag system
■ Location of the SRS airbags
SRS front airbags ...