Toyota Corolla (E120): Replacement
1. Remove battery
2. Remove battery carrier
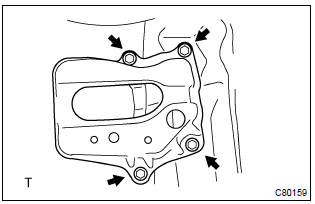
- Remove the 4 bolts and battery carrier.
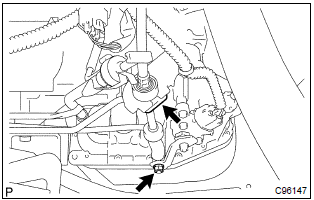
3. Disconnect floor shift cable transmission control shift
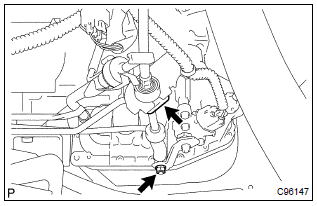
- Remove the nut from the control shaft lever.
- disconnect the control cable from the control shaft lever.
- remove the clip and disconnect the control cable from the control cable bracket.
4. Remove park/neutral position switch assy
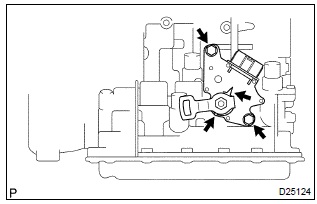
- Disconnect the park/neutral position switch connector.
- remove the nut, washer and control shaft lever.
- pry out the lock plate and remove the manual valve shaft nut.
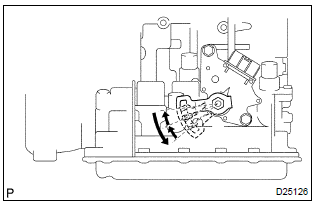
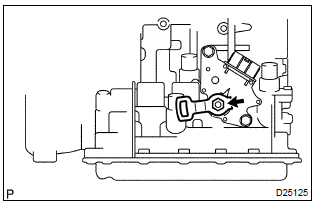
- remove the 2 bolts and pull out the park/neutral position switch.
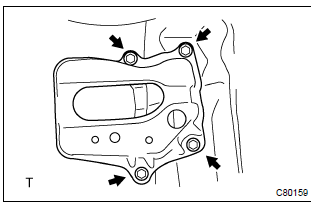
5. Install park/neutral position switch assy
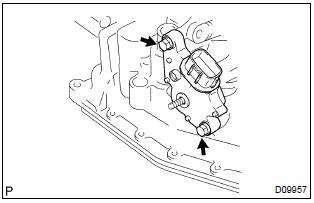
- Install the park/neutral position switch to the manual valve shaft.
- temporarily install the 2 bolts.
- place a new lock plate and tighten the nut.
Torque: 5.5 Nvm (56 Kgf·cm, 49 in.Vlbf)
- temporarily install the control shaft lever.
- Turn the lever counterclockwise until it stops, then turn it clockwise 2 notches.
- remove the control shaft lever.
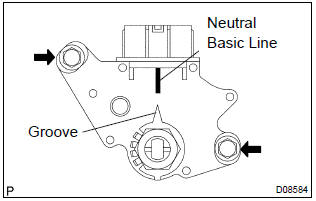
- Align the groove with neutral basic line.
- hold the switch in position and tighten the 2 bolts.
Torque: 5.5 Nvm (56 Kgf·cm, 49 in.Vlbf)
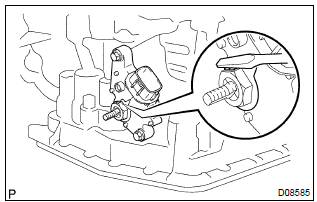
- Using a screwdriver, stake the nut with the lock plate.
- Install the control shaft lever, washer and nut.
Torque: 12.5 Nvm (127 Kgf·cm, 9 ft·lbf)
- connect the park/neutral position switch connector.
6. Install floor shift cable transmission control shift
- Temporarily install the control cable to the control shaft lever with nut.
- install the control cable and clip to the bracket.
7. Install battery carrier
- Install the battery carrier and 4 bolts.
Torque: 13 nvm (132 Kgf·cm, 10 ft·lbf)
8. Adjust shift lever position
9. Inspect shift lever position
10. Inspect park/neutral position switch assy


Other materials:
Circuit description
The d squib circuit consists of the airbag sensor assy center, spiral cable
sub–assy and horn button assy.
It causes the srs to deploy when the srs deployment conditions are satisfied.
Dtc b1180/17 is recorded when a short is detected in the d squib circuit (2nd
step).
Wiring diagra ...
Heater control & accessory assy
Replacement
1. Remove console panel upper
2. Remove instrument cluster finish panel
3. Remove heater control & accessory assy
Release the 2 fitting claws and pull out the heater control
& accessory assy.
Using a screwdriver, open the claw of the cable clamp and
dis ...
Inspection procedure
1 Check tvip ecu
Check that the operation of the tvip function is normal.
Hint:
with this inspection, the tvip ecu cpu can be diagnosed if it works normally or
not.
2 Check wire harness (tvip ecu integration relay)
Disconnect the tvip ecu and integration relay connectors.
ch ...