Toyota Corolla (E120) 2002–2008 Repair Manual / Exterior/interior trim / Out side moulding
Toyota Corolla (E120): Out side moulding
Replacement
Hint
: use the same procedures for the rh side and lh side.
1. Remove outside moulding
- Put protective tape around the moulding.
- insert a piano wire between the vehicle body and moulding.
- tie objects that can serve as handles (for example, wooden blocks) to all wire ends.
- pull the piano wire and scrape off the double–sided tape that holds the moulding to the vehicle body.
Notice
:
- if reusing the moulding, take care not to damage the moulding.
- Becareful not to damage the body.
- remove the moulding.
2. Install outside moulding lh
- using a heat light, heat the body.
Heating temperature: 40 to 60 c (104 to 140 f)
Notice
: do not heat the body excessively.
- remove the double–sided tape from the body.
- wipe off the stains with cleaner.
- clean the moulding (if reusing).
- Using a heat light, heat the body.
Heating temperature: 20 to 30 c (68 to 86 f).
Notice
: do not heat the moulding excessively.
- Remove the double–sided tape from the moulding.
- Wipe off the stains with cleaner.
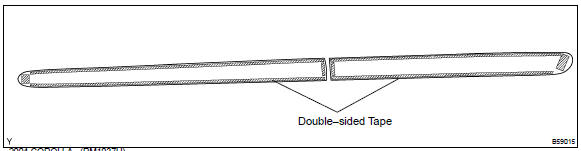
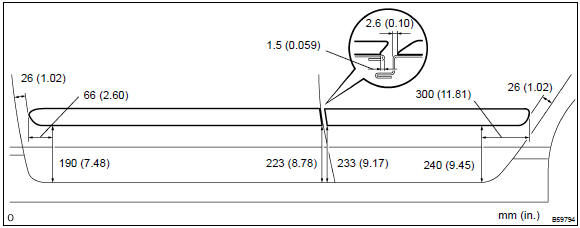
- Apply new adhesive tape to the moulding as shown in the illustration.
- Using a heat light, heat the body and moulding.
Heating temperature:

Notice
: do not heat the body and moulding excessively.
- remove the peeling paper from the double–sided tape on
the moulding face.
Notice
: when the peeling paper is removed, take care that no dirt or dust contaminates the adhesive.
- affix the moulding to the body, as shown in the illustration.
Notice
: do not apply excessive force onto the moulding. Use steady pressure with your thumbs.


Other materials:
Mechanical system tests
1. Perform mechanical system tests
Measure the stall speed.
The object of this test is to check the overall performance of the transaxle
and engine by measuring
the stall speeds in the d and r positions.
Notice:
Do the test at normal operating atf temperature 50 to 80 °c (122 to
...
License plate lamp assy
Replacement
1. Remove luggage compartment lock cylinder & key set
2. Remove luggage compartment door garnish outside
3. Remove license plate lamp assy
Pull the license plate light assy to the side of vehicle as
shown in the illustration and release the claw.
disconnect the c ...
Pre–check
1. Srs warning light check
Turn the ignition switch to the on position and check that
the srs warning light lights up.
check that the srs warning light goes out after approx.
6 Seconds.
Hint:
when the ignition switch is at on and the srs warning
light remains on or flashes, the ...