
Toyota Corolla (E120) 2002–2008 Repair Manual / Diagnostics / Toyota vehicle intrusion protection system / Door courtesy switch circuit / Inspection procedure
Toyota Corolla (E120): Inspection procedure
1 Check courtesy lamp switch
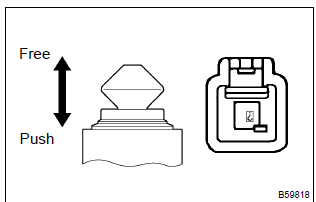
- Check the courtesy switch, as shown in the illustration and table.
Standard:



2 Check wire harness (integration relay door courtesy sw)
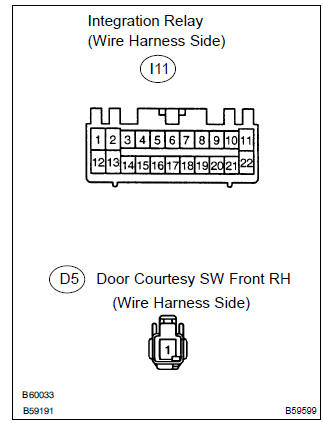
- Disconnect the integration relay and door courtesy connectors.
- check the continuity between the terminals of the integration relay and door courtesy switch connectors, as shown in the illustration and table.
Standard:

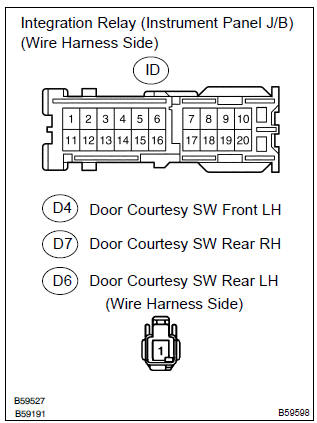
- Disconnect the each door courtesy switch connectors.
- check the continuity between the terminals of the integration relay and door courtesy switch connectors, as shown in the illustration and table.
Standard:
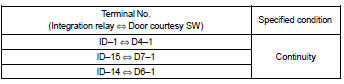


3 Check wire harness (tvip ecu luggage compartment light sw)
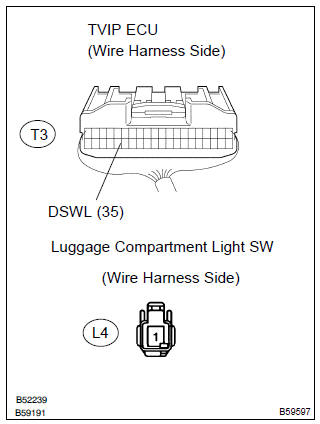
- Disconnect the tvip ecu and luggage comportment light switch connectors.
- check the continuity between the terminals of the tvip ecu and luggage compartment light switch connectors, as shown in the illustration and table.
Standard:



Proceed to next circuit inspection shown on problem symptoms table


Other materials:
Inspection procedure
Hint:
if different dtcs related to different systems that have terminal e2
as the ground terminal are output
simultaneously, terminal e2 may be open.
If dtc p0441 (purge flow), p0446 (vsv for ccv), p0451, p0452 or p0453
(evaporative pressure
sensor) is output with dtc p0442 or p0456, ...
Body dimension drawings
Engine compartment
Body opening areas (side view: front)
Body opening areas (side view: rear)
Sedan
Body opening areas (rear view)
Sedan
Under body
Under body
Front suspension crossmember
Front suspension crossmember
...
Mass or volume air flow circuit
Dtc p0100 mass or volume air flow circuit
Dtc p0102 mass or volume air flow circuit
low input
Dtc p0103 mass or volume air flow circuit
high input
Circuit description
The maf (mass air flow) sensor measures the amount of air flowing through the
throttle valve. The ecm
uses this information ...