Toyota Corolla (E210) 2019-2026 Owners Manual / Maintenance and care / Light bulbs
Toyota Corolla (E210): Light bulbs
You may replace the following bulbs yourself. The difficulty level of replacement varies depending on the bulb. If necessary bulb replacement seems difficult to perform, contact your Toyota dealer.
For more information about replacing other light bulbs, contact your Toyota dealer.
Preparing for light bulb replacement
Check the wattage of the light bulb to be replaced.
Bulb locations
■ Front
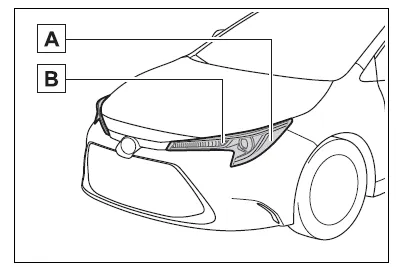
- Front side marker lights (bulb type)
- Front turn signal/parking lights (vehicles without side turn signal lights)
■ Rear
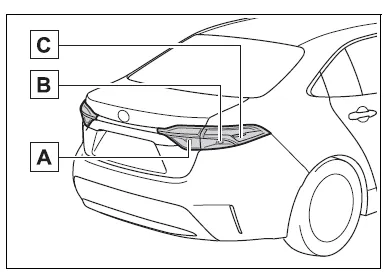
- Back-up lights
- Rear turn signal lights
- Rear side marker lights (bulb type)
■ Bulbs that need to be replaced by your Toyota dealer
- Headlights/daytime running lights
- Parking lights (vehicles with side turn signal lights)
- Front turn signal lights (vehicles with side turn signal lights)
- Front side marker lights (LED type)
- LED accent lights (if equipped)
- Side turn signal lights (if equipped)
- Tail lights
- Stop lights
- Rear side marker lights (LED type)
- High mounted stoplight
- License plate lights
■LED light bulbs
The lights other than the front turn signal lights/parking lights (vehicles without side turn signal lights), front side marker lights (bulb type), rear turn signal lights, rear side marker lights (bulb type) and back-up lights consist of a number of LEDs. If any of the LEDs burn out, take your vehicle to your Toyota dealer to have the light replaced.
■Condensation build-up on the inside of the lens
In certain situations, such as when driving in the rain or when washing the vehicle, condensation may form on the inner side of the headlight lens and other lights. As each light has a ventilation hole, moist air may enter. If the ambient temperature is low, condensation may form temporarily, but it will dissipate as the inside of the light is warmed up. As the condensation is due to a phenomenon similar to windows fogging in the rain, it does not indicate a malfunction.
Contact your Toyota dealer for more information in the following situations:
- Large drops of water have built up on the inside of the lens.
- Water has built up inside the headlight.
Replacing light bulbs
■ Front turn signal/parking lights (vehicles without side turn signal lights)
1. Turn the bulb base counterclockwise.
Type A
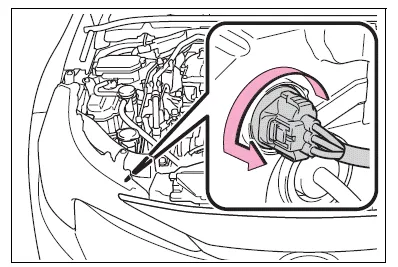
Type B
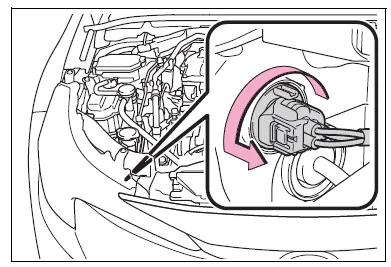
2. Remove the light bulb.
Type A
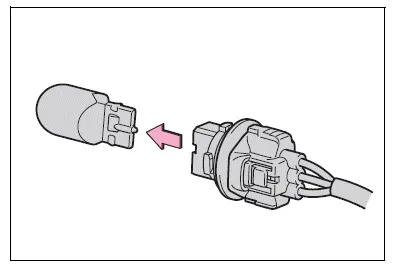
Type B
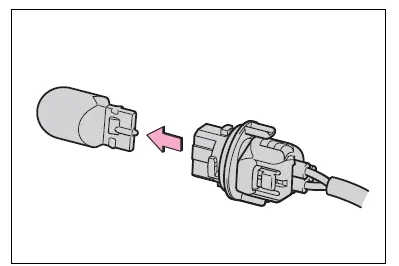
3. When installing, reverse the steps listed.
■ Front side marker lights (bulb type)
1. Turn the bulb base counterclockwise.

2. Remove the light bulb.
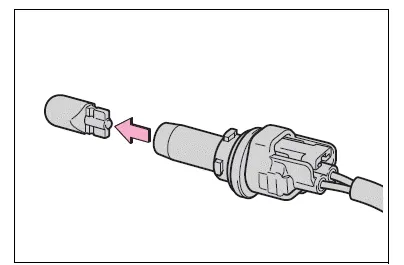
3. When installing, reverse the steps listed.
■ Rear turn signal lights and rear side marker lights (vehicles with blub type rear side marker lights)
1. Open the trunk lid.
2. Insert a flathead screwdriver between the cover and the light assembly and pry up the cover to disengage the claws (indicated by a dotted line).
To prevent scratching the vehicle, wrap the tip of the flathead screwdriver with a cloth, etc.
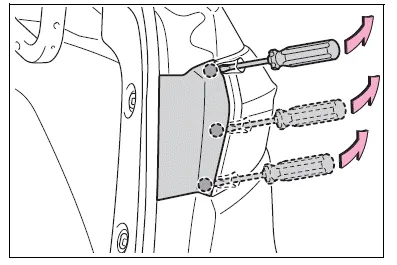
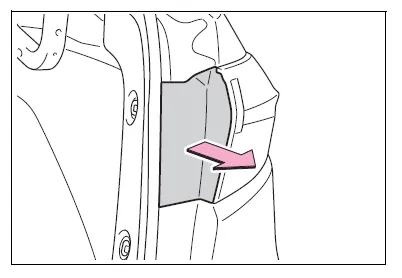
3. Pull the cover toward the rear of the vehicle and remove the cover.
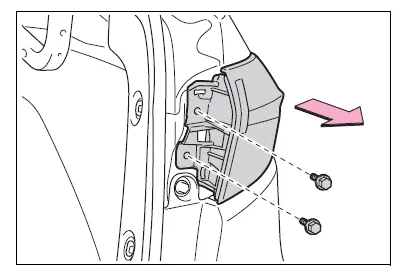
4. Remove the 2 screws and then remove the light assembly by pulling it straight back.
5. Turn the bulb base counterclockwise.
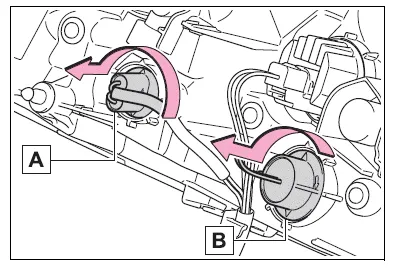
- Rear side marker lights
- Rear turn signal lights
6. Remove the light bulb.
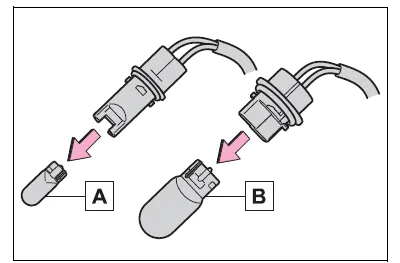
- Rear side marker lights
- Rear turn signal lights
7. When installing the light bulb, install it by conducting steps 6 and 5 with the directions reversed.
8. Install the light assembly and then install the 2 screws.
Align the A guide and pin B on the light assembly with the mounting when installing it.
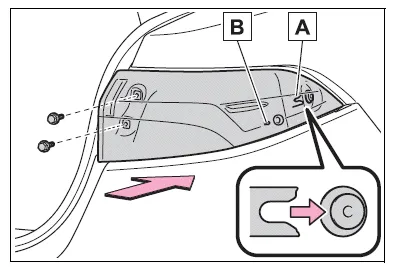
9. Install the cover.
■ Rear turn signal lights (vehicles with LED type rear side marker lights)
1. Open the trunk lid.
2. Insert a flathead screwdriver between the cover and the light assembly and pry up the cover to disengage the claws (indicated by a dotted line).
To prevent scratching the vehicle, wrap the tip of the flathead screwdriver with a cloth, etc.
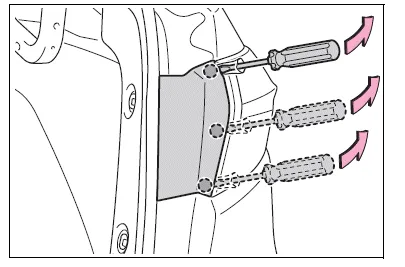
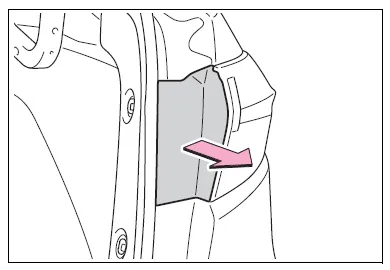
3. Pull the cover toward the rear of the vehicle and remove the cover.
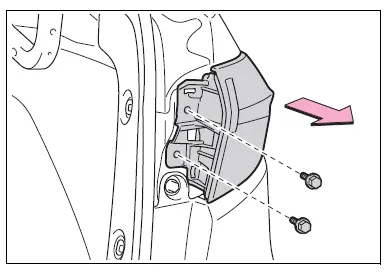
4. Remove the 2 screws and then remove the light assembly by pulling it straight back.
5. Turn the bulb base counterclockwise.
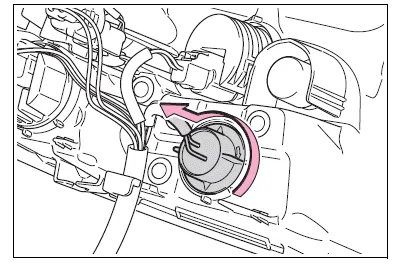
6. Remove the light bulb.
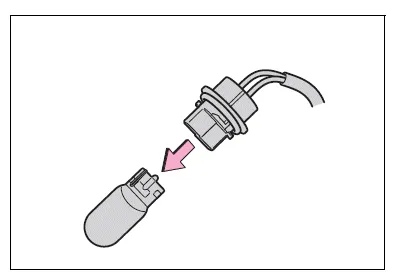
7. When installing the light bulb, install it by conducting steps 6 and 5 with the directions reversed.
8. Install the light assembly and then install the 2 screws.
Align the guide A and pin B on the light assembly with the mounting when installing it.
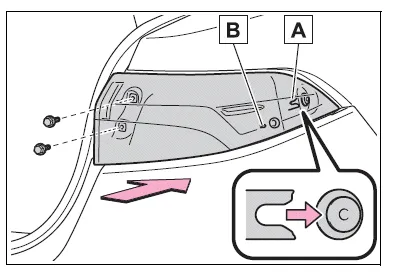
9. Install the cover.
■ Back-up lights
1. Open the trunk lid, remove the clips, and pull back the cover.
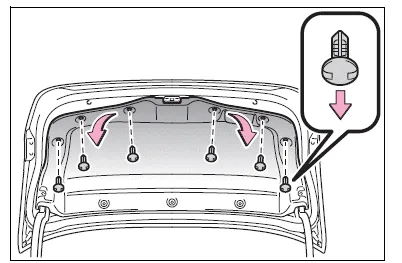
2. Turn the bulb base counterclockwise and remove it.

3. Remove the light bulb.
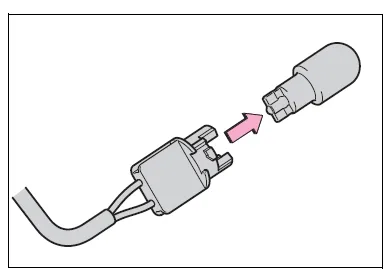
4. When installing, reverse the steps listed.
WARNING
■Replacing light bulbs
- Turn off the lights. Do not attempt to replace the bulb immediately after turning off the lights. The bulbs become very hot and may cause burns.
- Do not touch the glass portion of the light bulb with bare hands. When it is unavoidable to hold the glass portion, use and hold with a clean dry cloth to avoid getting moisture and oils on the bulb. Also, if the bulb is scratched or dropped, it may blow out or crack.
- Fully install light bulbs and any parts used to secure them. Failure to do so may result in heat damage, fire, or water entering the light unit. This may damage the lights or cause condensation to build up on the lens.
■To prevent damage or fire
Make sure bulbs are fully seated and locked.
Other materials:
Changing the engine switch positions
1 “LOCK”
The steering wheel is locked and the key can be removed. (Vehicles with an automatic
transmission or continuously variable transmission: The key can be removed only
when the shift lever is in P.) 2 “ACC”
Some electrical components such as the audio system can be used.
3 “ON ...
RCTA function
■ Operation of the RCTA function
The RCTA function uses rear side radar sensors to detect vehicles
approaching from the right or left at the rear of the vehicle and alerts
the driver of the presence of such vehicles by flashing the outside
rear view mirror indicators and sounding a buzzer.
Appr ...
Safety Connect services
■ Automatic Collision Notification
In case of either airbag deployment
or severe rear-end collision,
the system is designed to
automatically call the response
center. The responding agent
receives the vehicle's location
and attempts to speak with the vehicle occupants to assess the
level of emerge ...


