Toyota Corolla (E120) 2002–2008 Repair Manual / Diagnostics / Supplemental restraint system / How to proceed with troubleshooting
Toyota Corolla (E120): How to proceed with troubleshooting
The hand–held tester can be used at step 4, 6, 8 and 9.
1 Vehicle brought to workshop

2 Customer problem analysis

3 Warning light check

4 The dtcs check (present and past dtcs)
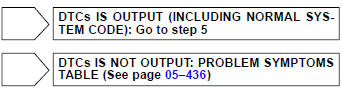
5 The dtcs chart

6 Circuit inspection
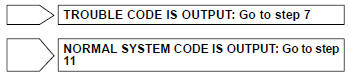
7 Repair

8 Clear the dtcs (present and past dtcs)

9 The dtcs check (present and past dtcs)

10 Symptom simulation

11 Confirmation test
End
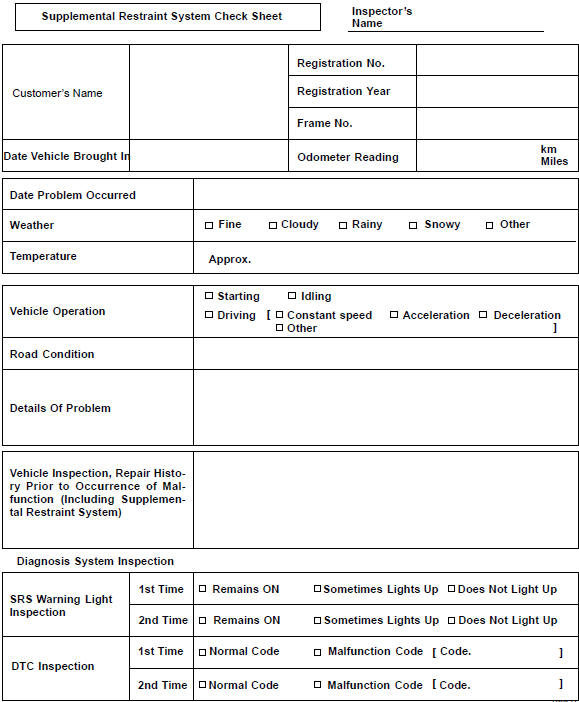
Customer problem analysis check


Other materials:
Circuit description
Refer to dtc p0115
Dtc no.
Dtc detection condition
Trouble area
P0116
If engine coolant temperature (ect) was between 35 c (95 °F)
and 60 c (140 °F) when starting the engine, and also conditions
(a) and (b) are met:
vehicle has run with acceleration an ...
Engine mechanical
Preparation
Sst
Recomended tools
Ssm
Equipment
Exhaust
Preparation
Equipment
...
Checking the messages
1 Display the “Message Inbox” screen.
2 Select the desired message from the list.
3 Check that the message is displayed.
1 E-mails: Select “Mark Unread” or “Mark Read” to mark mail unread or read on
the message inbox screen.
This function is available when “Update Message Read S ...