Toyota Corolla (E120) 2002–2008 Repair Manual / Diagnostics / Cruise control system / How to proceed with troubleshooting
Toyota Corolla (E120): How to proceed with troubleshooting
1 Vehicle brought to workshop

2 Customer problem analysis

3 Check and clear dtc

4 Problem symptom confirmation

5 Symptom simulation

6 Dtc check

7 Dtc chart

8 Problem symptoms table

9 Circuit inspection
10 Identification of problem
11 Parts inspection
12 Repair
13 Confirmation test
End
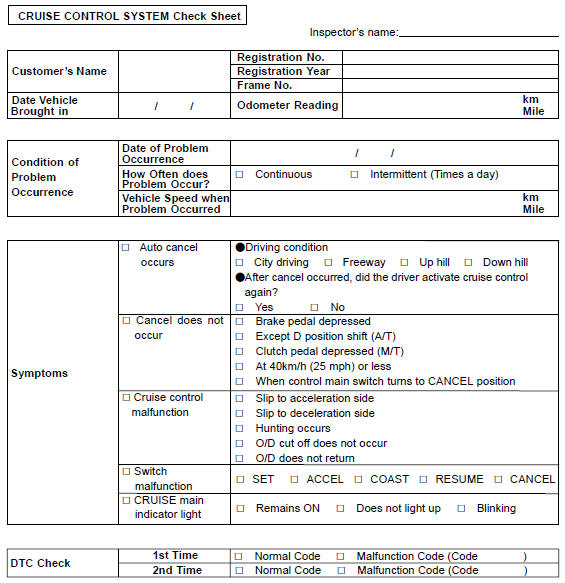
Customer problem analysis check


Other materials:
Replacement
1. Remove clutch start switch assy
disconnect the clutch start switch assy connector.
remove the nut and clutch start switch assy from the clutch pedal
support.
2. Install clutch start switch assy
install the clutch start switch assy with the nut.
Torque: 15.68 Nv ...
Inspection procedure
1 Inspect cruise control actuator assy
Inspect the cruise control actuator arm locking operation.
Turn the ignition switch to off.
Disconnect the cruise control actuator assy connector.
Connect the positive (+) lead from the battery to the
terminal 3 (l) of crui ...
Wireless remote control/electronic key battery
Replace the battery with a new one if it is depleted.
You will need the following items:
● Flathead screwdriver
● Small flathead screwdriver
● Lithium battery CR2016 (vehicles without a smart key system), or CR2032 (vehicles
with a smart key system)
Replacing the battery
&# ...