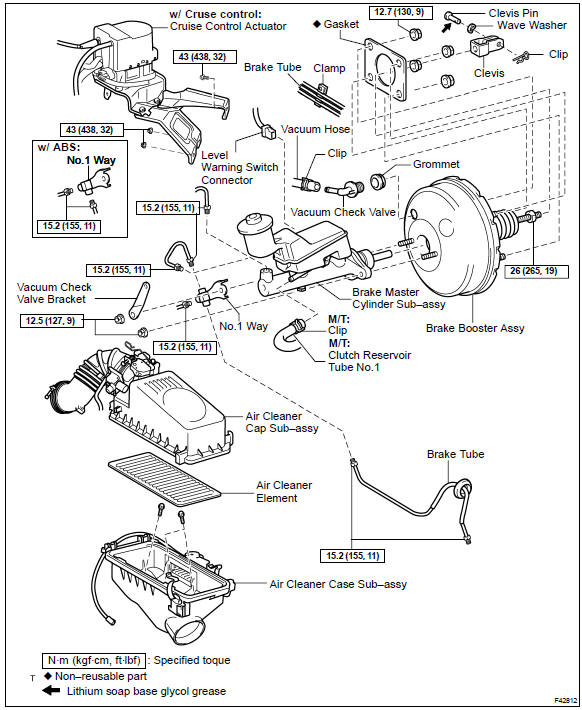
Toyota Corolla (E120): Components


Other materials:
Replacement
1. Remove instrument panel sub–assy lower
2. Remove clutch pedal spring
3. Remove clutch master cylinder push rod clevis w/hole pin
Remove the clip and hole pin.
4. Remove clutch pedal support sub–assy
W/ cruise control:
disconnect the clutch switch assy connector.
&nbs ...
Purpose of the readiness tests
The on–board diagnostic (obd ii) system is designed to monitor the
performance of emission–related
components and report any detected abnormalities in the form of diagnostic
trouble codes
(dtcs). Since the various components need to be monitored during different
driving condition ...
Opening the trunk from outside the vehicle
◆ Smart key system (if equipped)
While carrying the electronic key, press the button on the trunk lid.
When all the doors are unlocked with the power door lock system, the trunk can
be opened without carrying the electronic key.
◆ Wireless remote control (if equipped)
► Veh ...