Toyota Corolla (E140) 2007–2013 Body Repair Manual / Introduction / About this vehicle
Toyota Corolla (E140): About this vehicle
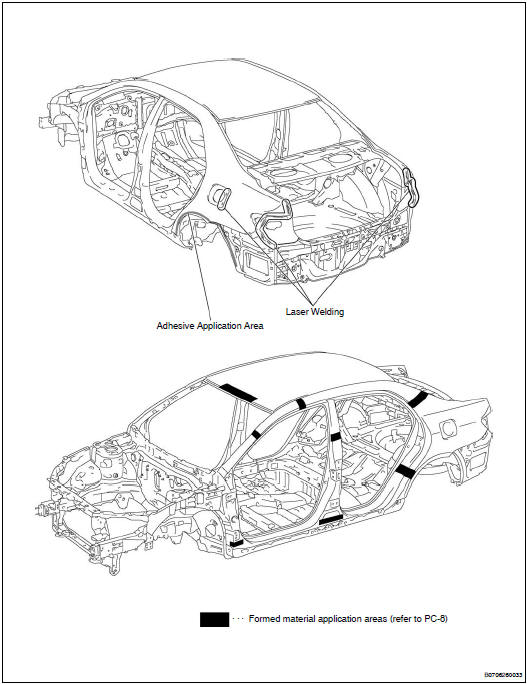
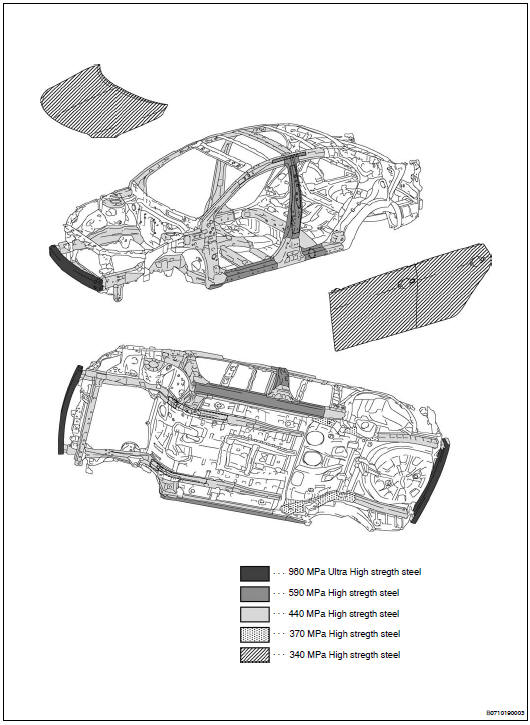
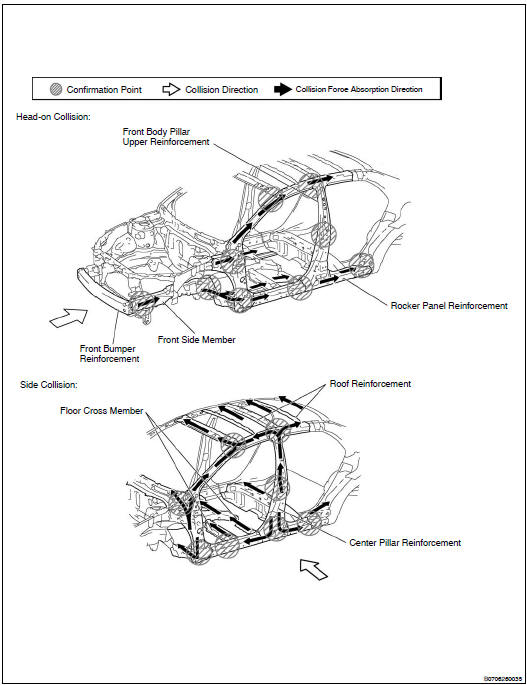
1. Structural outline
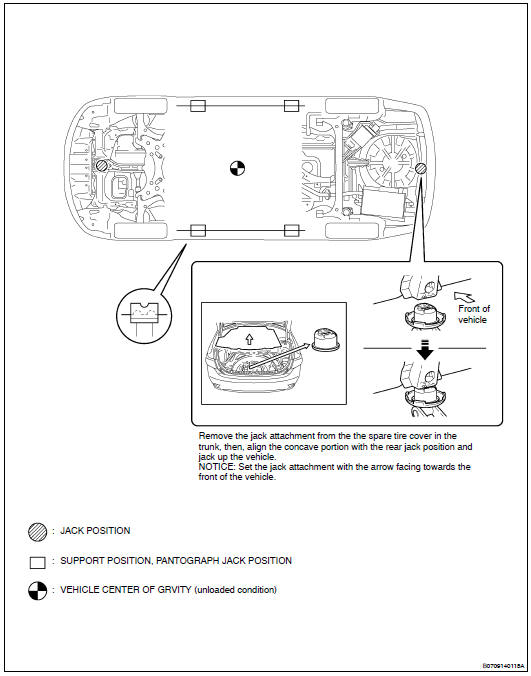
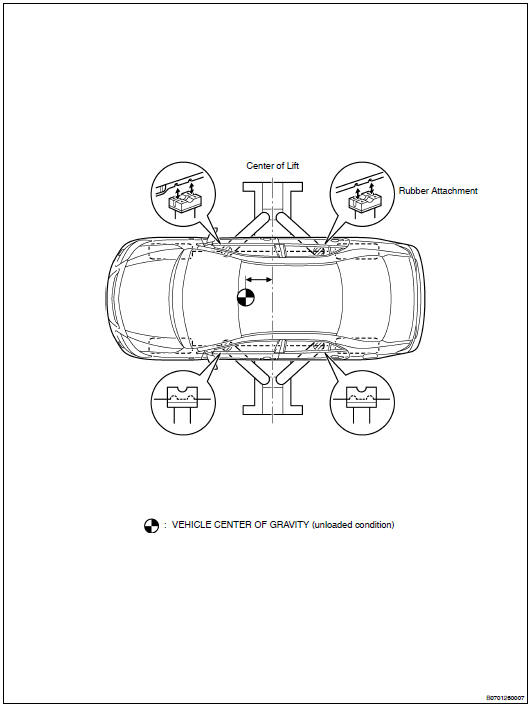
2. Notice about vehicle condition when jacking up vehicle
(a) notice for using jack and safety stand
(B) notice for using swing arm type lift
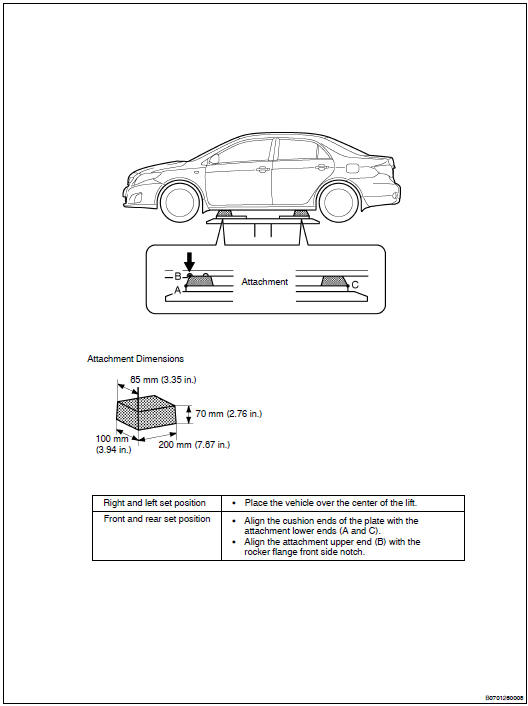
(C) notice for using plate type lift
3. Damage diagnosis
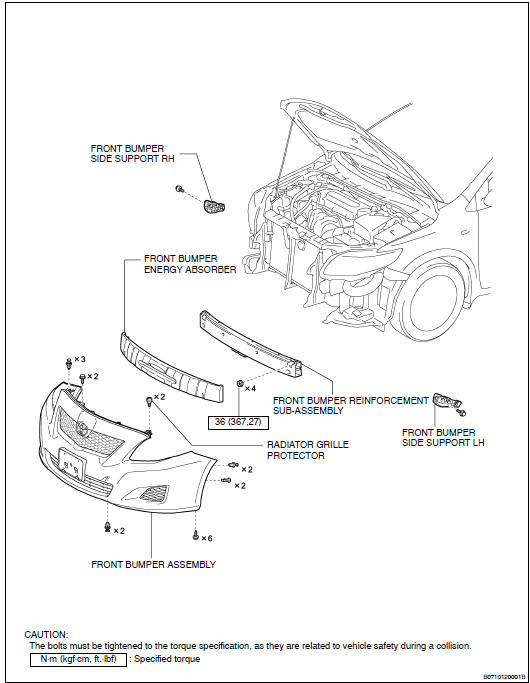
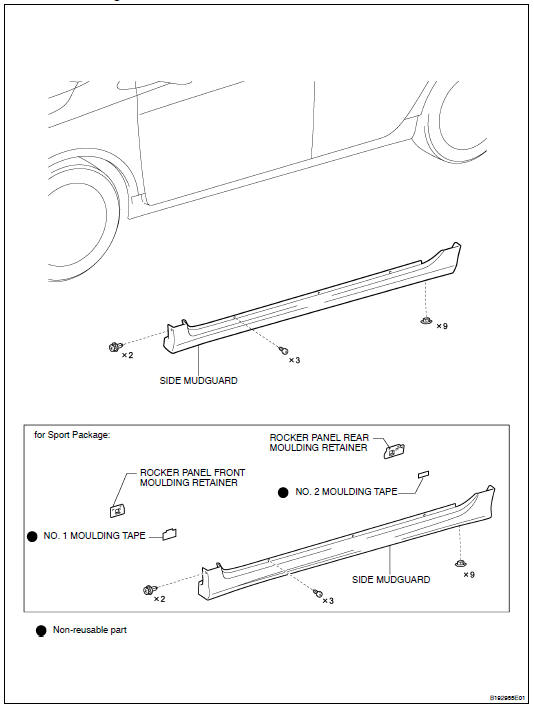
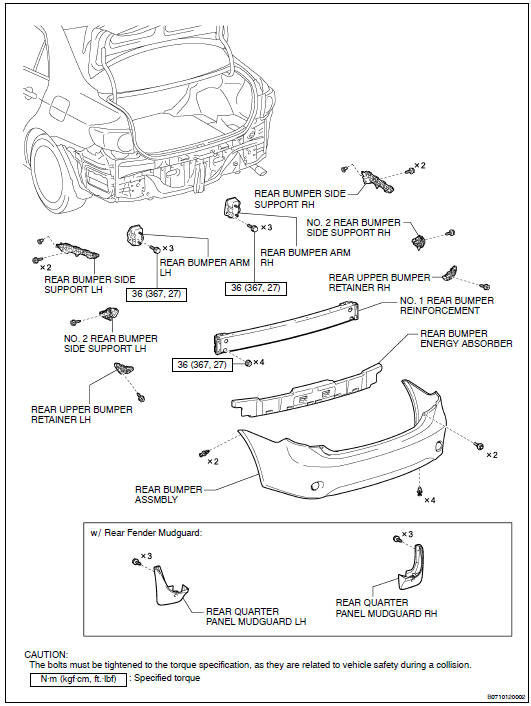
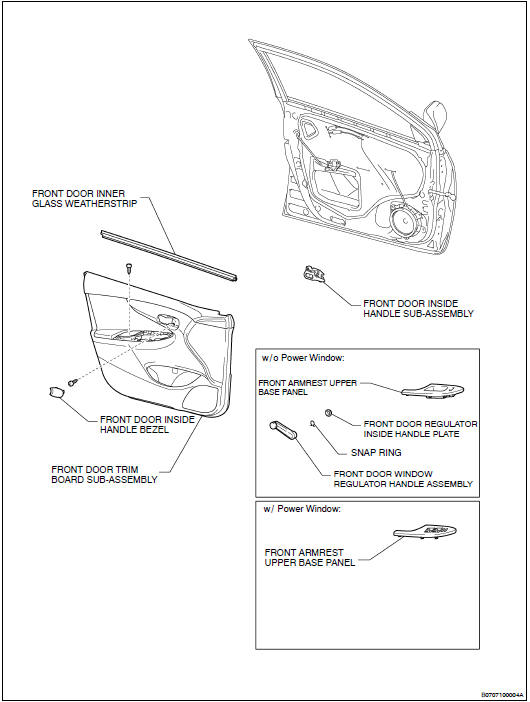
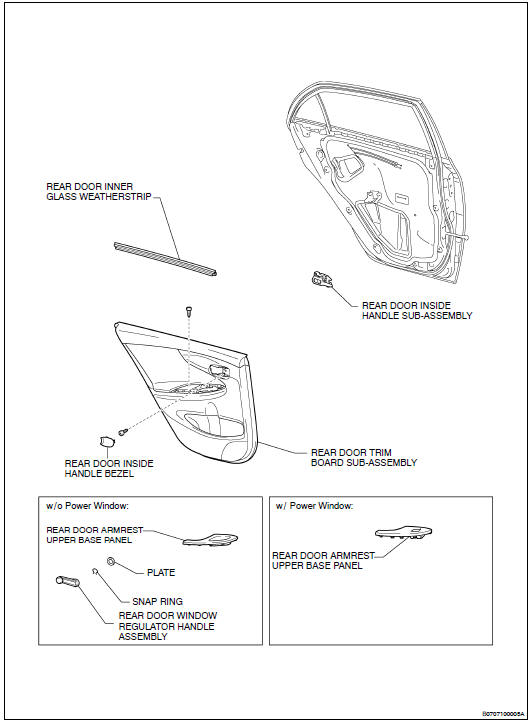
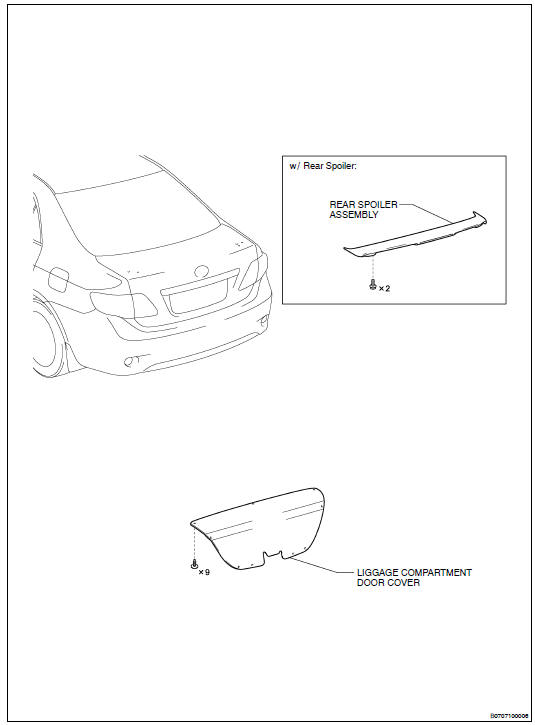
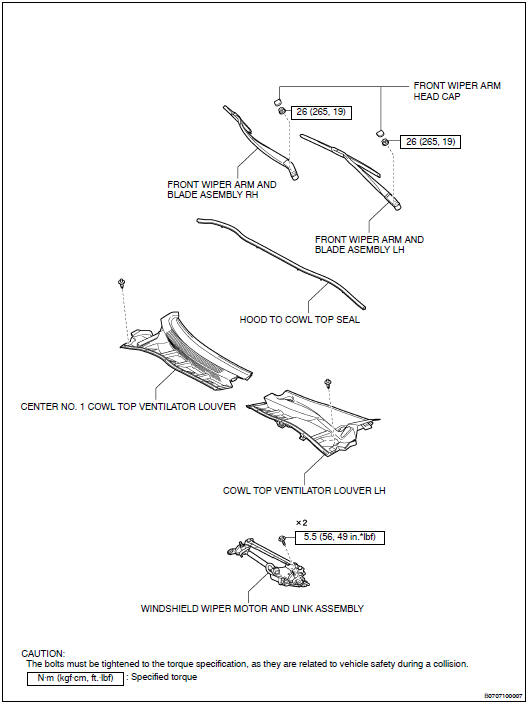
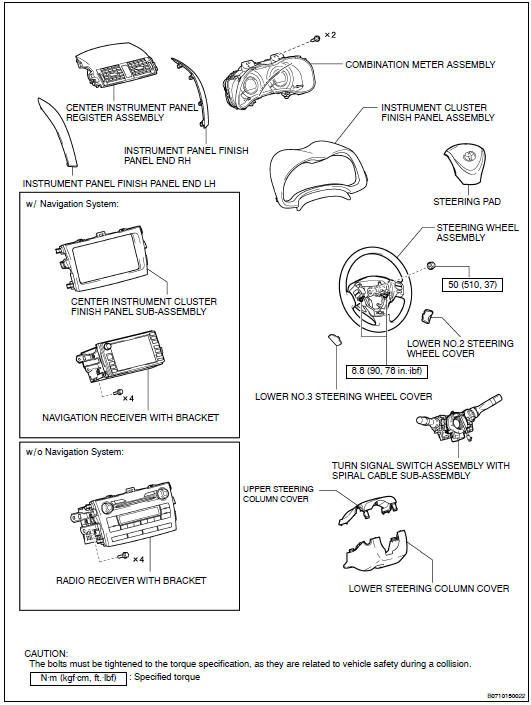
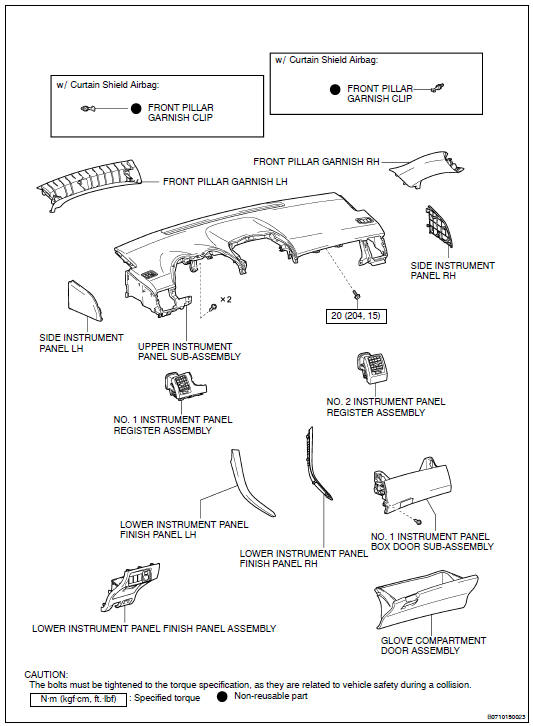
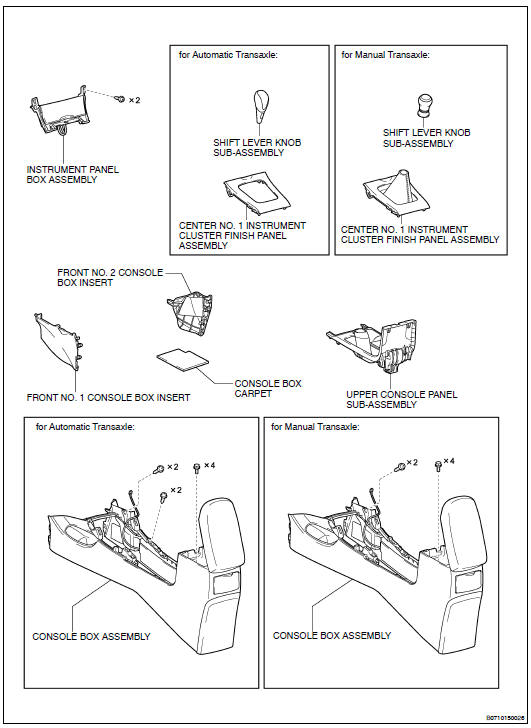
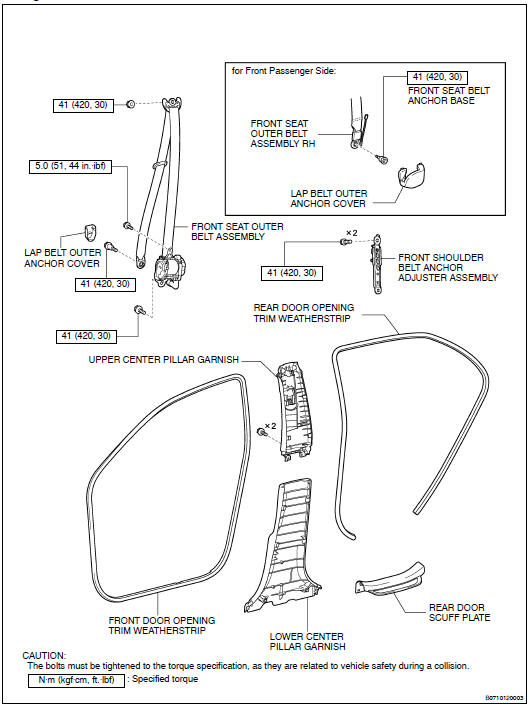
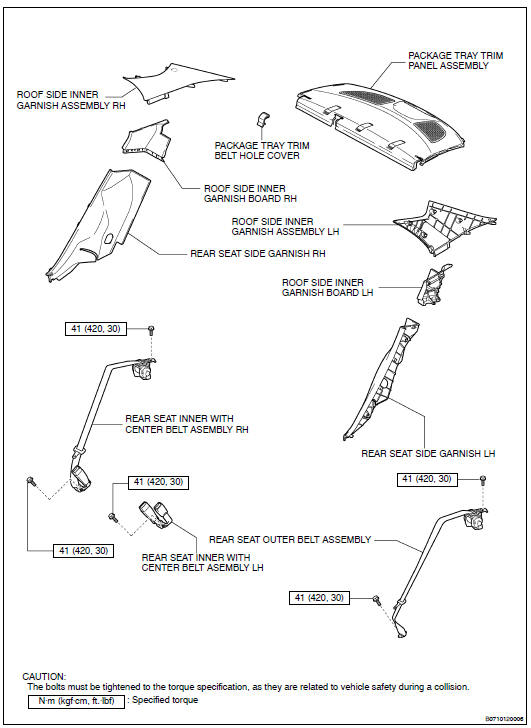
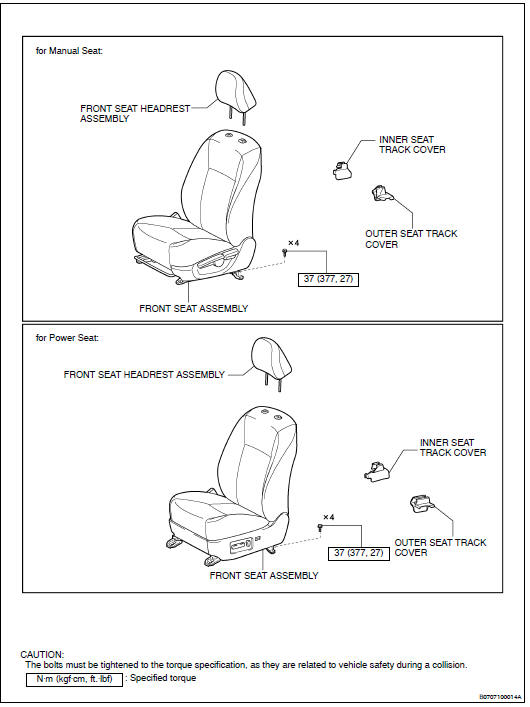
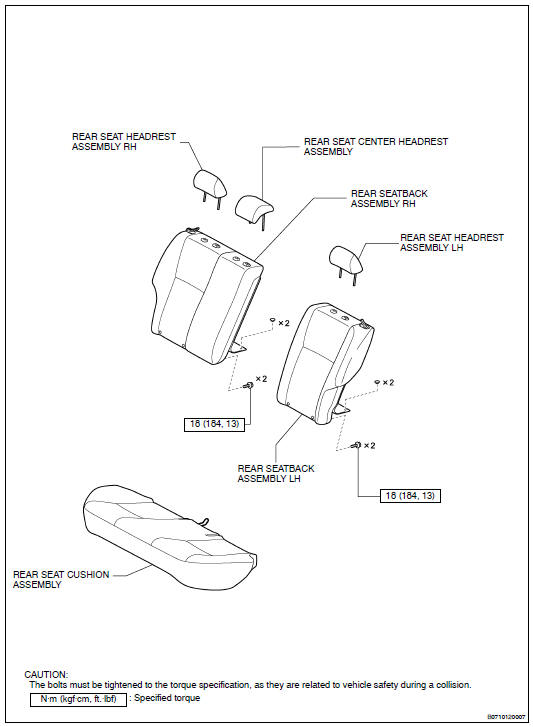
4. Components
(a) front bumper
(B) side mudguard
(C) rear bumper
(D) door
(E) cowl top ventilator louver
(F) instrument panel
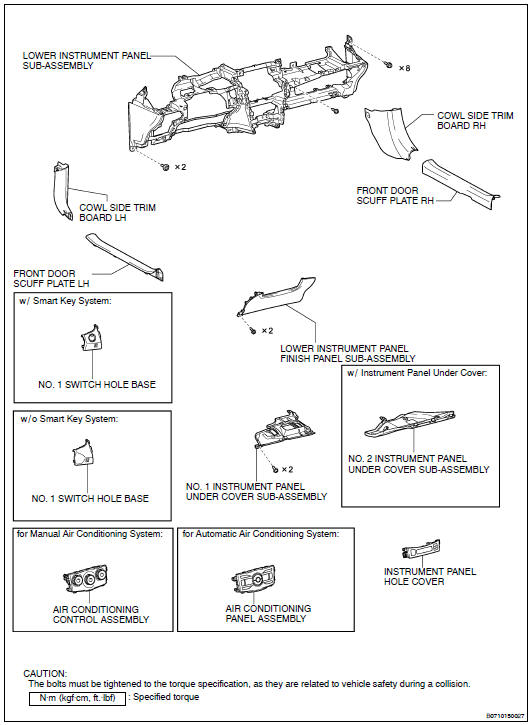
(G) interior trim
(H) seat
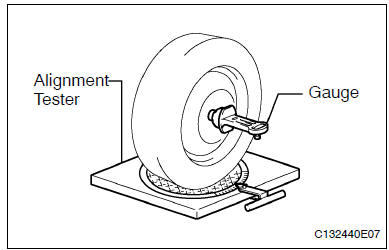
5. Wheel alignment standard
(a) front wheel alignment
(1) Vehicle height (unloaded vehicle)
Notice
:
- before inspecting the wheel alignment, adjust the vehicle height to the specified value.
- Be sure to perform measurement on a level surface.
- If it is necessary to go under the vehicle for measurement, confirm that the parking brake is applied and the vehicle is secured with chocks.
Measuring points:
- no. 1 Lower suspension arm bushing set bolt ground clearance
- rear axle beam set bolt ground clearance
- front wheel center ground clearance
- rear wheel center ground clearance

*For vehicle height for mexico, add 15 mm (0.591 In.)
(2) Wheel angle (unloaded vehicle)

*For vehicle height for mexico, add 15 mm (0.591 In.) If the angles are not as specified, check and adjust the right and left rack end lengths.
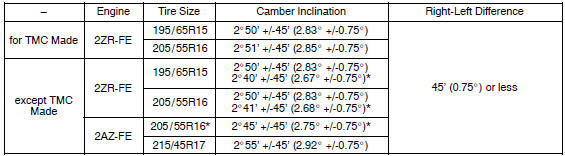
(3) Camber (unloaded vehicle)
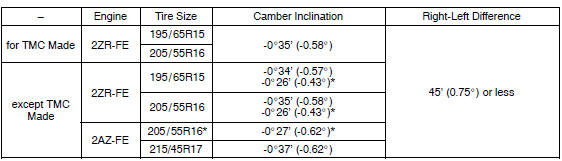
* For vehicle height for mexico, add 15 mm (0.591 In.)
(4) Caster (unloaded vehicle)
* For vehicle height for mexico, add 15 mm (0.591 In.)
(5) Steering axis inclination (unloaded vehicle) except tmc made:
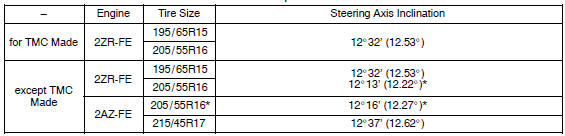
* For vehicle height for mexico, add 15 mm (0.591 In.)
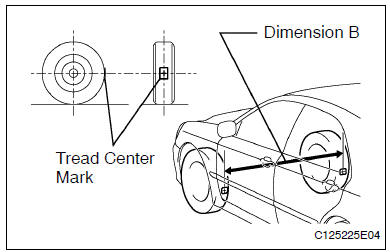
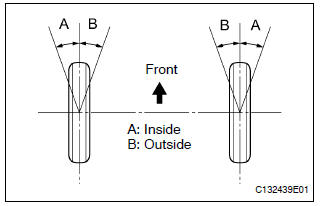
(6) Toe-in
Hint:
- measure “b - a” only when “c + d” cannot be measured.
- If toe-in is not within the specified range, adjust it at the rack ends.

(B) rear wheel alignment
(6) Toe-in (unloaded vehicle)
- measure “b - a” only when “c + d” cannot be measured.
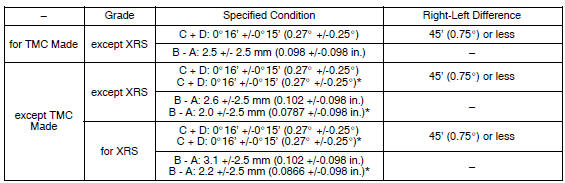
* For vehicle height for mexico, add 15 mm (0.591 In.) If the toe-in is not within the specified range, inspect the suspension parts and replace them if necessary.
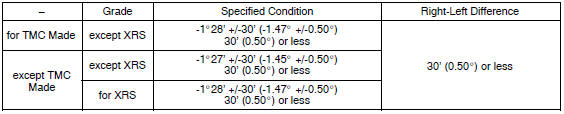
(2) Camber (unloaded vehicle)
Hint: camber is not adjustable. If the measurement is not within the specified range, inspect the suspension parts for damage and/or wear, and replace them if necessary.


Other materials:
Correct use of the seat
belts
Extend the shoulder belt so
that it comes fully over the
shoulder, but does not come
into contact with the neck or
slide off the shoulder.
Position the lap belt as low as
possible over the hips.
Adjust the position of the
seatback. Sit up straight and
well back in the seat.
Do not twist ...
Inspection procedure
1 Check operation(starter)
Check that the starter operates normally and that the engine starts.
2 Input signal check
See input signal check on page 05–745.
check the indicator light when shifting into except d position.
Ok:
the indicator light goes off when shifting ...
Vehicle control system
Ignition or starter switch assy
Replacement
1. Remove steering column cover
2. Remove ignition or starter switch assy
Disconnect the ignition switch connector and unlock
warning switch connector.
remove the 2 clamps.
remove the 2 screws and ignition switch.
Inspectio ...