Toyota Corolla (E140) 2007–2013 Body Repair Manual / Introduction / Precaution
Toyota Corolla (E140): Precaution
1. Work precautions
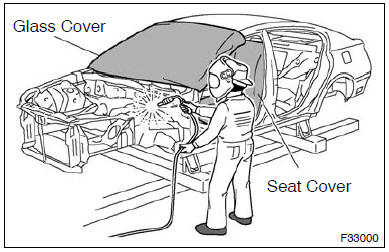
(A) vehicle protection
(1) when welding, cover glass, seats, carpets, etc. With heat resistant fireploof covers to protect them.
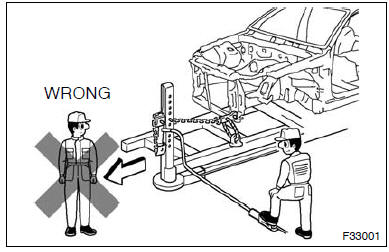
(B) safety
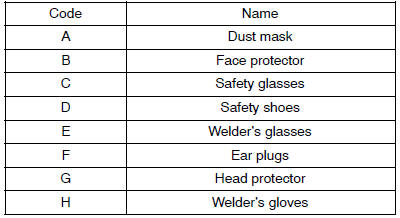
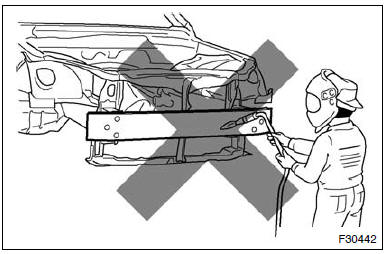
(1) never stand in the path of the chain when using a puller on the body or frame, and be sure to attach a safety cable.
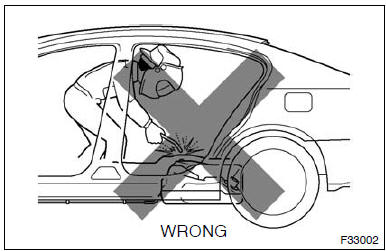
(2) If it is necessary to use a frame in the area of the fuel tank, first remove the tank and plug the fuel line.
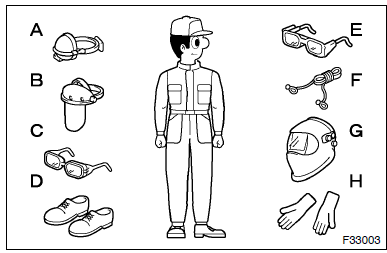
(C) safety work clothes
(1) in addition to the usual mechanic’s wear, cap and safety shoes, the appropriate gloves, head protector, welder’s glasses, ear plugs, face protector, dust mask, etc. Should be worn as the situation demands.
2. Precautions when repairing body frame parts (including crush box)
(A) prohibition of heat repair for body frame parts
(1) rustproof high strength steel sheets are used for the body frame. Therefore, if these parts are heat repaired using an acetylene torch or equivalent, the crystalline structure changes, causing the strength of the steel sheets to decrease. Also, the zinc corting which is used to protect the body from rust will be damaged. This causes the surface of the steel sheets to become oxidized, which reduces their ability to resist rust.
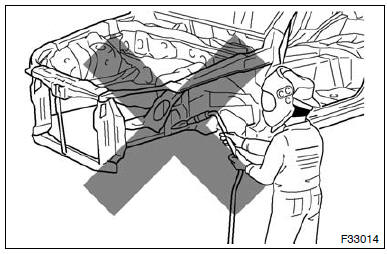
(B) when to replace frame parts
Notice
: replace frame parts that have kinks. Hint: what is kink? A deformatision bon a steel sheet that cannot be returned to its original shape by pulling or hammering due to the deformation angle being sharp.

(C) repair of door side impact beam is prohibited
(1) the impact beam is desined so that it performs at 100% in its original shape.
However, if the impact beam is repaired, its performance may not be the same as before the accident.
Parts ehich are prohibited to be repaired: door side impact beam
(D) repair of bumper reinforcement is prohibited
(1) the bumper reinforcement is designed so that it parforms at 100% in uts original shape.
However, if the impact beam is repaired, its performance may not be the same as before the accident.
Parts ehich are prohibited to be repaired: bumper reinforcement
3. Precautions for correct repair
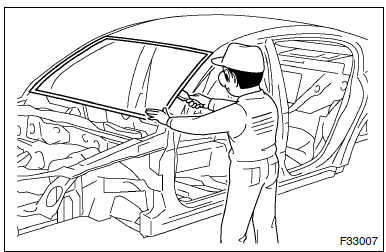
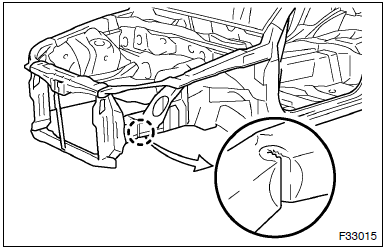
(A) removal of adjacent components
(1) when removing adjacent components, apply protective tape to the surrounding body and your tools to prevent damage.
Notice
: if the paint film is damaged, make sure to refinish the paint.
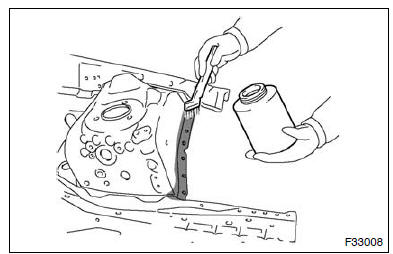
(B) anti-rust treatment before welding
(1) apply welding primer to the contact surfaces of the welding areas to protect them from rust.
Notice
: do not apply welding primer outside of the contact surfaces.
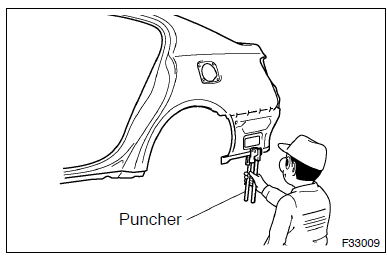
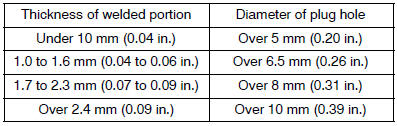
(C) making holes for plug welding
(1) for areas where a spot welder cannot be used, use a puncher or drill to make holes for plug welding.
(D) welding precautions
(1) the number of welding spots should be as follows.
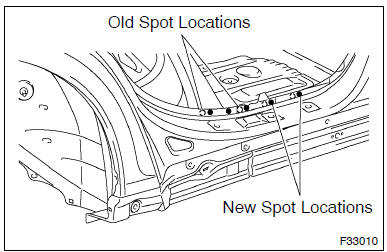
Spot weld: 1.3 X no. Of manufacturer’s spots plug weld: more than no. Of manufacturer’s plugs (2) spot weld locations avoid welding over previously welded areas.
8. Precautions for resin parts
(a) plastic properties chart
(1) when repairing, some parts may be deformed by the heat. Therefore, confirm the properties of the platic parts, and remove parts beforehand as necessary.
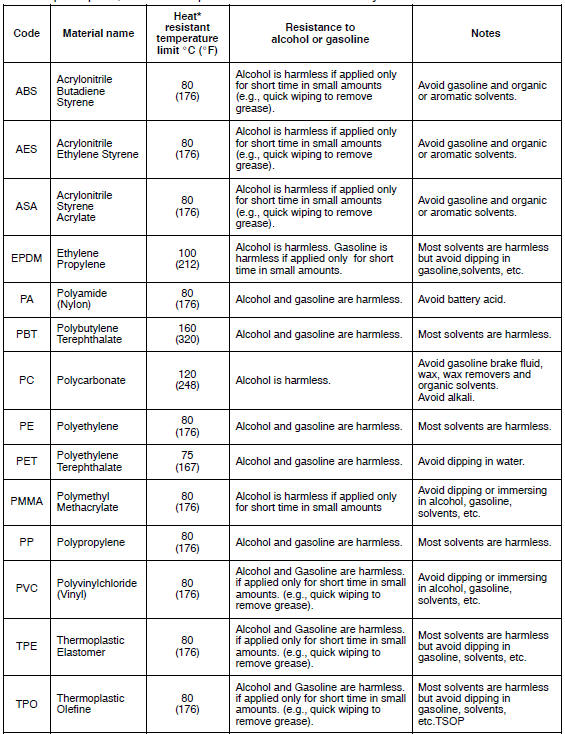

* Temperatures higher than those listed here may result in material deformation during repair.
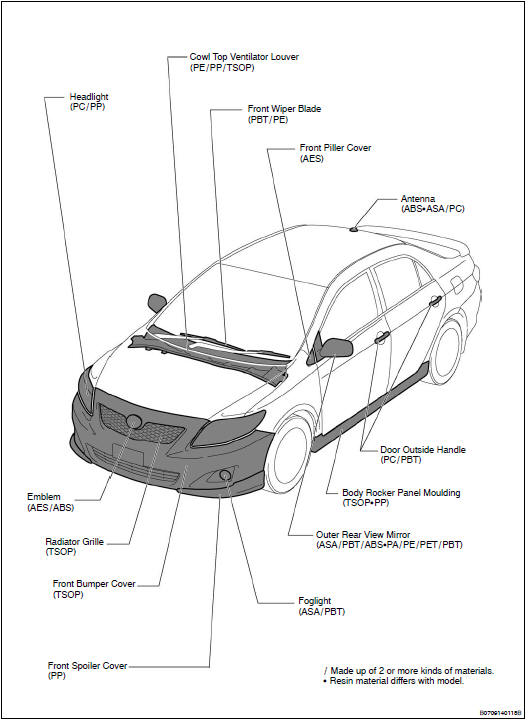
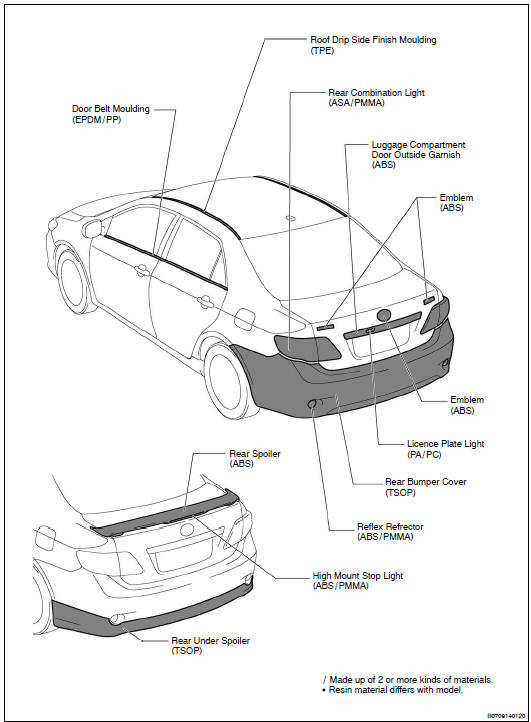


Other materials:
Description
When troubleshooting obd ii vehicles, the only difference
from the usual troubleshooting procedure is that you
need to connect the vehicle to the obd ii scan tool complying
with sae j1978 or the hand–held tester, and read
various data output from the vehicle’s ecm.
Obd ii regulation ...
Identification information
Vehicle identification and serial numbers
1. Vehicle identification number
The vehicle identification number is stamped on the vehicle
identification number plate and certification label, as
shown in the illustration.
Vehicle identification number plate
certification label
2. Engine ...
Air outlets
■ Location of air outlets
The air outlets and air volume changes according to the selected airflow mode.
: Some models
■ Adjusting the position of and opening and closing the air outlets
► Front center outlets
Direct air flow to the left or right, up or down.
► Fron ...