Toyota Corolla (E120) 2002–2008 Repair Manual / Diagnostics / Power door lock control system / Terminals of ecu
Toyota Corolla (E120): Terminals of ecu
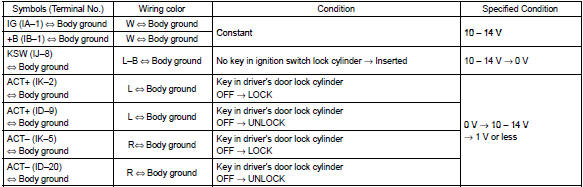
1. Inspect integration relay
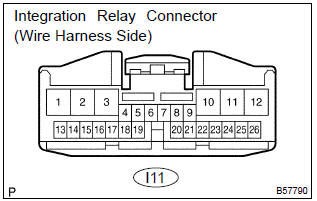
- Disconnect the connector and check the continuity of each terminal of the disconnected connector.
Standard :
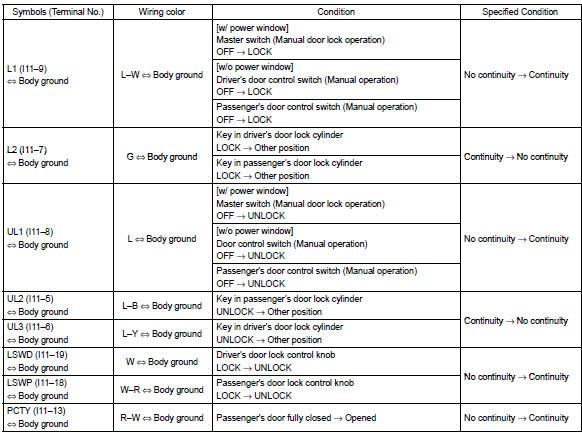
If the result is not as specified, the vehicle’s side may malfunction.
- Reconnect the connector and check each terminal.
Standard:

If the result is not as specified, the integration relay may malfunction.
2. Inspect instrument panel j/b (integration relay)
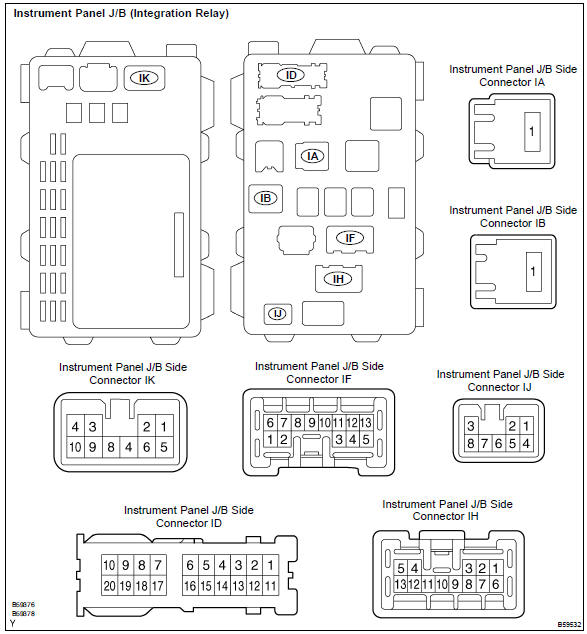
- Inspect the door fuse.
- disconnect connectors id, if, ih and ij of the instrument panel j/b.
- check each terminal of the disconnected connectors.
Standard:
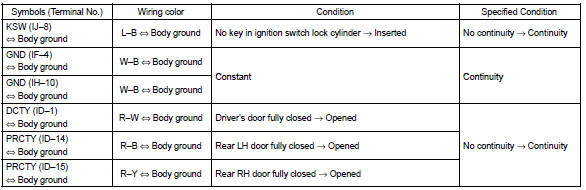
If the result is not as specified, the vehicle’s side may malfunction.
- reconnect the connectors and check each terminal.
Standard:
If the result is not as specified, the instrument panel j/b (integration relay) assembly may malfunction.


Other materials:
Inspection procedure
1 Inspect dlc3 terminal voltage(tc terminal)
Turn the ignition switch to on.
measure voltage between terminals tc and cg of dlc3.
Ok:
voltage: 10 – 14 v
2 Check harness and connector(dlc3 – body ground)
Check for open and short circuit in harness and connector betw ...
License plate lamp assy
Replacement
1. Remove luggage compartment lock cylinder & key set
2. Remove luggage compartment door garnish outside
3. Remove license plate lamp assy
Pull the license plate light assy to the side of vehicle as
shown in the illustration and release the claw.
disconnect the c ...
Inspection procedure
1 Check door lock
2 Check wire harness (tvip ecu door lock)
Disconnect the tvip ecu and door lock connectors.
check the continuity between the terminals of the tvip
ecu and door lock connectors, as shown in the illustration
and table.
Standard:
3 Check wire harness ...