Toyota Corolla (E120): Replacement
1. Remove engine under cover rh
2. Drain coolant
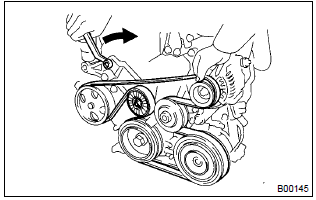
3. Remove fan and generator v belt
4. Remove generator assy
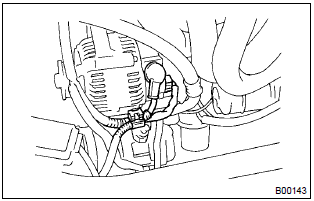
- Disconnect the wire clamp from the wire clip on the rectifire end frame.
- remove the rubber cap and nut, and disconnect the alternator wire.
- disconnect the alternator connector.
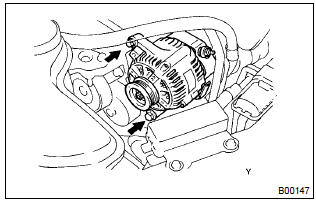
- Remove the 2 bolts and alternator.
5. Remove water pump assy
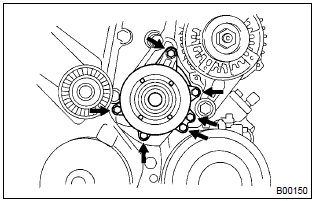
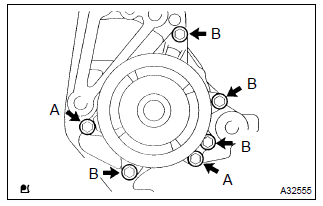
- Remove the 6 bolts, water pump and o–ring.
6. Install water pump assy
- Place a new o–ring on the timing chain cover.
- install the water pump with the 6 bolts.
Torque:
bolt a 9.0 Nvm (92 Kgf·cm, 80 invlbf) bolt b 11 nvm (113 Kgf·cm, 8 ft·lbf)
7. Install generator assy
Torque:
12 mm head 25 nvm (250 Kgf·cm, 18 ft·lbf)
14 mm head 54 nvm (550 Kgf·cm, 39 ft·lbf)
8. Add coolant
9. Check engine coolant leak


Other materials:
Air outlets
■ Location of air outlets
The air outlets and air volume changes according to the selected airflow mode.
: Some models
■ Adjusting the position of and opening and closing the air outlets
► Front center outlets
Direct air flow to the left or right, up or down.
► Fron ...
Diagnostic trouble code chart
Hint:
as for the vehicle for mexico, refer to repair manual 2003 corolla (pub. No.
Rm938u).
Parameters listed in the chart may not be exactly the same as your readings due
to the type of instrument
or other factors.
If a malfunction code is displayed during the dtc check in the check mod ...
Wiring
Power source
Location
...