Toyota Corolla (E120): Overhaul
1. Inspect 4th gear thrust clearance
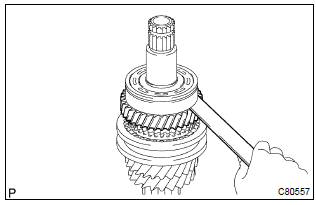
- Using a feeler gauge, measure the 4th gear thrust clearance.
4Th gear thrust clearance:

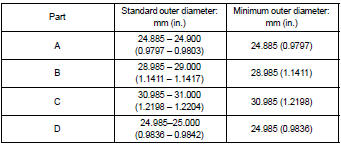
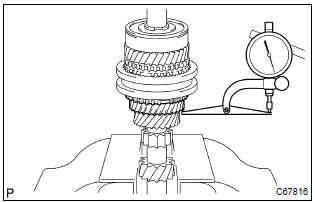
2. Inspect 3rd gear thrust clearance
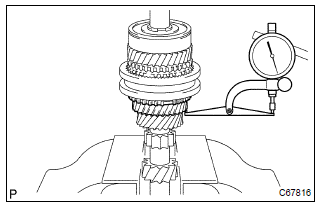
- Using a dial indicator, measure the 3rd gear thrust clearance.
3Rd gear thrust clearance:

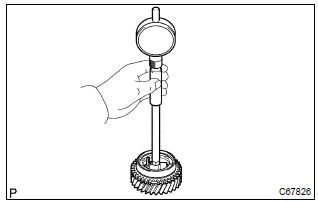
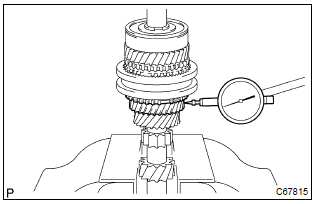
3. Inspect 4th gear radial clearance
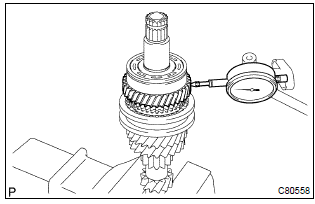
- Using a dial indicator, measure the 4th gear radial clearance.
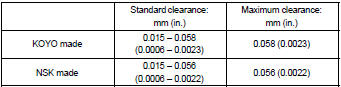
4Th gear radial clearance:
If the clearance exceeds the maximum, replace the gear, needle roller bearing or shaft.
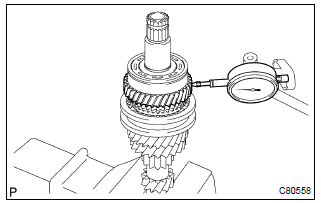
4. Inspect 3rd gear radial clearance
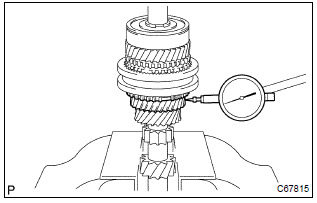
- Using a dial indicator, measure the 3rd gear radial clearance.
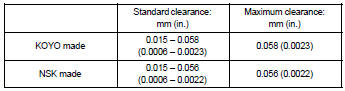
3Rd gear radial clearance:
If the clearance exceeds the maximum, replace the gear, needle roller bearing or shaft.
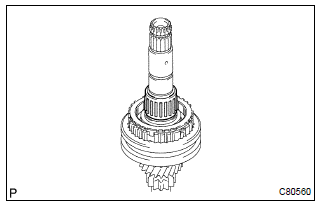
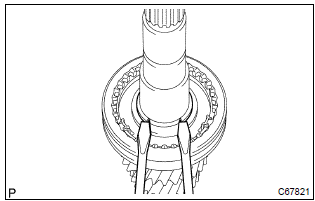
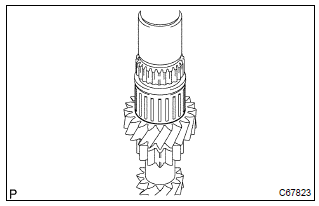
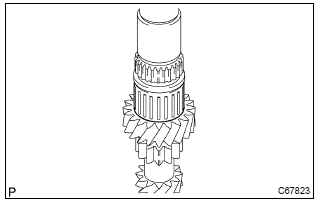
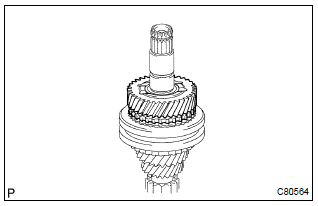
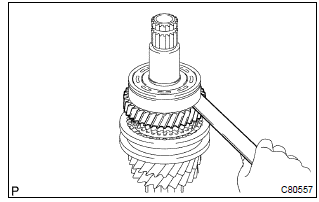
5. Remove 4th gear
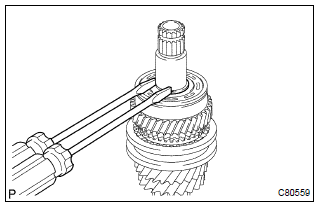
- Using 2 screwdrivers and a hammer, tap out the snap ring.
Hint
: using a waste to prevent the snap ring from being scattered.
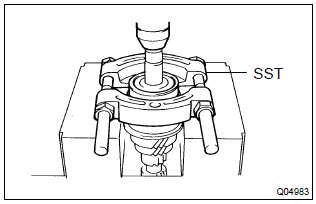
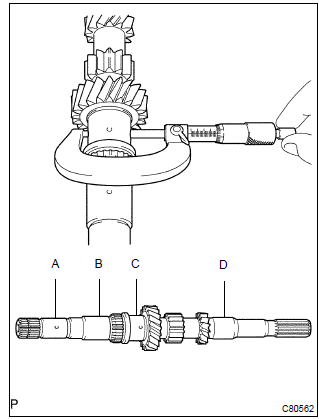
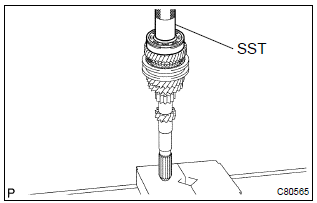
- Using sst and a press, remove the input shaft radial ball
bearing rear and 4th gear from the input shaft.
Sst 09950–00020
Notice
:
- do not tighten sst excessively.
- Support the input shaft assy by hand so that it will not be dropped off.
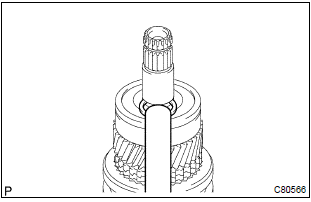
6. Remove 4th gear needle roller bearing
- Remove the 4th gear needle roller bearing and 4th gear bearing spacer from the input shaft.
7. Remove 4th gear synchronizer ring
- Remove the 4th gear synchronizer ring from the transmission clutch hub no.2.
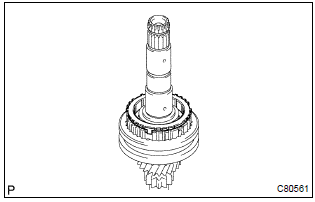
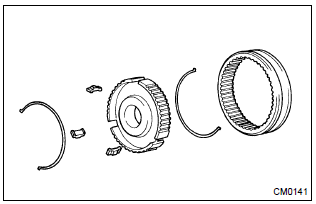
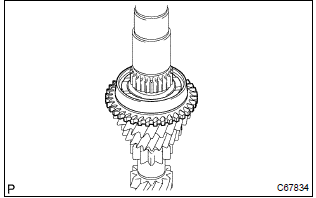
8. Remove 3rd gear
- Using 2 screwdrivers and a hammer, tap out the snap ring.
Hint
: using a waste to prevent the snap ring from being scattered.

- Using sst and a press, remove the transmission clutch
hub no.2 And 3rd gear from the input shaft.
Sst 09950–00020
Notice
:
- do not tighten sst excessively.
- Support the input shaft by hand so that it will not be dropped off.
9. Remove 3rd gear synchronizer ring
- Remove the 3rd gear synchronizer ring from the 3rd gear.
10. Remove 3rd gear needle roller bearing
- Remove the 3rd gear needle roller bearing from the input shaft.
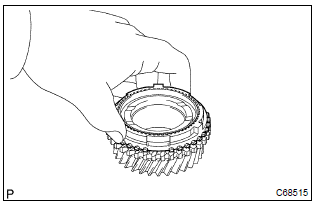
11. Remove transmission hub sleeve no.2
- Remove the transmission hub sleeve no.2, 3 Synchromesh shifting keys and 2 synchromesh shifting key springs from the transmission clutch hub no.2.
Hint
: using a waste to prevent the shifting key and shifting key spring from being scattered.
12. Inspect input shaft
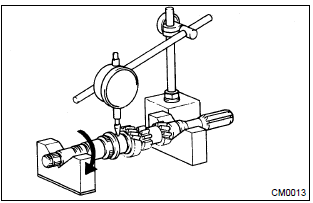
- Using a dial indicator, check the shaft runout.
Maximum runout: 0.015 Mm(0.0006 In.) If the runout exceeds the maximum, replace the input shaft.
- Using a micrometer, measure the outer diameter of the input shaft journal surface.
Input shaft outer diameter:
If the outer diameter is below the minimum, replace the input shaft.
13. Inspect 4th gear
- Using a cylinder gauge, measure the inside diameter of
the 4th gear.
Standard inside diameter: 34.015 – 34.031 Mm (1.3391 – 1.3398 In.) Maximum inside diameter: 34.031 Mm (1.3398 In.)
If the inside diameter exceeds the maximum, replace the 4th gear.
14. Inspect 3rd gear
- Using a cylinder gauge, measure the inside diameter of
the 3rd gear.
Standard inside diameter: 36.015 – 36.031 Mm (1.4179 – 1.4185 In.) Maximum inside diameter: 36.031 Mm (1.4185 In.)
If the inside diameter exceeds the maximum, replace the 3rd gear.
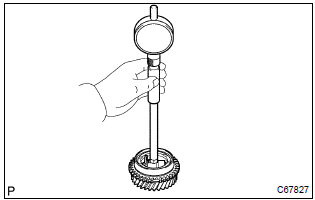
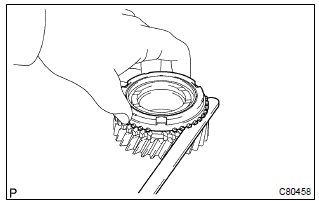
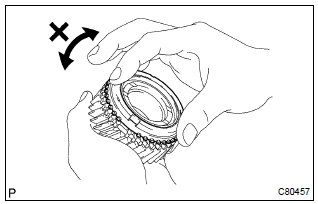
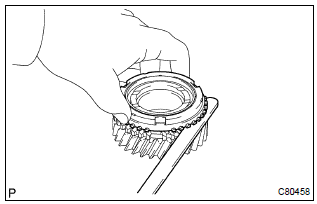
15. Inspect 3rd gear synchronizer ring
- Check for wear or damage.
- check the braking effect of the 3rd gear synchronizer ring.
Turn the 3rd gear synchronizer ring in one direction while pushing it to the gear cone. Check that the ring locks.
If the braking effect is insufficient, apply a small amount of the fine lapping compound between 3rd gear synchronizer ring and 3rd gear cone. Lightly rub the 3rd gear synchronizer ring and 3rd gear cone together.
Notice
: ensure the fine lapping compound is completely washed off after rubbing.
- check again the braking effect of the synchronizer ring.
- Using a feeler gauge, measure the clearance between
3rd gear synchronizer ring back and 3rd gear spline end.
Minimum clearance:
0.65 Mm (0.0256 In.)
If the clearance below than the minimum, replace the 3rd gear synchronizer ring, and apply small amount of the fine lapping compound on gear cone.
Notice
: ensure the fine lapping compound is completely washed off after rubbing.
16. Inspect 4th gear synchronizer ring
- Check for wear or damage.
- check the braking effect of the 4th gear synchronizer ring.
Turn the 4th gear synchronizer ring in one direction while pushing it to the gear cone. Check that the ring locks.
If the braking effect is insufficient, apply a small amount of the fine lapping compound between 4th gear synchronizer ring and 4th gear cone. Lightly rub the 4th gear synchronizer ring and 4th gear cone.
Notice
: ensure the fine lapping compound is completely washed off after rubbing.
- Using a feeler gauge, measure the clearance between
4th gear synchronizer ring back and 4th gear spline end.
Minimum clearance: 0.75 Mm (0.0295 In.) If the clearance below than the minimum, replace the 4th gear synchronizer ring, and apply small amount of the fine lapping compound on gear cone.
Notice
: ensure the fine lapping compound is completely washed off after rubbing.
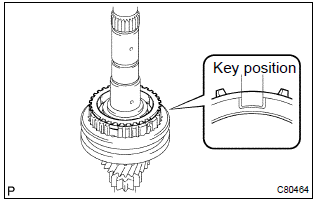
17. Inspect transmission hub sleeve no.2
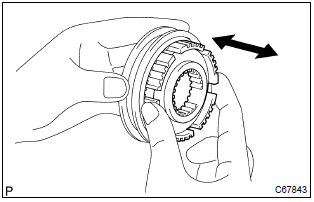
- Check the sliding condition between the transmission hub sleeve no.2 And transmission clutch hub no.2.
- check that the spline gear’s edges of the transmission hub sleeve no.2 Is not worn down.
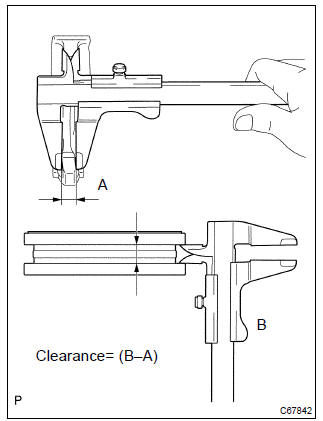
- Using a vernier caliper, inspect the transmission hub
sleeve no.2 And gear shift fork no.2 As shown in the illustration.
Standard clearance:
0.15 – 0.35 Mm (0.0059 – 0.0137 In.)
If the clearance is out of specification, replace the transmission hub sleeve no.2 And gear shift fork no.2.
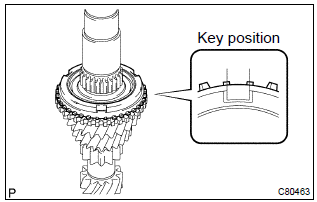
18. Install transmission hub sleeve no.2
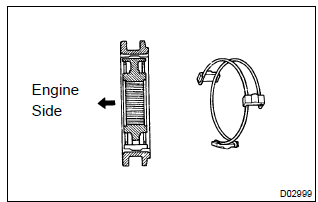
- Coat the transmission hub sleeve no.2 With gear oil, install it to the transmission clutch hub no.2.
Notice
: do not set the transmission clutch hub sleeve no.2 And the transmission clutch hub no.2 In incorrect orientation.
- Install the 2 synchromesh key springs with 3 synchromesh shifting keys to the transmission clutch hub no.2.
Hint
: do not set the both openings of the shifting key springs in the same position.
19. Install 3rd gear needle roller bearing
- Coat the 3rd gear needle roller bearing with gear oil, install it to the input shaft.
20. Install 3rd gear
- Coat the 3rd gear with gear oil, install it to the input shaft.
21. Install 3rd gear synchronizer ring
- Coat the 3rd gear synchronizer ring with gear oil, install it to the 3rd gear.
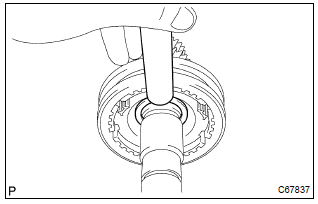
22. Install transmission clutch hub no.2

- Using sst and a press, install the transmission clutch
hub no.2 To the input shaft.
Sst 09316–60011 (09316–00021)
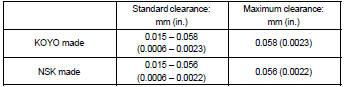
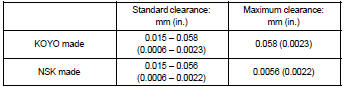
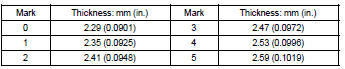
- Select a snap ring from the table below that will make the thrust clearance of the transmission clutch hub no.2 Below 0.1 Mm (0.0039 In.).
Snap ring thickness:

- Using a brass bar and a hammer, tap in the snap ring.
Notice
: take care not to damage the journal surface of the input shaft.
23. Install 4th gear synchronizer ring
- Coat the 4th gear synchronizer ring with gear oil, install it to the transmission clutch hub no.2.
24. Install 4th gear needle roller bearing
- Coat the 4th gear needle roller bearing and 4th gear bearing spacer with gear oil, install them to the input shaft.
25. Install 4th gear
- Coat the 4th gear with gear oil, install it to the input shaft.
26. Install input shaft rear radial ball bearing
- Using sst and a press, install the input shaft rear radial
ball bearing to the input shaft.
Sst 09636–20010
- Select a snap ring from the table below that will make the thrust clearance of the input shaft rear radial ball bearing below 0.1 Mm (0.0039 In.).
Snap ring thickness:
- Using a brass bar and a hammer, tap in the snap ring.
Notice
: take care not to damage the journal surface of the snap ring.
27. Inspect 3rd gear radial clearance
- Using a dial indicator, measure the 3rd gear radial clearance.
3Rd gear radial clearance:
If the clearance exceeds the maximum, replace the gear, needle roller bearing or shaft.
28. Inspect 4th gear radial clearance
- Using a dial indicator, measure the 4th gear radial clearance.
4Th gear radial clearance:
If the clearance exceeds the maximum, replace the gear, needle roller bearing or shaft.
29. Inspect 3rd gear thrust clearance
- If the clearance exceeds the maximum, replace the gear, needle roller bearing or shaft.
29. Inspect 3rd gear thrust clearance
- Using a dial indicator, measure the 3rd gear thrust clearance.
3Rd gear thrust clearance:

30. Inspect 4th gear thrust clearance
- Using a feeler gauge, measure the 4th gear thrust clearance.
4Th gear thrust clearance:


Other materials:
Wiper & washer
Preparation
Sst
Recomended tools
Equipment
...
Inspection procedure
Hint:
hand–held tester only:
narrowing down the trouble area is possible by performing ”a/f control” active
test (heated oxygen
sensor or other trouble areas can be distinguished).
Perform active test using hand–held tester (a/f control).
Hint:
”a/f control” is the active te ...
Manual transmission / transaxle
Service data
Torque specification
...