Toyota Corolla (E210): Sun visors
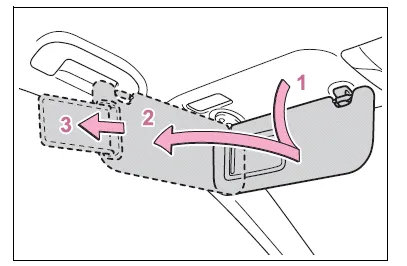
- To set the visor in the forward position, flip it down.
- To set the visor in the side position, flip down, unhook, and swing it to the side.
- To use the side extender,
place the visor in the side
position, then slide it backward.
(if equipped)
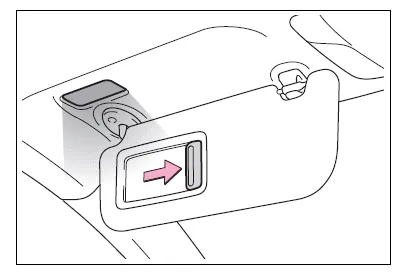
Vanity mirrors
Slide the cover to open.
The vanity light turns on. (if equipped)
■To prevent battery discharge (vehicles with vanity lights)
If the vanity lights remain on when the engine switch is OFF, the lights will go off automatically after 20 minutes.
NOTICE
■To prevent the battery from being discharged (vehicles with vanity lights)
Do not leave the vanity lights on for extended periods while the engine is stopped.
Armrest (if equipped)
Fold down the armrest for use.

NOTICE
■To prevent damage to the armrest
Do not apply too much load on the armrest.
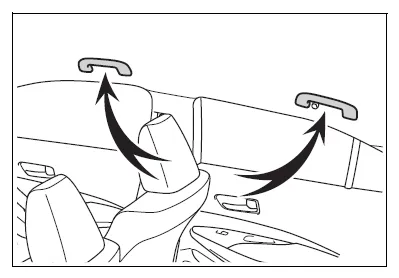
Assist grips
An assist grip installed on the ceiling can be used to support your body while sitting on the seat.
WARNING
■Assist grip
Do not use the assist grip when getting in or out of the vehicle or rising from your seat.
NOTICE
■To prevent damage to the assist grip
Do not hang any heavy object or put a heavy load on the assist grip.
Coat hooks
The coat hooks are provided with the rear assist grips.

WARNING
■Items that cannot be hung on the coat hook
Do not hang coat hangers or other hard or sharp objects on the hook. If the SRS curtain shield airbags deploy, these items may become projectiles, causing death or serious injury.


Other materials:
Precaution
1. Handling precautions on steering system
care must be taken when replacing parts. Incorrect replacement may
affect the performance of the
steering system and result in a driving hazard.
2. Handling precautions on srs airbag system
the vehicle is equipped with srs (suppl ...
Listening to a USB memory device
Connecting a USB memory device enables you to enjoy music from the vehicle
speakers.
Touch “USB” on the audio source selection screen.
Connecting a USB memory device
Audio control screen
Pressing the “AUDIO” button displays the audio control screen from any screens
of the selected so ...
Malfunction in speedometer
Wiring diagram
Inspection procedure
1 Check combination meter assy
Remove the combination meter assy with connector still
connected.
check voltage.
Jack up either of the front wheels.
Shift the shift lever to neutral.
Turn the ignition switch to on ...