Toyota Corolla (E120) 2002–2008 Repair Manual / Ignition / Inspection
Toyota Corolla (E120): Inspection
1. Spark plug
Notice
:
- never use a wire brush for cleaning.
- Never attempt to adjust the electrode gap on used spark plug.
- Spark plug should be replaced every 192,000 km (120,000 miles).

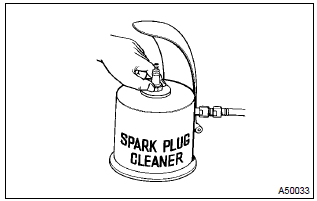
- Clean the spark plugs.
Air pressure: below 588 kpa (6.0 Kg/cm2, 85 psi) duration: 20 seconds or less

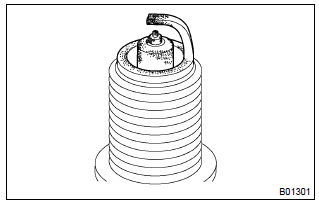
- Check the spark plug for thread damage and insulator damage.
Hint
: if abnormal, replace the spark plug.
Recommended spark plug:
sk16r11 (denso made)
ifr5a11 (ngk made)

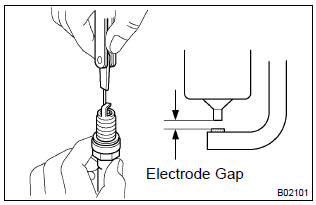
- Check the spark plug electrode gap.
Electrode gap: 1.1 Mm (0.043 In.)
2. Crank position sensor no.1
- using an ohmmeter, measure the resistance between terminals.
Resistance:
at cold 835 – 1,400 w
at hot 1,060 – 1,645 w
N
otice
: ”cold” and ”hot” on the table express the temperature of the coils themselves. ”Cold” is from –10 c (14 f) to 50 c (122 f) and ”hot” is from 50 c (122 f) to 100 c (212 f).
Hint
: if the resistance is not as specified, replace the crank position sensor no. 1.
3. Crank position sensor
- using an ohmmeter, measure the resistance between terminals.
Resistance:
at cold 1,630 – 2,740 w
at hot 2,065 – 3,225 w
Notice
: ”cold” and ”hot” on the table express the temperature of the coils themselves. ”Cold” is from –10 c (14 f) to 50 c (122 f) and ”hot” is from 50 c (122 f) to 100 c (212 f).
Hint
: if the resistance is not as specified, replace the crank position sensor.
4. Ignition relay

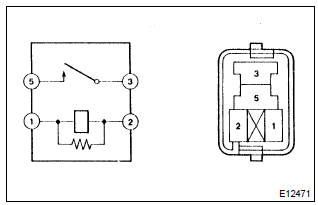
- Continuity inspection.
- Using an ohmmeter, check that continuity exists between
each terminal.
Specified condition: between terminal 1 and 2 continuity between terminal 3 and 5 no continuity
- using an ohmmeter, check that continuity exists between terminals 3 and 5 when the battery voltage is applied across terminals 1 and 2.
Other materials:
Replacing a flat tire
1 Chock the tires.
2 For vehicles with steel wheels, remove the wheel ornament using the wrench.
To protect the wheel ornament, place a rag between the wrench and the wheel ornament,
as shown in the illustration.
3 Slightly loosen the wheel nuts (one turn).
4 Turn the tire jack portion ...
Brake fluid
Bleeding
Notice:
wash the brake fluid off immediately if it comes into contact with any painted
surface.
Hint:
if any work is done on the brake system or if air in the brake lines is
suspected, bleed the air from the system.
1. Fill reservoir with brake fluid
fluid: sae j1703 or fmvss no. ...
How to proceed with troubleshooting
Troubleshoot in accordance with the procedure on the following pages.
1 Vehicle brought to workshop
2 Customer problem analysis check and symptom check
Without applicable symptoms, proceed to ”a”.
with applicable symptoms, proceed to ”b”.
3 Symptom simulation
4 Prob ...


