Toyota Corolla (E120) 2002–2008 Repair Manual / Brake / Brake fluid
Toyota Corolla (E120): Brake fluid
Bleeding
Notice
: wash the brake fluid off immediately if it comes into contact with any painted surface. Hint
: if any work is done on the brake system or if air in the brake lines is suspected, bleed the air from the system.
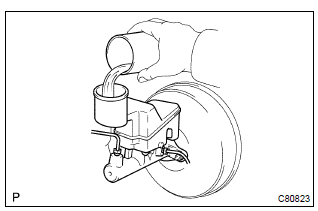
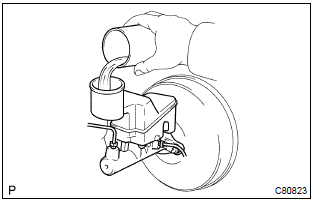
1. Fill reservoir with brake fluid fluid: sae j1703 or fmvss no. 116 Dot3
2. Bleed master cylinder
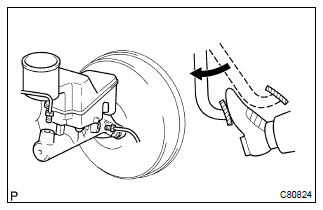
Hint
: if the master cylinder has been disassembled or if the reservoir becomes empty, bleed the air from the master cylinder.
- disconnect the brake lines from the master cylinder.
Sst 09023–00100
- slowly depress the brake pedal and hold it.
- Block off the outer holes with your fingers, and release the brake pedal.
- repeat (b) and (c) 3 or 4 times.
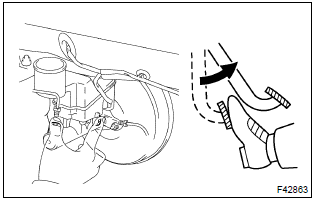
3. Bleed brake line
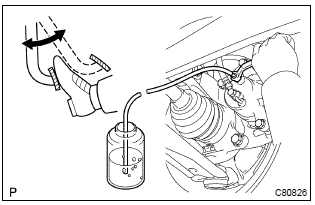
- Connect the vinyl tube to the brake caliper.
- depress the brake pedal several times, then loosen the bleeder plug with the pedal held down.
- at the point when fluid stops coming out, tighten the
bleeder plug, then release the brake pedal.
Torque: 8.3 Nvm (85 Kgf·cm, 74 in.Vlbf)
- repeat (b) and (c) until all the air in the fluid has been bled out.
- Repeat the above procedures to bleed the air out of the brake line for each wheel.
4. Check fluid level in reservoir
- Check the fluid level and add fluid if necessary.
Fluid: sae j1703 or fmvss no. 116 Dot3


Other materials:
Hydraulic test
1. Perform hydraulic test
Measure the line pressure.
Notice:
Do the test at normal operation atf temperature 50 to 80 °c (122 to
176 °f).
The line pressure test should always be carried out in pairs. One
technician should observe
the conditions of wheels or wheel stopper outsi ...
Parking the vehicle
► Automatic transmission or continuously
variable transmission Automatic transmission or continuously variable transmission
1 With the shift lever in D, depress the brake pedal.
2 Shift the shift lever to P.
3 Set the parking brake.
4 Vehicles without a smart key system: Turn ...
Warning lights
Warning lights inform the driver of malfunctions in the indicated vehicle’s systems.
*1: Vehicles without a smart key system:
These lights turn on when the engine switch is turned to the “ON” position to indicate
that a system check is being performed. They will turn off after the engi ...