Toyota Corolla (E120): Replacement
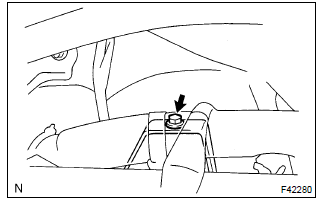
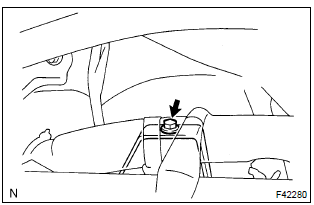
1. Remove combination meter assembly
2. Disconnect brake master cylinder push rod clevis
- remove the clip and push rod clevis pin and wave washer, and disconnect the push rod clevis from the brake pedal.
3. Remove brake pedal support sub–assy
- Remove the bolt from the brake pedal support.
- disconnect the stop lamp switch connector.
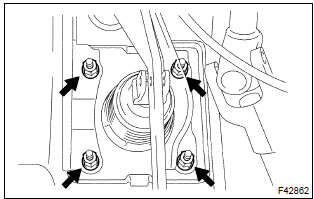
- Remove the 4 nuts and brake pedal support assy.
4. Remove brake pedal sub–assy
- remove the bolt and nut from the brake pedal support sub–assy.
- remove the brake pedal sub–assy and 2 bushes.
5. Remove stop lamp switch assy
- loosen the stop lamp switch lock nut.
- remove the stop lamp switch assy from the brake pedal support sub–assy.
6. Remove brake pedal pad
- remove the brake pedal pad from the brake pedal sub–assy.
7. Install brake pedal pad
- install the brake pedal pad to the brake pedal sub–assy.
8. Install stop lamp switch assy
- install the stop lamp switch assy to the brake pedal sub–assy.
9. Install brake pedal sub–assy
- apply the lithium soap base glycol grease to the 2 new bushes on the ends and sides.
- install the brake pedal sub–assy and 2 bushes to the brake pedal
support with the bolt and nut.
Torque: 36.8 Nvm (375 Kgf·cm, 27 ft·lbf)
10. Install brake pedal support sub–assy

- Install the brake pedal support assy with the 4 nuts.
Torque: 12.7 Nvm (130 Kgf·cm, 9 ft·lbf)
- connect the stop lamp switch connector to the stop lamp switch assy.
- Install the bolt to the brake pedal support sub–assy.
Torque: 23.6 Nvm (240 Kgf·cm, 17 ft·lbf)
11. Connect brake master cylinder push rod clevis
- apply the lithium soap base glycol grease to the push rod clevis pin.
- connect the brake master cylinder push rod clevis with the push rod clevis pin, wave washer and clip.
12. Install combination meter assembly
13. Check and adjust brake pedal height
14. Check pedal free play
15. Check pedal reserve distance


Other materials:
Menu list of the Bluetooth® audio/phone
To enter a menu, press and navigate
menus by using :
*: Bluetooth is a registered trademark of Bluetooth SIG, Inc.
■Bluetooth® audio/phone system functions
Depending on the Bluetooth® device, certain functions may not be available. ...
Cruise control actuator assy
Replacement
1. Remove cruise control actuator cover
Disengage the 2 claws, then remove the cruise control actuator
cover.
2. Separate accelerator control cable assy
Loosen the double nut and separate the accelerator control
cable assy.
3. Separate accelerator auto drive ca ...
Customer problem analysis
Hint:
in troubleshooting, the problem symptoms must be confirmed
accurately, meaning that all preconceptions
must be set aside in order to make an accurate judgement. To ascertain what
the problem symptoms
are, it is extremely important to ask the customer about the problem and
cond ...