Toyota Corolla (E210) 2019-2026 Owners Manual / Interior features / Using the air conditioning system and defogger / Air outlet layout and operations
Toyota Corolla (E210): Air outlet layout and operations
â– Location of air outlets
The air outlets and air volume changes according to the selected air flow mode.
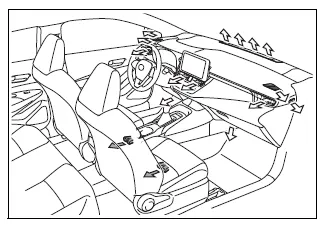
 :If equipped
â– Adjusting the position of and opening and closing the air outlets
Front center
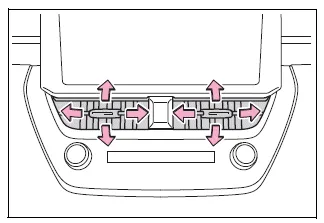
Direct air flow to the left or right, up or down
Front right-hand side
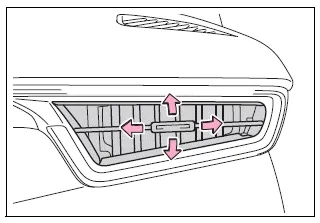
Direct air flow to the left or right, up or down
Front left-hand side
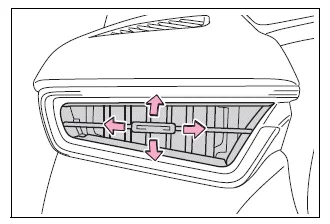
Direct air flow to the left or right, up or down
WARNING
â– To prevent the windshield defogger from operating improperly
Do not place anything on the instrument panel which may cover the air outlets. Otherwise, air flow may be obstructed, preventing the windshield defoggers from defogging.


Other materials:
Cd cannot be taken out
Wiring diagram
Inspection procedure
1 Check if radio auto–search functions properly
Check if the radio auto–search function properly.
Perform the auto–research of the radio and check that the
operation is normal.
Standard: malfunction disappear.
2 Press ”eject†...
Child restraint system
fixed with a seat belt
A child restraint system for a
small child or baby must itself be
properly restrained on the seat
with the lap portion of the
lap/shoulder belt.
â– Installing child restraint
system using a seat belt
(child restraint lock function
belt)
Install the child restraint system
in accordance to the operat ...
Electronic control
Removal and installation of battery terminal
before performing electrical work, disconnect the
battery negative (–) terminal cable beforehand so
as to prevent burnt–out damage by short.
When disconnecting and installing the terminal
cable, turn the ignition switch an ...