Toyota Corolla (E120) 2002–2008 Repair Manual / Diagnostics / Sfi system / Diagnostic trouble code chart
Toyota Corolla (E120): Diagnostic trouble code chart
Hint
: as for the vehicle for mexico, refer to repair manual 2003 corolla (pub. No. Rm938u).
Parameters listed in the chart may not be exactly the same as your readings due to the type of instrument or other factors.
If a malfunction code is displayed during the dtc check in the check mode, check the circuit for the codes listed in the table below. For details of each code, refer to the ’’’’ under the respective ’’dtc no.’’ In the dtc chart.
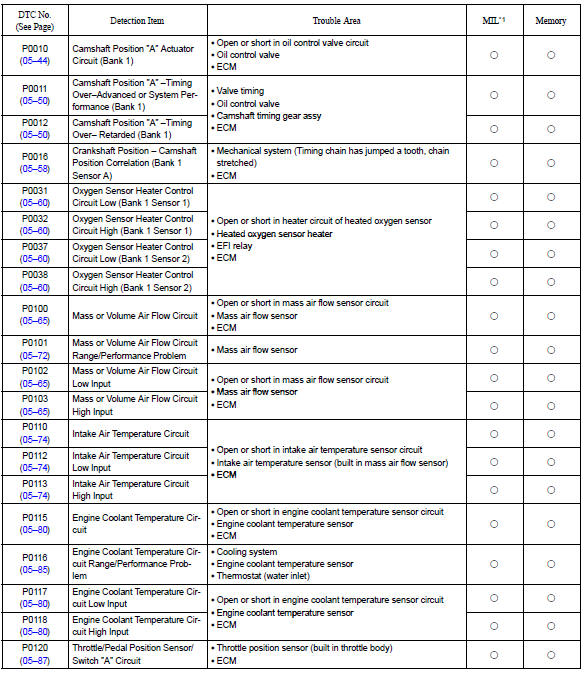
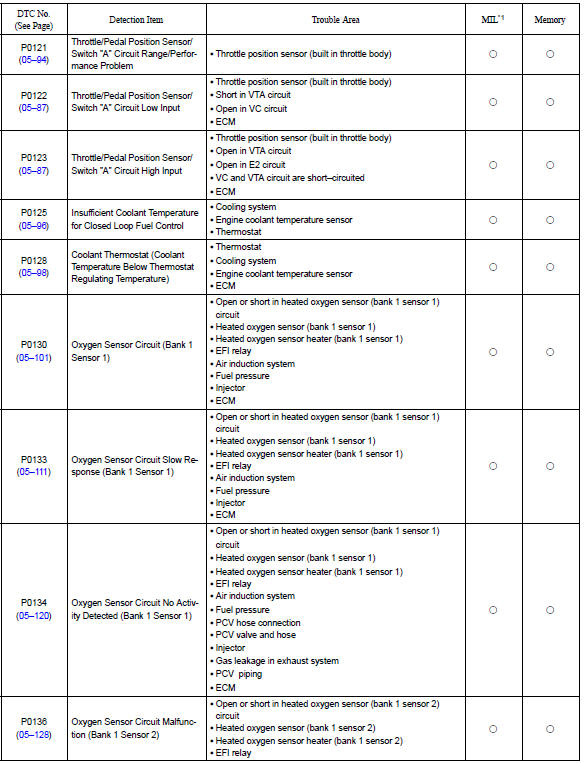
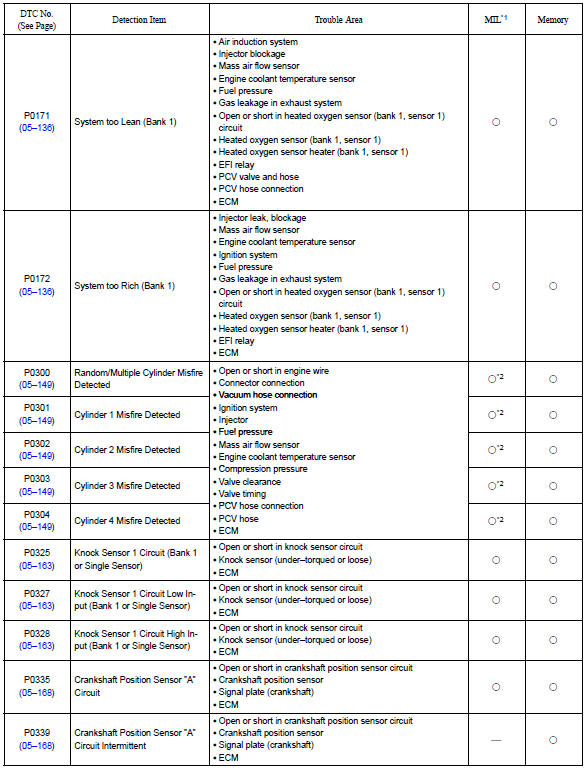
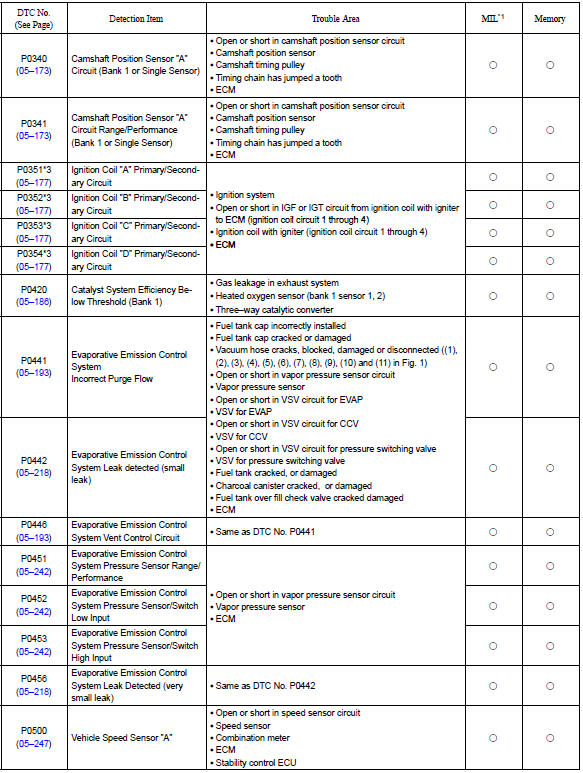
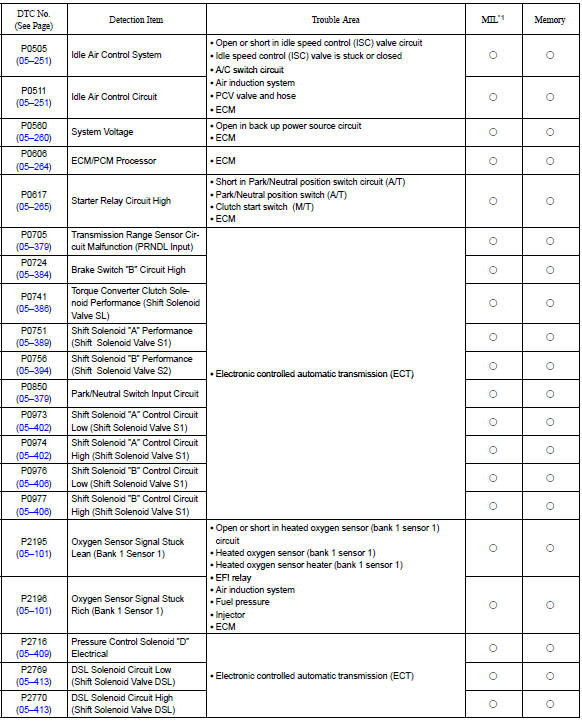
*1: ” ○” ... Mil is illuminated, ”—” ... Mil is not illuminated.
*2: Mil is illuminated or blinks *3: this dtc is indicate a malfunction related to primary circuit.


Other materials:
Speed sensor front lh
Replacement
Hint:
replace the rh side by the same procedure as the lh side.
1. Remove front wheel
2. Remove front fender liner lh
3. Remove speed sensor front lh
Disconnect the speed sensor wire harness clamp from
the body.
disconnect the speed sensor connector.
Remo ...
Rear door belt moulding assy lh
Replacement
Hint:
the installation procedures are the removal procedures in reverse
order.
Use the same procedures for the rh side and lh side.
1. Remove rear armrest assy lh
2. Remove power window regulator switch assy rear (w/ power window)
3. Remove rear door window regulator han ...
Engine mechanical
Service data
Torque specification
...