Toyota Corolla (E120): Replacement
1. Remove front door scuff plate rh
- Using a screwdriver, remove the front door scuff plate rh.
Hint
: tape the screwdriver tip before use.
- Remove front door scuff plate lh
- Remove rear door scuff plate rh
- Using a screwdriver, remove the rear door scuff plate rh.
Hint
: tape the screwdriver tip before use.
- employ the same manner described above to the other side.
4. Remove rear door scuff plate lh
5. Remove cowl side trim board rh
- Remove the clip.
- using a screwdriver, remove the cowl side trim board rh.
Hint
: tape the screwdriver tip before use.
- employ the same manner described above to the other side.
6. Remove cowl side trim board lh
7. Remove front door opening trim rh
8. Remove front door opening trim lh
9. Remove rear door opening trim rh
10. Remove rear door opening trim lh
11. Remove center pillar garnish lower rh
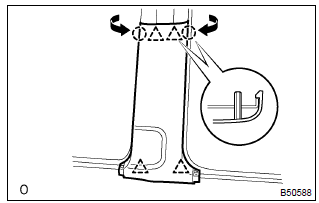
- Pull the center pillar garnish lower rh upward to remove it.
- employ the same manner described above to the other side.
12. Remove center pillar garnish lower lh
13. Remove center pillar garnish rh

- Using a screwdriver, remove the shoulder anchor cover
cap.
Hint
: tape the screwdriver tip before use.
- remove the bolt and front seat outer belt shoulder anchor.
- remove the bolt and front seat outer belt floor anchor.

- Using a screwdriver, remove the center pillar upper garnish rh.
Hint
: tape the screwdriver tip before use.
- employ the same manner described above to the other side.
14. Remove center pillar garnish lh
15. Remove rear seat cushion assembly (, 72ﻗ°±8)
16. Remove rear seat back assy (fixed type rear seat)
17. Remove rear seat back assy (separated type rear seat)
18. Remove rear seat side cover rh (fixed type rear seat)

- Using a screwdriver, remove the rear seat side cover rh.
Hint
: tape the screwdriver tip before use.
- employ the same manner described above to the other side.
19. Remove rear seat side garnish lh (fixed type rear seat)
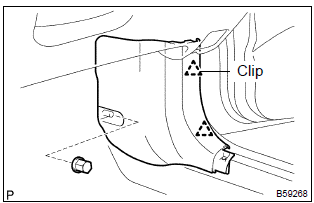
20. Remove room partition board lh (separated type rear seat)
- Remove the 2 clips and 2 builtﻗ°±in clips room partition board lh.
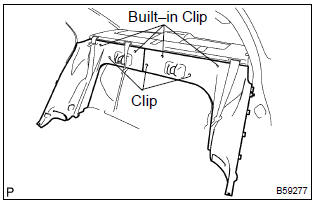
21. Remove room partition board rh
(separated type rear seat)
- remove the clip and 2 builtﻗ°±in clips room partition board rh.
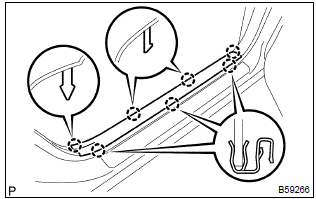
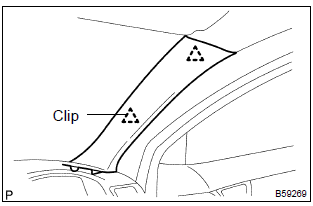
22. Remove roof side garnish inner rh
- Using a screwdriver, remove the roof side garnish inner
rh.
Hint
: tape the screwdriver tip before use.
- employ the same manner described above to the other side.
23. Remove roof side garnish inner lh
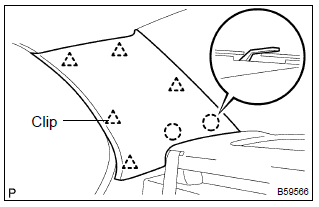
24. Remove package tray trim panel assy
- Using a clip remover, remove the 7 clips.
- pull out the belt from the slit and then remove the package tray trim panel assembly.
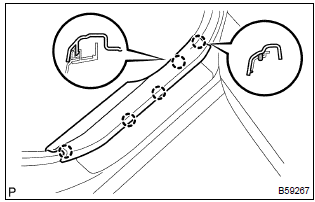
25. Remove front pillar garnish rh
- Using a screwdriver, remove the front pillar garnish rh.
Hint
: tape the screwdriver tip before use.
- employ the same manner described above to the other side.
26. Remove front pillar garnish lh
27. Remove rh visor assy
- Remove the 2 screws and rh visor assembly.
28. Remove lh visor assy
29. Remove map lamp assy (w/ sliding roof)
- Remove the screw.
- using a screwdriver, remove the map lamp lens and cover.
Hint
: tape the screwdriver tip before use.
- remove the screw.
- using a screwdriver, remove the glove box lamp assembly.
Hint
: tape the screwdriver tip before use.
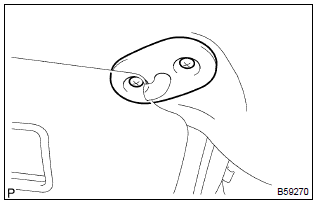
30. Remove room lamp assy no.1
- Using a screwdriver, remove the lens cover.
- using a screwdriver, remove the room lamp assembly no.1 As shown in the illustration.
31. Remove assist grip subﻗ°±assy
- Using a screwdriver, remove the 2 assist grip covers.
- remove the 2 screws and assist grip subﻗ°±assy.
32. Remove visor holder
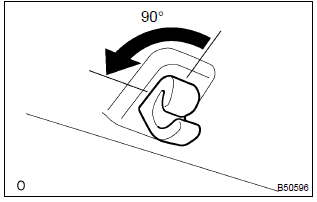
- Remove the holder of the sun visor by turning it counterclockwise.
33. Remove sun roof opening trim moulding (w/ sliding roof)
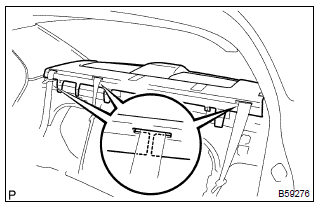
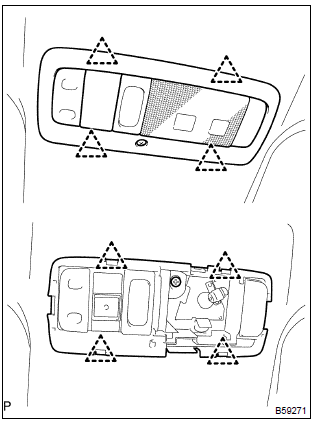
34. Remove roof headlining assy
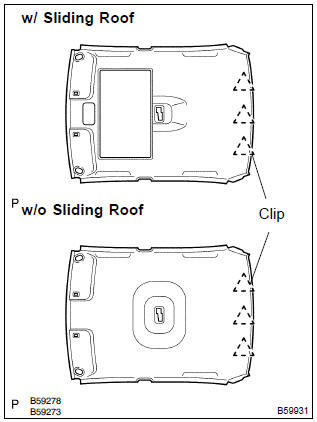
- Remove the 3 clips and roof headlining assembly.
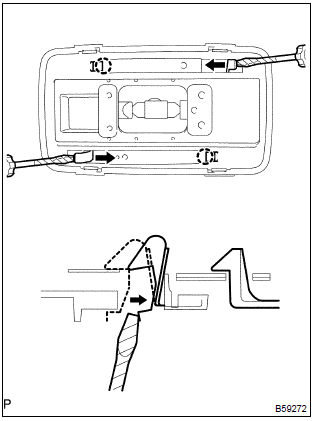
35. Install roof headlining assy
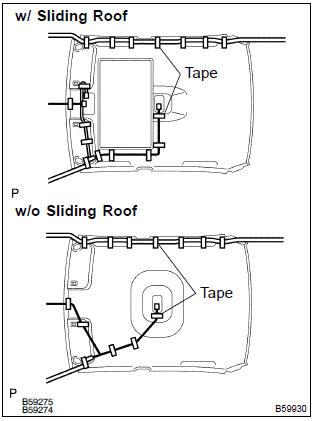
- Align the markings, and then install the wire harness with tape.
Hint
: be careful for dirt or foreign objects not to stick to the adhered part when peeling off the doubleﻗ°±stick tape.
- attach the roof wire harness across the adhered part.
Notice
: roof wire harness should be attached securely.
- install the 3 clips.
36. Install room partition board rh (separated type rear seat)
37. Install room partition board lh (separated type rear seat)
38. Install rear seat side cover rh (fixed type rear seat)
39. Install rear seat side garnish lh (fixed type rear seat)
40. Install rear seat back assy (fixed type rear seat)
41. Install rear seat back assy (separated type rear seat)


Other materials:
Overhaul
1. Drain brake fluid
Notice:
wash the brake fluid off immediately if it comes into contact with any painted
surface.
2. Remove air cleaner cap subﻗ°±assy
3. Remove brake master cylinder subﻗ°±assy
disconnect the brake fluid level switch connector from
master cylinder reservoir subﻗ ...
Inspection procedure
1 Check d squib circuit(airbag sensor assy center ﻗ°± horn button
assy)
Disconnect the negative (ﻗ°±) terminal cable from the battery,
and wait at least for 90 seconds.
disconnect the connectors between the airbag sensor
assy center and the horn button assy.
release the airbag ...
Bluetoothﺁﺡ phone message function
Received messages can be forwarded from the connected Bluetoothﺁﺡ phone, enabling
checking and replying using the multimedia system.
Depending on the type of Bluetoothﺁﺡ phone connected, received messages may not
be transferred to the message inbox.
If the phone does not support the message fu ...