Toyota Corolla (E120) 2002–2008 Repair Manual / Diagnostics / Electronic controlled automatic transaxle / Problem symptoms table
Toyota Corolla (E120): Problem symptoms table
Hint
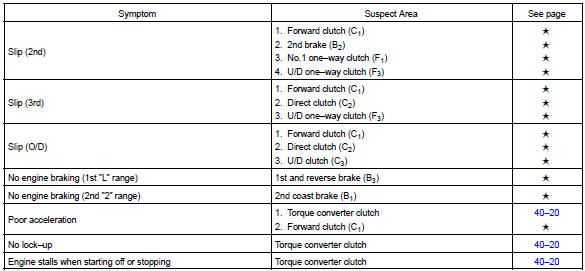
: if a normal code is displayed during the dtc check but the trouble still occurs, check the circuits for each symptom in the order given in the charts on the following pages and proceed to the page given for troubleshooting.
The matrix chart is divided into 3 chapters.
- If the instruction ”proceed to next circuit inspection shown on matrix chart” is given in the flow chart for each circuit, proceed to the circuit with the next highest number in the table to continue the check.
- If the trouble still occurs even though there are no abnormalities in any of the other circuits, then check and replace the ecm.
Chapter 1: electronic circuit matrix chart
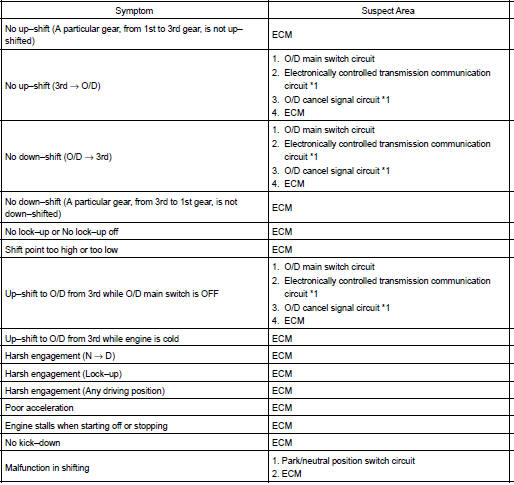
*1: W/ cruise control
Chapter 2: on–vehicle repair
( : a245e/a246e automatic transaxle repair manual pub. No. Rm941u)
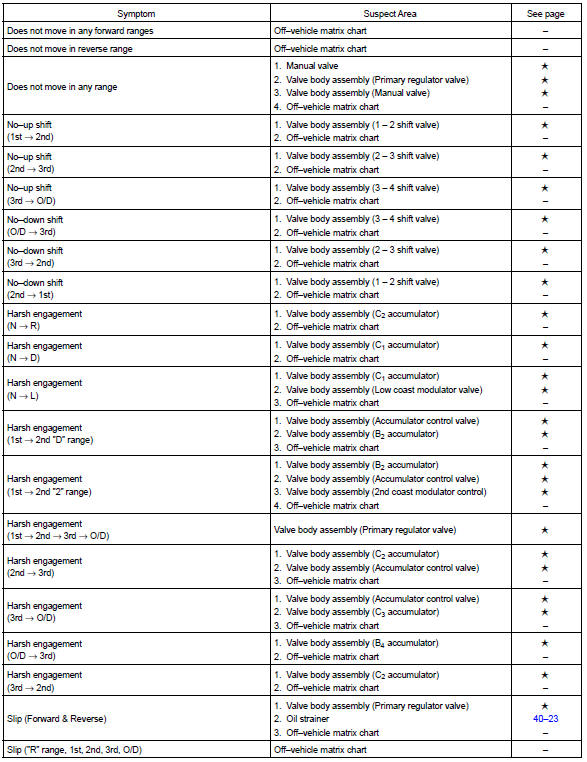
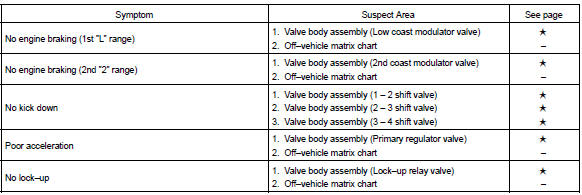
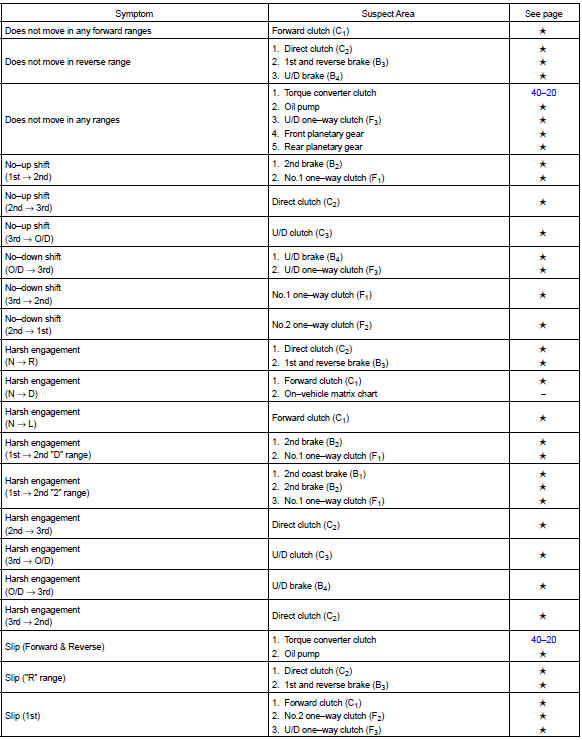
Chapter 3: off–vehicle repair
( : a245e/a246e automatic transaxle repair manual pub. No. Rm941u)


Other materials:
Outer rear view mirror assy lh
Replacement
Hint:
installation is according to the reverse order of the removal.
In the rh side, work in the same procedure as in the lh side.
1. Remove front armrest assy lh
2. Remove power window regulator master switch assy (w/ power window)
3. Remove front armrest base panel upper ...
Registering a Bluetooth® device
Before using the Bluetooth® audio/phone, it is necessary to register a Bluetooth®
device in the system. You can register up to 5 Bluetooth® devices.
How to register a Bluetooth® device
1 Press and select “Bluetooth*”
using .
2 Press and select “BT Pairing”
using .
A passkey w ...
Roof drip side finish moulding center lh
Replacement
Hint:
use the same procedures for the rh side and lh side.
The installation procedures are the removal procedures in reverse
order. However, only installation
procedures requiring additional information are included.
1. Remove roof drip side finish moulding center lh
...