Toyota Corolla (E120): Overhaul
1. Remove roof headlining assy
2. Remove sliding roof glass sub–assy
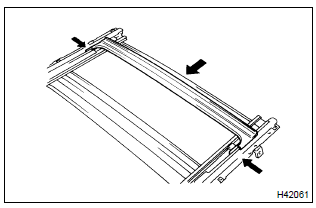
- using a torx wrench (t25), remove the 4 screws the sliding roof glass.
- pull the glass upward to remove it.
3. Remove sliding roof weatherstrip
4. Remove sliding roof drive gear sub–assy
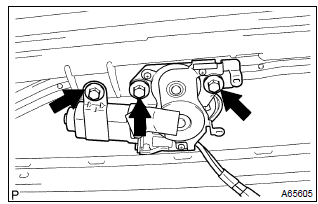
Notice
: remove the drive gear with the sliding roof fully closed.
- disconnect the connector.
- remove the 3 bolts and drive gear.
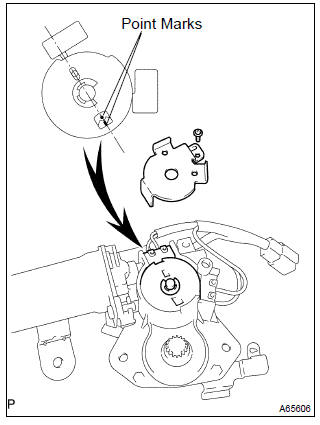
- Remove the screw and cam plate cover.
- turn the drive gear to align the point marks, as shown in the illustration.
- install the cam plate cover and screw.
Notice
: at the time of installation, if the sliding roof position and drive gear fully closed position are not aligned, the sliding roof does not operate normally.
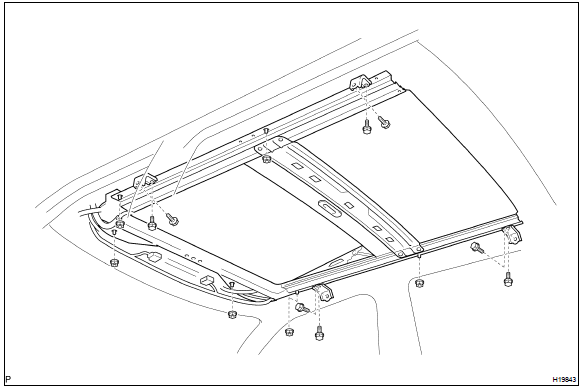
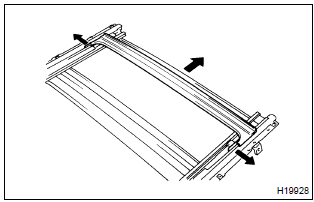
5. Remove sliding roof housing assy
- disconnect the 4 drain hoses from the housing.
- remove the 8 bolts and 4 brackets.
- remove the 6 nuts and housing.
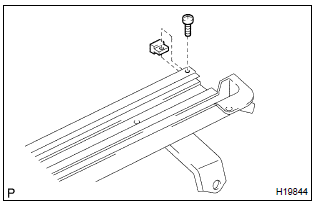
6. Remove sliding roof panel stopper
- Remove the 2 screws and 2 stoppers.
7. Remove sunshade trim sub–assy
- Remove the 2 screws and 2 stoppers.
- sliding the sunshade trim backward, remove it.
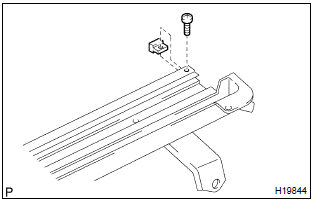
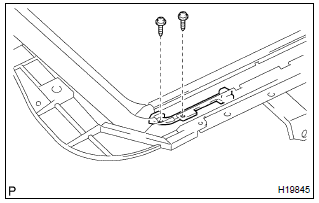
8. Remove roof drip channel rear
- Remove the roof drip channel rear as shown in the illustration.
9. Remove sliding roof drive cable lh
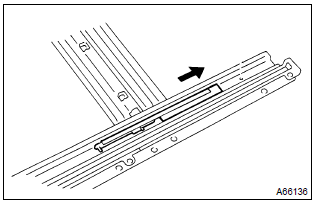
- Sliding the drive cable backward, remove it.
10. Remove sliding roof drive cable rh
- sliding the drive cable backward, remove it.
11. Remove roof wind deflector panel sub–assy
- remove the 2 screws and roof wind deflector panel.
12. Remove sliding roof guide block lh
- Remove the 2 screws and guide block.
13. Remove sliding roof guide block rh
- remove the 2 screws and guide block.
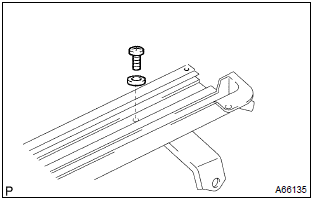
14. Remove slide roof rail sub–assy
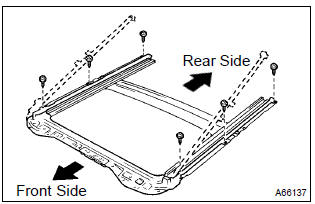
- Remove the 6 screws and sliding roof housing.
15. Install slide roof rail sub–assy
- install the sliding roof housing with the 6 screws.
16. Install sliding roof guide block lh
- Install the guide block with the 2 screws.
17. Install sliding roof guide block rh
- install the guide block with the 2 screws.
18. Install roof wind deflector panel sub–assy
- install the roof deflector panel with the 2 screws.
19. Install sliding roof drive cable lh
- Sliding the drive cable forward, install it.
20. Install sliding roof drive cable rh
- sliding the drive cable forward, install it.
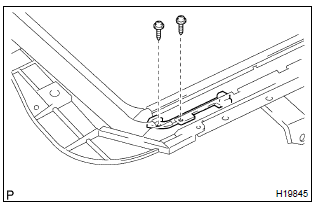
21. Install roof drip channel rear
- Install the roof drip channel rear, as shown in the illustration.
22. Install sunshade trim sub–assy
- Install the 2 stopper with the 2 screws.
23. Install sliding roof panel stopper
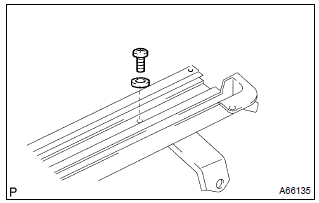
- Install the 2 stoppers with the 2 screws.
24. Install sliding roof housing assy
- install the housing with the 6 nuts.
Torque: 5.5 N·m (56 kgf·cm, 49 in.·Lbf)
- install the 4 brackets with the 8 bolts.
Torque: 5.0 N·m (51 kgf·cm, 44 in.·Lbf)
- connect the 4 drain hoses to the housing.
25. Install sliding roof drive gear sub–assy
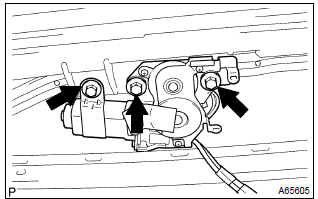
- Install the drive gear with the 3 bolts.
Torque: 5.4 N·m (55 kgf·cm, 48 in.·Lbf)
- connect the connector.
26. Install sliding roof weatherstrip
27. Install sliding roof glass sub–assy
torque: 4.0 Nvm(41 kgfvcm, 35 in.Vlbf)
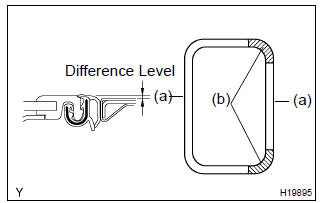
- Check the difference in level between the sliding roof weatherstrip and roof panel.
Standard:

28. Adjust sliding roof glass sub–assy
- Using a torx wrench (t25), loosen the sliding roof glass installation screws.
- adjust the sliding roof glass forward and backward.
- When the front or rear alignment is not correct, remove the drive gear and sliding roof glass, then adjust the drive rail.
Notice
: remove the drive gear with the sliding roof fully closed.
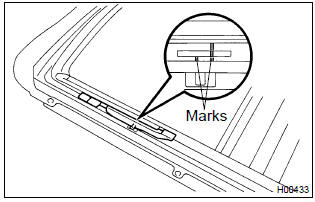
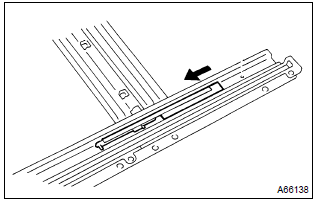
- Adjust the roof rail by sliding the cable forward or backward to align the 2 marks, as shown in the illustration.
- install the drive gear and sliding roof glass.
29. Inspect for leak
- adjusting the sliding roof, check there is no water leak.
- in case of water leak, readjust the sliding roof.
30. Install roof headlining assy


Other materials:
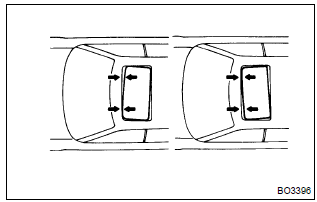
Positioning a floor jack
When using a floor jack, follow the instructions in the manual provided with
the jack and perform the operation safely.
When raising your vehicle with a floor jack, position the jack correctly.
Improper placement may damage your vehicle or cause injury.
◆ Front
◆ Rear
1 Take out ...
Sound quality is bad only when playing tape
Inspection procedure
1 Replace cassette tape with another and recheck
Replace the cassette tape with another and recheck.
Replace the faulty cassette tape with the normal one to see if the
same trouble occurs again.
Standard: malfunction disappear.
2 Check for any foreig ...
Inspection procedure
1 Check door lock
When the door does not operate manually, proceed to ”a”.
when the door does not operate via the key, proceed to ”b”.
2 Inspect door lock control switch
W/ power window:
remove the power window regulator master switch assy.
Inspect th ...