Toyota Corolla (E170): Driving monitor
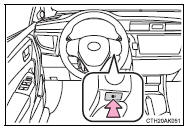
■ Switching the display
Items displayed can be switched by pressing the “DISP” switch.
■ Average fuel consumption
Displays the average fuel consumption since the function was reset.
• Press and hold the “DISP” switch to reset when the average fuel consumption is displayed.
• Use the displayed average fuel consumption as a reference.
■ Current fuel consumption
Displays the current rate of fuel consumption.
Use the displayed current fuel consumption as a reference.
■ Driving range
Displays the estimated maximum distance that can be driven with the quantity of fuel remaining.
• This distance is computed based on your average fuel consumption. As a result, the actual distance that can be driven may differ from that displayed.
• When only a small amount of fuel is added to the tank, the display may not be updated.
When refueling, turn the engine switch off. If the vehicle is refueled without turning the engine switch off, the display may not be updated.
■ Average vehicle speed
Displays the average vehicle speed since the engine was last started.
■ Elapsed time
Displays the elapsed time since the engine was started.
■ Customization
Language and Eco Driving Indicator Light settings can be changed.
■ Eco Driving Indicator Zone Display (except vehicles with a manual transmission)


Other materials:
Windshield wiper motor assy
Replacement
1. Remove windshield wiper arm cover
2. Remove fr wiper arm rh
operate the wiper and stop the windshield wiper motor assy at the
automatic stop position.
remove a nut and fr wiper arm rh.
3. Remove fr wiper arm lh
remove a nut and fr wiper arm lh.
4 ...
Shift lock system (atm)
On–vehicle inspection
1. Check shift lock operation
shift the shift lever to p position.
turn the ignition switch to lock.
check that the shift lever cannot be shifted to any other
positions other than p.
turn the ignition switch to on, depress the brake pedal ...
Continuously variable transmission
(vehicles with paddle shift
switches)
Select the shift position
depending on your purpose
and situation.
Shift position purpose
and functions
P - Parking the vehicle/
starting the engine
R - Reversing
N - Neutral
(Condition in which the
power is not transmitted)
D - Normal driving*
M - 10-speed sport sequential
shiftmatic mode driving
* ...