Toyota Corolla (E120) 2002–2008 Repair Manual / Diagnostics / Electronic controlled automatic transaxle / Check mode procedure
Toyota Corolla (E120): Check mode procedure
1. Dtc check (check mode)
Hint
: hand–held tester only: compared to the normal mode, the check mode has more sensing ability to detect malfunctions. Furthermore, the same diagnostic items which are detected in the normal mode can also be detected in the check mode.
- Procedure for check mode using the hand–held tester.
- Check the initial conditions.
Battery positive voltage 11 v or more throttle valve fully closed transaxle in the p or n position a/c switch is off
- turn the ignition switch off.
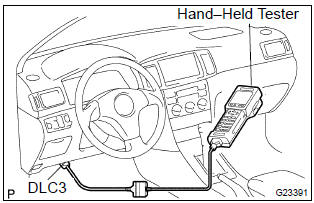
- Connect the hand–held tester to the dlc3.
- Turn the ignition switch to the on position.
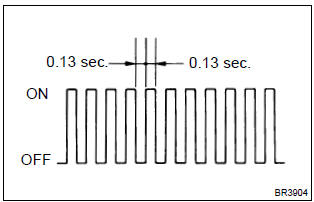
- Switch the hand–held tester from the normal mode to the check mode (check that the mil flashes).
Notice
: if the hand–held tester switches the ecm from the normal mode to the check mode or vice–versa, or if the ignition switch is turned from the on position to the acc or lock position during the check mode, the dtc and freeze frame data will be erased.
- Start the engine (mil goes off after the engine starts).
- Simulate the conditions of the malfunction described by the customer.
Notice
: leave the ignition switch in the on position until you have checked the dtcs, etc.
- After simulating malfunction conditions, use the
hand–held tester diagnosis selector to check the
dtcs and freeze frame data, etc.
Hint
: be sure not to turn the ignition switch off, as turning it off switches the diagnosis system from the check mode to the normal mode, which erases all the dtcs, etc.
- After checking the dtc, inspect the applicable circuit.
2. Dtc clear
- When using the obd ii scan tool or hand–held tester: clearing the dtcs.
- Connect the obd ii scan tool or hand–held tester to the dlc3.
- Turn the ignition switch to the on position.
- When operating the obd ii scan tool (complying with sae j1978) or hand–held tester to erase the codes, the dtcs and freeze frame data will be erased. (See the obd ii scan tool’s instruction book for operating instructions.)
- when not using the obd ii scan tool or hand–held tester: clearing the dtcs.
- Disconnecting the battery terminal or remove the efi and etcs fuses from the engine room j/b for 60 seconds or more.


Other materials:
Circuit description
The rotary solenoid type idle air control (iac) valve is located
under the throttle body and intake air bypassing the throttle
valve flows into the iac valve through the passage.
In this way the intake air volume bypassing the throttle valve is
regulated, controls the engine speed.
The ...
Driving
► Automatic transmission or continuously
variable transmission
1 With the brake pedal depressed, shift the shift lever to D.
(, 174, 176)
2 Release the parking brake.
3 Gradually release the brake pedal and gently depress the accelerator pedal to
accelerate the vehicle.
► ...
Cruise control system
On–vehicle inspection
1. Check play of accelerator auto drive cable assy
Push the wire into the cable so as not to move the throttle
link and put a mark on the position shown in the illustration.
Pull the wire and check the moved distance of the mark.
2. Adjust play in acce ...