
Toyota Corolla (E120) 2002–2008 Repair Manual / Diagnostics / Sfi system / Stop light switch circuit / Inspection procedure
Toyota Corolla (E120): Inspection procedure
Hand–held tester:
1 Check operation of stop light
- Check if the stop lights go on and off normally when the brake pedal is depressed and released.


2 Inspect stop light switch assy
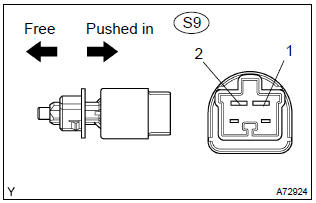
- Check the resistance between the terminals when the switch is turned on and off.
Standard:



3 Read value of hand–held tester(stp signal)
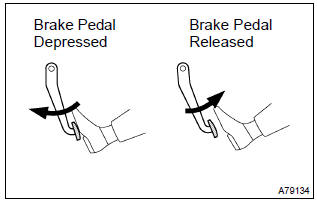
- Turn the ignition switch on.
- select the item ”diagnosis / enhanced obd ii / data list / all / stop light sw” and read its value displayed on the hand–held tester.
Standard:



4 Check harness and connector(stop light switch – ecm)
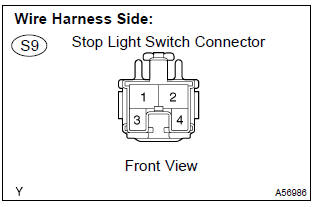
- Disconnect the s9 stop light switch connector.
- disconnect the e5 ecm connector.
- check the resistance between the wire harness side connectors.
Standard (check for open):

Standard (check for short):

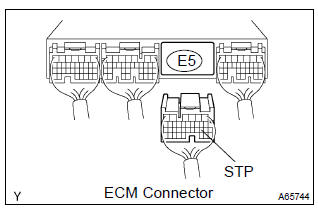
- Reconnect the ecm connector.
- reconnect the stop light switch connector.


Replace ecm
Obd ii scan tool (excluding hand–held tester):
1 Check operation of stop light
- Check if the stop lights go on and off normally when the brake pedal is depressed and released.


2 Inspect stop light switch assy
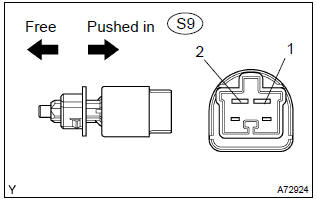
- Check the resistance between terminals when the switch on and off.
Standard:



3 Inspect ecm(stp voltage)
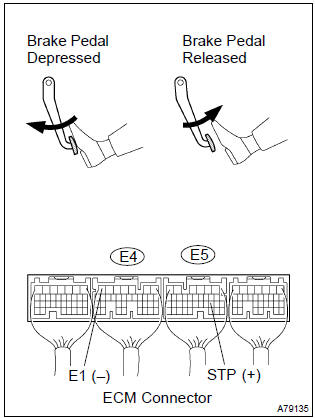
- Turn the ignition switch on.
- measure the voltage between the terminals of the e4 and e5 ecm connectors.
Standard:



4 Check harness and connector(stop light switch – ecm)
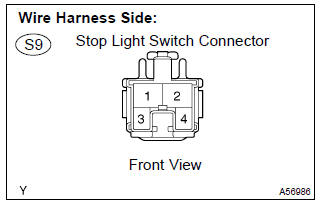
- Disconnect the s9 stop light switch connector.
- disconnect the e5 ecm connector.
- check the resistance between the wire harness side connectors.
Standard (check for open):

Standard (check for short):

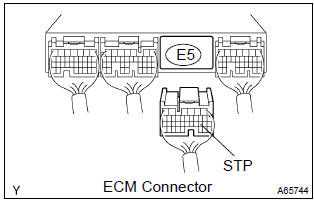
- Reconnect the ecm connector.
- reconnect the stop light switch connector.


Replace ecm


Other materials:
Disposal
Hint:
when scrapping vehicle equipped with an srs or disposing of a instrument panel
passenger airbag assy,
always first deploy the airbag in accordance with the procedure described below.
If any abnormality occurs
with the airbag deployment, contact the service dept. Of toyota motor sales,
...
Replacement
Hint: components:
1. Discharge refrigerant from refrigeration system
sst 07110–58060 (07117–58080, 07117–58090, 07117–78050, 07117–88060,
07117–88070,
07117–88080)
2. Disconnect cooler refrigerant suction
hose no.1
Remove the bolt and disconnect the cooler refriger ...
Dialing by selecting a name
1 Select “Phonebook” using .
2 Select the desired name using
and press the off-hook switch.
By pressing (Add S. Dial) and then
one of the speed dial buttons (from
to ) while the desired name is selected,
it can be registered as a speed dial. ...