Toyota Corolla (E120): Replacement
1. Remove engine under cover rh
2. Drain coolant
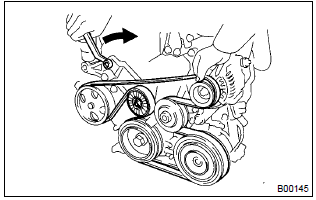
3. Remove fan and generator v belt
4. Remove generator assy
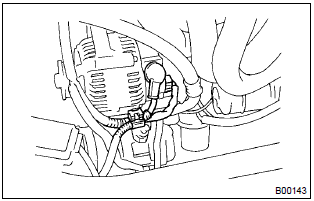
- Disconnect the wire clamp from the wire clip on the rectifire end frame.
- remove the rubber cap and nut, and disconnect the alternator wire.
- disconnect the alternator connector.
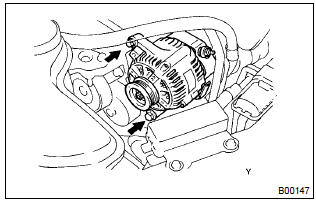
- Remove the 2 bolts and alternator.
5. Remove water pump assy
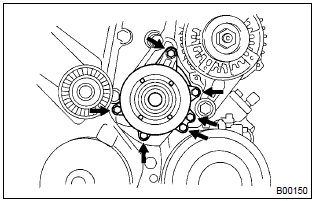
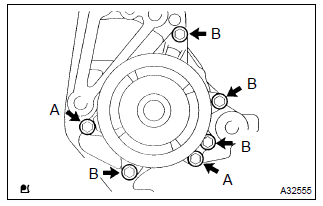
- Remove the 6 bolts, water pump and o–ring.
6. Install water pump assy
- Place a new o–ring on the timing chain cover.
- install the water pump with the 6 bolts.
Torque:
bolt a 9.0 Nvm (92 Kgf·cm, 80 invlbf) bolt b 11 nvm (113 Kgf·cm, 8 ft·lbf)
7. Install generator assy
Torque:
12 mm head 25 nvm (250 Kgf·cm, 18 ft·lbf)
14 mm head 54 nvm (550 Kgf·cm, 39 ft·lbf)
8. Add coolant
9. Check engine coolant leak


Other materials:
Inspection procedure
Hint:
if dtc p0441 (purge flow), p0446 (vsv for ccv or vsv for pressure
switching valve), p0451, p0452
or p0453 is output with dtc p0442 or p0456 , first troubleshoot
dtc p0441, p0446, p0451, p0452 or p0453. If no malfunction is detected,
troubleshoot dtc
p0442 or p0456 next.
...
Inspection procedure
1 Check operation(starter)
Check that the starter operates normally and that the engine starts.
2 Input signal check
See input signal check on page 05–745.
check the indicator light when shifting into except d position.
Ok:
the indicator light goes off when shifting ...
Starting the engine
1 Continuously variable transmission: Ensure that the shift lever is in P and
depress the brake pedal.
Manual transmission: Shift the shift lever to N and depress the clutch pedal.
2 Touch the Toyota emblem side of the electronic key to the engine switch.
When the electronic key is detected, a ...