Toyota Corolla (E120) 2002–2008 Repair Manual / Audio & visual / Amplifier antenna assy
Toyota Corolla (E120): Amplifier antenna assy
Replacement
Hint
: components:
- Remove roof headlining assy
Notice
: do not bend the roof headlining assy.
Hint
:
- refer to the procedure from ”remove roof headlining assy” of roof headlining assy.
- Remove the related parts as long as the amplifier antenna assy can be removed.
2. Remove roof antenna pole sub–assy
3. Remove amplifier antenna assy
- Disconnect the connector and antenna cord plug.
- remove the clamp.
- remove the antenna nut and amplifier antenna assy.
4. Install amplifier antenna assy
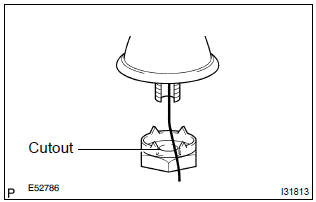
- Set the amplifier antenna assy to the hole on the roof, and place the antenna cord on the cutout of the antenna nut.
- install the amplifier antenna assy with the antenna nut.
Torque: 4.5 Nvm (46 kgfvcm, 40 in.Vlbf)
5. Install roof headlining assy
6. Install rear seat back assy (fixed type rear seat)
7. Install rear seat back assy (separated type rear seat)
8. Install bench type rear seat cushion assy


Other materials:
Auto connection
To turn auto connection mode on, set “Bluetooth* Power” to on.
When you register a phone, auto connection will be activated. Always set it to
this mode and leave the Bluetooth® phone in a place where a connection can be established.
When the engine switch is turned to ACCESSORY or ON <IG ...
Connecting a Bluetooth® device
Up to 5 Bluetooth® devices (Phones (HFP) and audio players (AVP)) can be registered.
If more than 1 Bluetooth® device has been registered, select which device to
connect to.
1 Press the “SETUP” button.
2 Select “Bluetooth*”.
*: Bluetooth is a registered trademark of Bluetooth SIG, In ...
Fastening and releasing
the seat belt
To fasten the seat belt, push
the plate into the buckle until
a click sound is heard.
To release the seat belt,
press the release button A.
■Emergency locking retractor
(ELR)
The retractor will lock the belt during
a sudden stop or on impact. It may
also lock if you lean forward too
quickl ...