Toyota Corolla (E120): On–vehicle inspection
1. Check fuel pump operation
- Connect the hand–held tester to the dlc3.
- turn the ignition switch on and hand–held tester main
switch on.
Notice
: do not start the engine.
- select the active test mode on the hand–held tester.
- please refer to the hand–held tester operator’s manual for further details.
- if you have no hand–held tester, connect the positive (+) lead form the battery to terminal 4 of the connecter, and the negative (–) lead to terminal 5.
Notice
:
- these tests must be done quickly (within 10 seconds) to prevent the coil burning out.
- Keep the fuel pump as far away from the battery as possible.
- Always do the switching at the battery side.
2. Check fuel pressure
- Prepare for inspection.
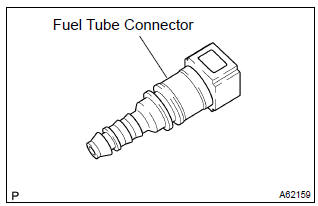
- Purchase a new fuel tube, and take out the fuel tube connector from its tube.
Hint
: part no. 23901–0D010
- work for prevent gasoline from spilling out.
- disconnect the efi fuel pipe clamp.
- disconnect the fuel tube from the fuel main tube.
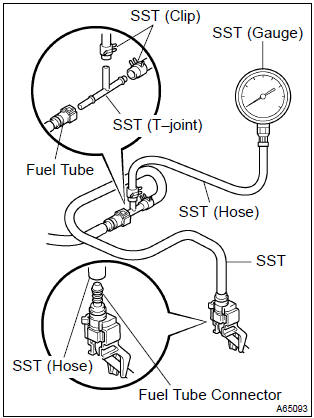
- Install sst (pressure gauge) as shown in the illustration
by using the sst and fuel tube connector.
Sst 09268–41047 (90467–13001, 95336–08070), 09268–45014 (09268–41200, 09268–41220, 09268–41250, 90467–13001)
- wipe off any splattered gasoline.
- ) start the engine.
- measure the fuel pressure at idle.
Fuel pressure: 304 – 343 kpa (3.1 – 3.5 Kgfvcm2, 44 – 50 psi)
- stop the engine.
- check that the fuel pressure remains as specified for 5
minutes after the engine has stopped.
Fuel pressure:
147 kpa (1.5 Kgfvcm2, 21 psi) or more
If pressure is not as specified, check the fuel pump, pressure regulator and/or injectors.
- after checking fuel pressure, disconnect the negative (–) terminal cable from the battery and carefully, remove the sst and fuel tube connector to prevent gasoline from the splashing.
- reconnect the fuel tube to fuel main tube.
- install the efi fuel pipe clamp.
- check fuel leak.


Other materials:
Problem symptoms table
The suspected circuits or parts for each problem symptom are shown in the
table below. Use this table to
troubleshoot the problem when a normal code is displayed in the diagnostic
trouble code chart but the problem
is still occurring. Numbers in the table indicate the order in which the
circ ...
Changing the passkey
1 Select “Passkey” using . 2 Input
a 4 to 8-digit passkey using .
Input the number 1 digit at a time.
3 When the entire number to be registered as a passkey has been input, press
again.
If the passkey to be registered has 8 digits, pressing
again is not necessary. ...
Introductions
4. Anti-rust treatment after installation
(A) body sealer application
Purpose:
for water-proofing and anti-rust measures, always
apply the body sealer to the body panel seams and
hems of the doors, hood, etc.
Notice:
apply body sealer neatly to parts that require a
high quality appeara ...