Toyota Corolla (E120) 2002–2008 Repair Manual / Diagnostics / Cruise control system / How to proceed with troubleshooting
Toyota Corolla (E120): How to proceed with troubleshooting
1 Vehicle brought to workshop

2 Customer problem analysis

3 Check and clear dtc

4 Problem symptom confirmation

5 Symptom simulation

6 Dtc check

7 Dtc chart

8 Problem symptoms table

9 Circuit inspection
10 Identification of problem
11 Parts inspection
12 Repair
13 Confirmation test
End
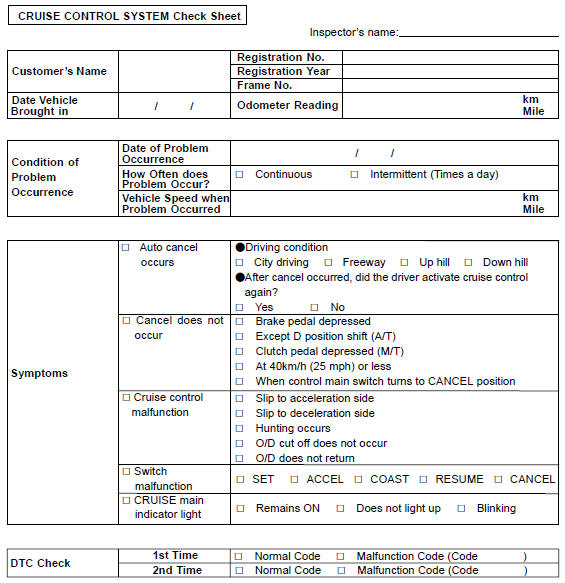
Customer problem analysis check


Other materials:
Calibrating the compass
The direction display deviates from
the true direction determined by the earth’s magnetic field. The amount of deviation
varies according to the geographic position of the vehicle.
If you cross over a map boundary shown in illustration, the compass will deviate.
To obtain higher precision or ...
Inspection procedure
1 Check front airbag sensor (lh) circuit (to b+)(airbag sensor assy
center – airbag sensor front lh)
Disconnect the negative (–) terminal cable from the battery,
and wait at least for 90 seconds.
disconnect the connectors between the airbag sensor
assy center and the airbag ...
On–vehicle inspection
1. Inspect front axle hub bearing
remove the front wheel.
separate the front disc brake caliper assy .
remove the front disc.
inspect the bearing backlash.
Using a dial indicator, check the backlash near the
center of the axle hub.
Maximum: 0.05 Mm (0. ...