Toyota Corolla (E120) 2002–2008 Repair Manual / Automatic transmission / trans / Floor shift cable transmission control shift
Toyota Corolla (E120): Floor shift cable transmission control shift
Replacement
Hint
: components:
1. Remove air conditioner unit assy
Hint
: refer to the instructions for removal of the air conditioner unit assy.
2. Separate air bag sensor assy center
- remove the 3 bolts, separate the airbag sensor assy center.
3. Remove exhaust pipe assy
4. Remove front floor heat insulator no.1
- remove the 3 nuts and heat insulator no.1.
5. Remove floor shift cable transmission control shift

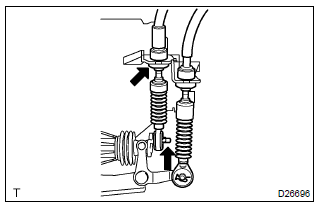
- Remove the clip and washer, separate the top of the shift cable from the transaxle.
- remove the clip, separate the shift cable from the control cable bracket.
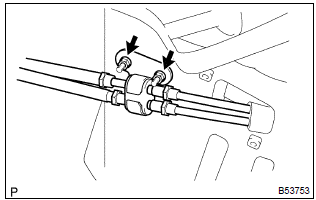
- Remove the 2 nuts and clamp.
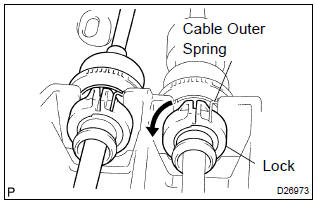
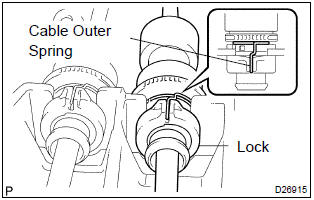
- Using a screwdriver, release the cable outer spring.
- turn the lock, separate the shift cable from the shift lever retainer.
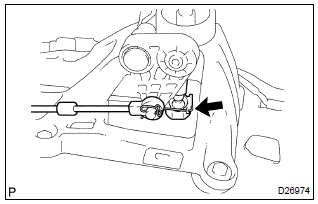
- Separate the end of the shift cable from the shift lever assy.
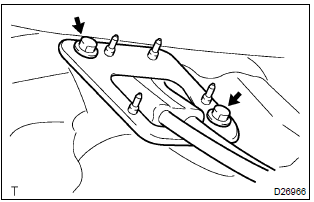
- Remove the 2 bolts and retainer from the floor.
- pull out the control cable assy from the floor.
- Remove the retainer from the grommet.
6. Install floor shift cable transmission control shift
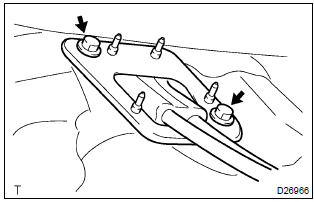
- Put the control cable assy through the floor hole and retainer.
- install the retainer to the grommet.
Notice
: fit 4 projections of the grommet into 4 holes of the retainer.
- Install the control cable assy with the 2 bolts.
Torque: 5.0 Nvm (51 Kgf·cm, 44 in.Vlbf)
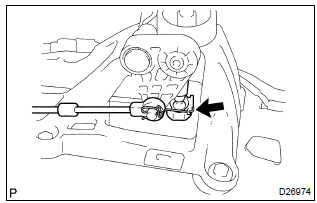
- Connect the end of the shift cable to the shift lever assy.
- Connect the shift cable to the retainer of shift lever assy,
turn the lock.
Notice
: the projecting part of the lock should face upward when the shift cable is installed.
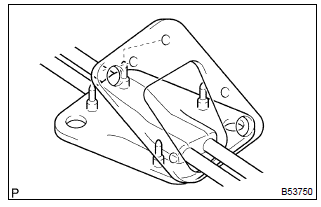
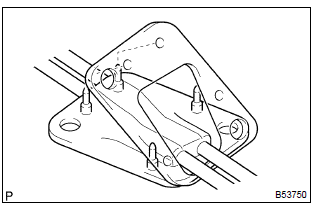
- install the cable outer spring to the lock.
Notice
: make sure that after installation the cable outer spring is moved to the place shown in the illustration.
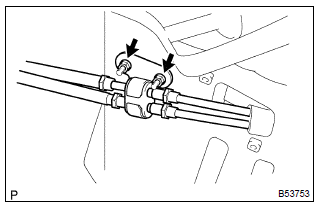
- Install the clamp with the 2 nuts.
Torque: 5.0 Nvm (51 Kgf·cm, 44 in.Vlbf)
- Connect the shift cable to the control cable bracket, install a new clip.
- connect the shift cable to the transaxle, install the washer and clip.
7. Install front floor heat insulator no.1
- install the heat insulator no.1 With the 3 nuts.
Torque: 5.5 Nvm (56 Kgf·cm, 49 in.Vlbf)
8. Install exhaust pipe assy
9. Connect air bag sensor assy center
- install the airbag sensor assy center with the 3 bolts.
Torque: 17.5 Nvm (178 Kgf·cm, 13 ft·lbf)
10. Inspect srs warning light


Other materials:
Inspection procedure
1 Inspect fuse(ecu–ig fuse)
Remove ecu–ig fuse from the instrument panel j/b.
check continuity of ecu–ig fuse.
Ok:
continuity
2 Inspect battery
Ok:
voltage: 10 – 14 v
3 Inspect skid control ecu connector(ig1 terminal voltage)
In case of using hand–held te ...
Listing the registered cellular phones
Select “List Phone” using .
The list of registered cellular phones will be displayed.
● Connecting the registered cellular phone to the audio system
1 Select the name of the cellular phone to be connected using
.
2 Select “Select” using .
● Deleting a registered cell ...
Overhaul
Caution:
wear the gloves, because the cutting surface of the seat back frame and seat
adjuster may injure
your hand.
Hint:
tape the screwdriver tip before use when prying parts.
1. Disconnect battery negative terminal
Caution:
wait for 90 seconds after disconnecting the battery terminal a ...