Toyota Corolla (E120) 2002–2008 Repair Manual / Automatic transmission / trans / Floor shift cable transmission control
shift (atm)
Toyota Corolla (E120): Floor shift cable transmission control shift (atm)
Replacement
1. Precaution
2. Disconnect battery negative terminal
3. Remove parking brake hole cover sub–assy
4. Remove console panel upper
5. Remove console box carpet
6. Remove console box sub–assy rear
7. Remove air bag sensor assy center
8. Disconnect oxygen sensor connector
- remove the foot rest.
- pull up the floor carpet.
- disconnect the oxygen sensor connector.
9. Remove floor panel brace front
- remove the 2 nuts and floor panel brace.
10. Remove exhaust pipe assy front
11. Remove front floor heat insulator no.1
- remove the 3 nuts and heat insulator.
12. Remove air cleaner case
13. Remove air cleaner hose no.1
14. Remove floor shift cable transmission control shift
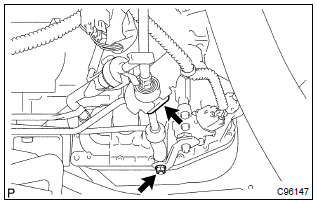
- Remove the nut from control shaft lever.
- disconnect the control cable from the control shaft lever.
- remove the clip and disconnect the control cable from the control cable bracket.
- disconnect the control cable from the control cable support.
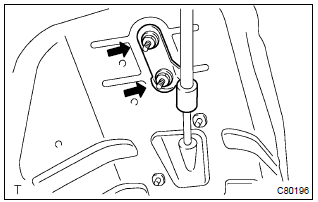
- Remove the 2 nuts.
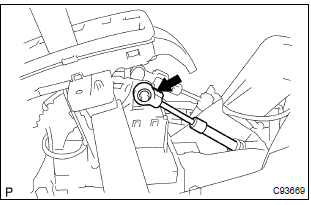
- Remove the cable end from the rod of the floor shift assembly.
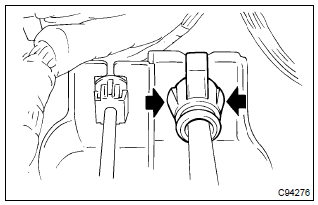
- Using a screw driver, disconnect the control cable from the shift lever plate.
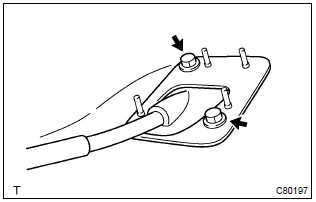
- Remove the 2 bolts.
- pull out the control cable assy from the body.
- remove the retainer from the shift cable.
15. Install floor shift cable transmission control shift
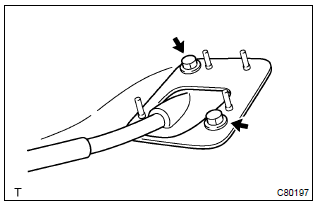
- Install the retainer to the shift cable.
- pull in the control cable assy to the body.
- install the 2 bolts.
Torque: 5.0 Nvm (50 Kgf·cm, 43 in.Vlbf)
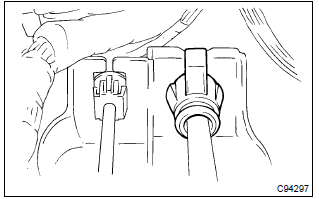
- Install the control cable to the shift lever plate.
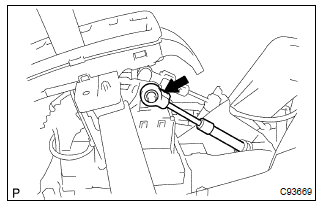
- Install the cable end to the rod of the floor shift assy.
Hint
: install it with the uneven surface facing upward.
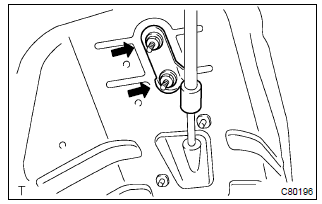
- Install the control cable and 2 nuts.
Torque: 12 nvm (122 Kgf·cm, 9 ft·lbf)
- connect the control cable to the control cable support.
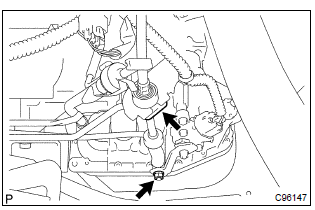
- Temporarily install the control cable to the control shaft lever with the nut.
- install the control cable and clip to the bracket.
16. Install air cleaner case
17. Install front floor heat insulator no.1
- install the heat insulator with the 3 nuts.
Torque: 5.5 Nvm (56 Kgf·cm, 49 in.Vlbf)
18. Install exhaust pipe assy front
19. Install floor panel brace front
- install the floor panel brace with the 2 nuts.
Torque: 29.6 Nvm (302 Kgf·cm, 22 ft·lbf)
20. Install oxygen sensor connector
- connect the oxygen sensor connector.
- install the floor carpet and foot rest.
21. Install air bag sensor assy center
22. Adjust shift lever position
23. Inspect shift lever position
24. Inspect srs warning light
Other materials:
Safe Exit Assist
The safe exit assist is a system
that uses rear side
radar sensors installed on
the inner side of the rear
bumper to help occupants
judge if an approaching
vehicle or bicycle may collide
with a door when opening
it or cancel opening of
the door, to reduce the possibility
of a collision.
WARNING
■C ...
Emergency towing
If a tow truck is not available in an emergency, your vehicle may be temporarily
towed using a cable or chain secured to the emergency towing eyelet. This should
only be attempted on hard surfaced roads for short distances at low speeds.
A driver must be in the vehicle to steer and operate the ...
Check short circuit
If the wire harness is ground shorted as shown in fig. 5,
Locate the section by conducting a resistance check with
the body ground in step (b).
Check the resistance with the body ground.
Disconnect connectors a and c and measure the
resistance between terminals 1 and 2 ...


