Toyota Corolla (E120): Cd sound skips
Inspection procedure
1 Disc cleaning
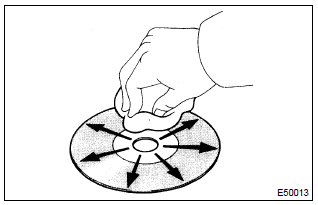
- Disk cleaning
- ) if the disk gets dirty, clean the disk by wiping the surface from the center to outside in the radial directions with a soft cloth.
Notice
: do not use a conventional record cleaner or anti–static preservative.
Standard: malfunction disappear.


2 Replace cd with another and recheck
- Replace the cd with another and recheck.
- Check the installation condition of the radio receiver assembly.
Standard: malfunction disappear.


3 Check when this happens
- Check then this happens.
- Check that in what condition (place) noise occurs.
Standard: driving on the bumpy road.


4 Compare it with another car of same model
- Compare it with another vehicle of the same model.
- Compare with the vehicle of the same type which does not have a
trouble to see if there is any
difference in the condition of trouble occurrence.
Standard: no difference found.


Disc cleaning
- Check of radio receiver assembly installation.
- Check the installation condition of the radio receiver assembly.
Standard: installed properly.


6 Did the temperature in the cabin change rapidly?
- Did the temperature in the cabin change rapidly?
- Check whether or not the rapid temperature change occurred in the
cabin.
Standard: the rapid temperature change occurred.
Reference: the rapid temperature change creates condensation inside the cd player, which may disable playing cd.


Check and replace radio receiver assy


Other materials:
Diagnostic trouble code chart
Notice:
when removing the part, turn the ignition switch to off.
Hint:
using sst 09843–18040, it connect the terminal tc and cg of dlc3.
If any abnormality is not found when inspecting parts, inspect the ecu and
ground points for poor contact.
If a malfunction code is displayed during ...
Inspection procedure
1 Inspect transmission wire(sl)
Disconnect the transmission wire connector from the
transaxle.
measure the resistance according to the value(s) in the
table below.
Standard:
2 Check harness and connector(transmission wire – ecm)
Connect the transmission wire c ...
Replacement
Hint: components:
1. Precaution
2. Disconnect battery negative terminal
3. Remove horn button assy
Place the front wheels facing straight ahead.
using a torx socket wrench (t30), loosen the 2 torx
screws until the groove along the screw circumference
catches on the screw ca ...