Toyota Corolla (E120) 2002–2008 Repair Manual / Emission control / Timing gear cover oil seal
Toyota Corolla (E120): Timing gear cover oil seal
Replacement
1. Remove engine under cover rh
2. Remove front wheel rh
3. Remove fan and generator v belt
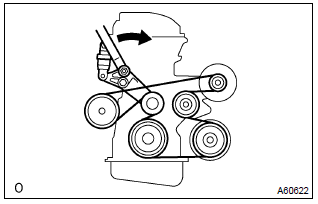
- Turn the v–ribbed belt tensioner slowly clockwise and loosen it. Then, remove the fan and generator belt v and put back the v–ribbed belt tensioner little by little and fix it quietly.
4. Remove engine mounting insulator sub–assy rh
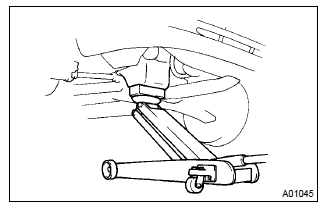
- Remove the the ps oil pump reservoir and put it aside.
- place a wooden block between the jack and engine, and set the jack. Then, remove the 4 bolts, the 2 nuts and engine mounting insulator rh.
5. Remove crankshaft pulley
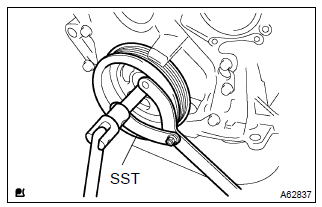
- Using sst, remove the crankshaft pulley bolt.
Sst 09960–10010 (09962–01000, 09963–01000)
- remove the crankshaft pulley from the crankshaft.
6. Remove timing gear cover oil seal
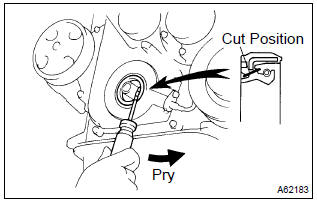
- Using a knife, cut off the oil seal lip.
- using a screwdriver with taping its tip, pry out the oil seal.
Notice
: after the removal, check if the crankshaft is not damaged.
If there is, mend it with a sandpaper (#400).
7. Install timing gear cover oil seal
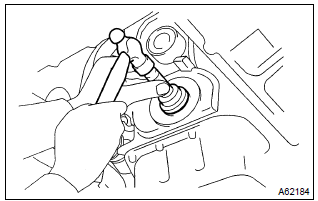
- Apply mp grease to a new oil seal lip.
Notice
: keep the lip off foreign materials.
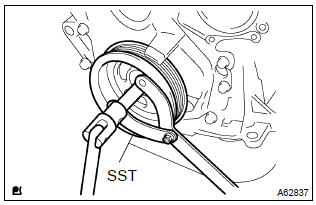
- using sst, tap in the oil seal until its surface is flush with
the timing chain cover edge.
Sst 09223–22010
N
otice
: wipe off extra grease on the crankshaft.
8. Install crankshaft pulley
- Align the pulley set key with the key groove of the pulley, and slide on the pulley.
- using sst, install the crankshaft pulley bolt.
Sst 09960–10010 (09962–01000, 09963–01000) torque: 138 nvm (1,407 Kgf·cm, 102 ft·lbf)
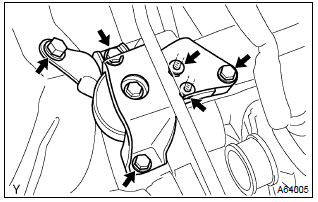
9. Install engine mounting insulator sub–assy rh
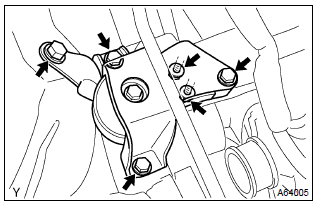
- Install the engine mounting insulator rh with the 4 bolts
and 2 nuts.
Torque: 52 nvm (530 Kgf·cm, 38 ft·lbf)
10. Install front wheel rh torque: 103 nvm (1050 Kgf·cm, 76 ft·lbf)
11. Check engine oil leak


Other materials:
Using the AUX port
This port can be used to connect a portable audio device and listen to it through
the vehicle’s speakers. Press until
“AUX” is displayed.
Connecting a portable player
■Operating portable audio devices connected to the audio system
The volume can be adjusted using the vehicle's ...
Hood
Adjustment
Hint:
since the centering bolt is used as a hood hinge and hood lock
set bolt, the hood and hood lock can not be adjusted with it on.
Substitute a bolt with washer for the centering bolt.
1. Inspect hood sub–assy
Check that the clearance is within the standard value.
...