
Toyota Corolla (E120) 2002–2008 Repair Manual / Diagnostics / Electronic controlled automatic transaxle / Shift solenoid ”a” performance
(shift solenoid valve s1)
Toyota Corolla (E120): Shift solenoid ”a” performance (shift solenoid valve s1)
Dtc p0751 shift solenoid ”a” performance (shift solenoid valve s1)
System description
The ecm uses signals from the vehicle speed sensor and crankshaft position sensor to detect the actual gear position (1st, 2nd, 3rd or o/d gear).
Then the ecm compares the actual gear with the shift schedule in the ecm memory to detect the mechanical trouble of the shift solenoid valves, the valve body or automatic transaxle (clutch, brake or gear etc.).

Monitor description
The ecm commands gear shifts by turning the shift solenoid valves ”on/off”. According to the input shaft revolution, intermediate (counter) shaft revolution and output shaft revolution, the ecm detects the actual gear position (1st, 2nd, 3rd or o/d gear position). When the gear position commanded by the ecm and the actual gear position are not same, the ecm illuminates the mil.
Monitor strategy
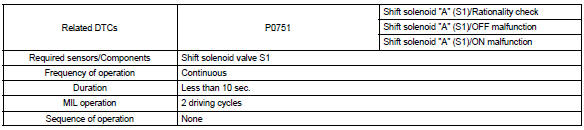
Typical enabling conditions
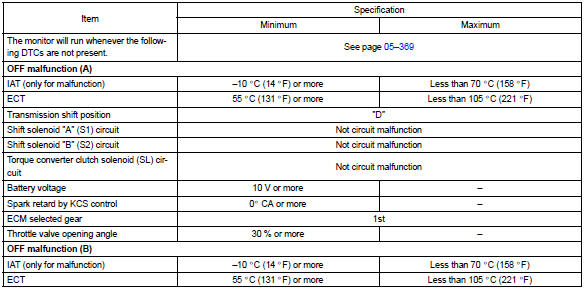
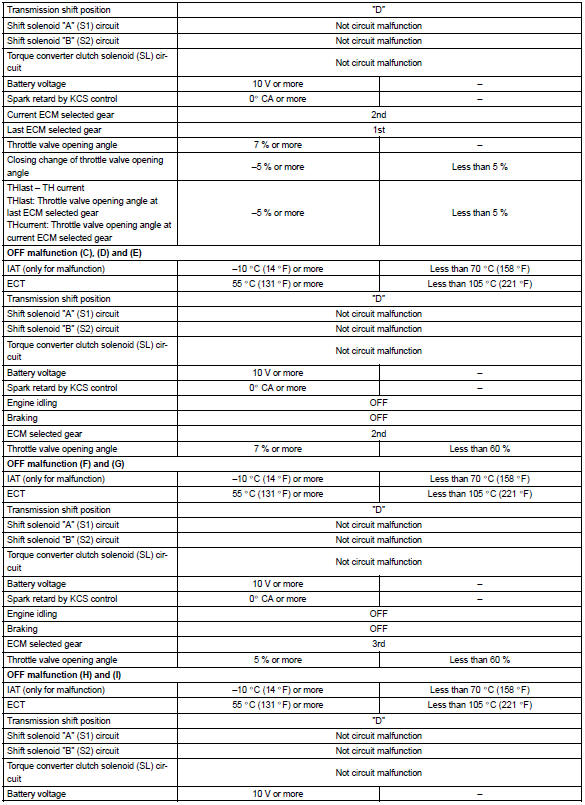
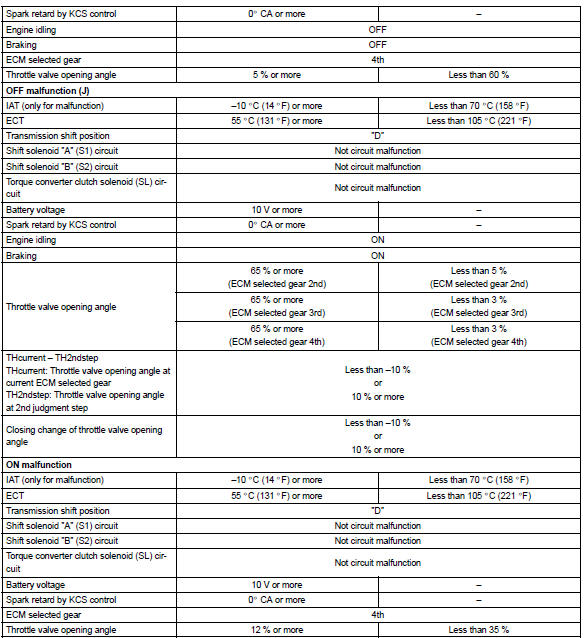
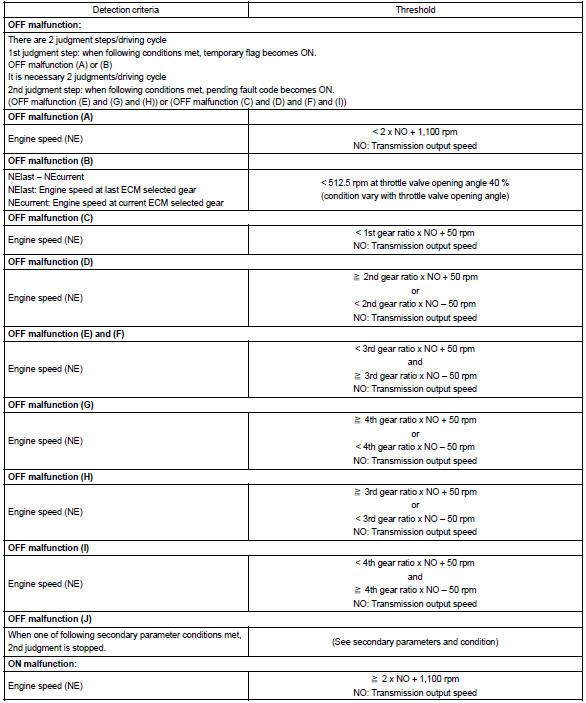
Typical malfunction thresholds


Other materials:
Dialing from call history
You can make a call using the call history, which has the 3 functions below.
: calls which you missed
: calls which you received
: calls which you made
1 Display the phone screen.
2 Select “Call History” tab.
3 Select or the desired entry from
the list.
► When
is selected
4 C ...
Vehicle identification
■ Vehicle identification number
The vehicle identification number (VIN) is the legal identifier for your vehicle.
This is the primary identification number for your Toyota. It is used in registering
the ownership of your vehicle.
This number is stamped on the top left of the instrument p ...
Check short circuit
If the wire harness is ground shorted as shown in fig. 5,
Locate the section by conducting a resistance check with
the body ground in step (b).
Check the resistance with the body ground.
Disconnect connectors a and c and measure the
resistance between terminals 1 and 2 ...