Toyota Corolla (E120): Replacement
Hint
: components:
1. Remove radiator grille sub–assy
2. Remove front bumper cover
3. Remove lh headlamp assy
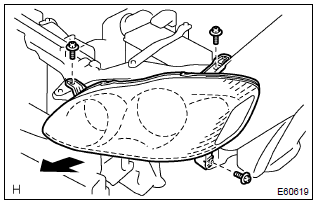
- Remove the 3 bolts.
- pull out the headlight assy lh forward, then disconnect the bracket of body side.
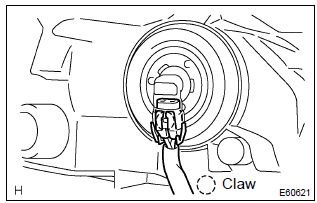
- Release the claws and disconnect the connectors as shown in the illustration, and remove the headlight assy lh.
4. Install retainer, headlamp protector, upr lh
Hint: when only the installation part of the headlight assy lh is damaged, it can be repaired inexpensively by using a headlight protector retainer upr lh. In this case, however, the headlight assy lh itself should not be damaged.
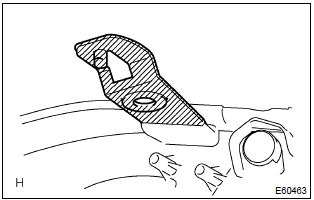
- Cut off the part shaded in the illustration and sand smooth with sandpaper.
Notice
: after cutting off the part roughly, place the headlight protector retainer upr lh against the bosses and gradually file any interfering part until the proper condition for installation is made.
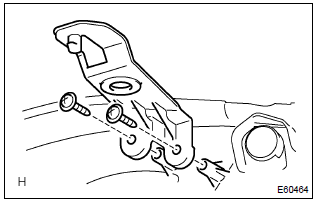
- Install the headlight protector retainer upr lh with 2 screws.
5. Install retainer, headlamp protector, lwr lh
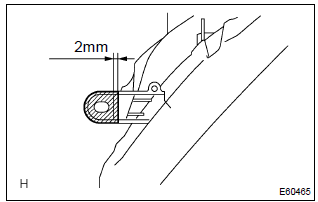
- Cut off the part shaded in the illustration and sand smooth with sandpaper.
Notice
: after cutting off the part roughly, place the headlight protector retainer lwr lh against the bosses and gradually file any interfering part until the proper condition for installation is made.
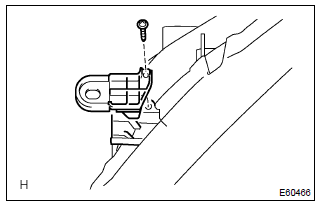
- Install the headlight protector retainer lwr lh with a screw.
6. Put vehicle these conditions
7. Adjust fog light aim
8. Headlight aim only
Other materials:
Parking brake
The parking brake can be
set or released automatically
or manually.
In automatic mode, the
parking brake can be set or
released automatically
according to shift lever
operation.
Also, even in automatic
mode, the parking brake can
be set or released manually.
Operating instructions
■ Using the ma ...
Wireless remote control/electronic key battery
Replace the battery with a new one if it is depleted.
You will need the following items:
● Flathead screwdriver
● Small flathead screwdriver
● Lithium battery CR2016 (vehicles without a smart key system), or CR2032 (vehicles
with a smart key system)
Replacing the battery
&# ...
Replacement
Hint: components:
1. Precaution
2. Disconnect battery negative terminal
3. Remove front door scuff plate rh
4. Remove rear door scuff plate rh
5. Remove front door opening trim rh
6. Remove rear door opening trim rh
7. Remove lap belt outer anchor cover
8. Remove center pillar garnis ...


