Toyota Corolla (E120): Replacement
1. Remove combination meter assembly
2. Disconnect brake master cylinder push rod clevis
- remove the clip and push rod clevis pin and wave washer, and disconnect the push rod clevis from the brake pedal.
3. Remove brake pedal support sub–assy

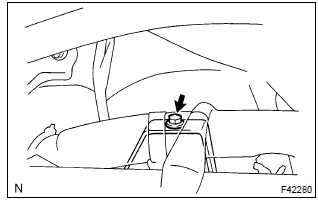
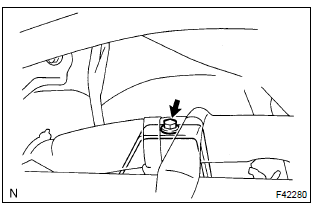
- Remove the bolt from the brake pedal support.
- disconnect the stop lamp switch connector.

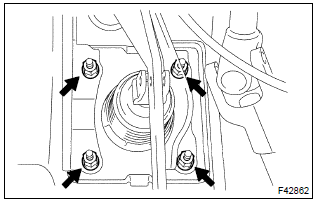
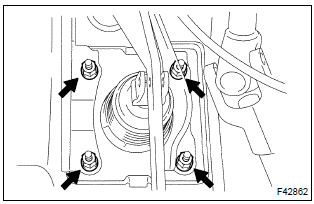
- Remove the 4 nuts and brake pedal support assy.
4. Remove brake pedal sub–assy
- remove the bolt and nut from the brake pedal support sub–assy.
- remove the brake pedal sub–assy and 2 bushes.
5. Remove stop lamp switch assy
- loosen the stop lamp switch lock nut.
- remove the stop lamp switch assy from the brake pedal support sub–assy.
6. Remove brake pedal pad
- remove the brake pedal pad from the brake pedal sub–assy.
7. Install brake pedal pad
- install the brake pedal pad to the brake pedal sub–assy.
8. Install stop lamp switch assy
- install the stop lamp switch assy to the brake pedal sub–assy.
9. Install brake pedal sub–assy
- apply the lithium soap base glycol grease to the 2 new bushes on the ends and sides.
- install the brake pedal sub–assy and 2 bushes to the brake pedal
support with the bolt and nut.
Torque: 36.8 Nvm (375 Kgf·cm, 27 ft·lbf)
10. Install brake pedal support sub–assy

- Install the brake pedal support assy with the 4 nuts.
Torque: 12.7 Nvm (130 Kgf·cm, 9 ft·lbf)
- connect the stop lamp switch connector to the stop lamp switch assy.

- Install the bolt to the brake pedal support sub–assy.
Torque: 23.6 Nvm (240 Kgf·cm, 17 ft·lbf)
11. Connect brake master cylinder push rod clevis
- apply the lithium soap base glycol grease to the push rod clevis pin.
- connect the brake master cylinder push rod clevis with the push rod clevis pin, wave washer and clip.
12. Install combination meter assembly
13. Check and adjust brake pedal height
14. Check pedal free play
15. Check pedal reserve distance
Other materials:
Replacement
Hint: components:
1. Remove front wheel
2. Remove front axle hub lh nut
sst 09930–00010
3. Separate front stabilizer link assy lh
4. Separate speed sensor front lh (w/ abs)
5. Separate front disc brake caliper assy lh
Remove the 2 bolts, separate the brake caliper assy ...
Driving the vehicle
The following procedures
should be observed to
ensure safe driving:
Driving procedure
â– Driving
1. With the brake pedal
depressed, shift the shift
lever to D.
2. Release the parking brake.
If the parking brake is in automatic
mode, the parking brake will be
released automatically.
3. Gradually re ...
Diagnosis system
Description
when troubleshooting obd ii vehicles, the only difference
from the usual troubleshooting procedure
is that you need to connect an obd ii scan tool complying
with sae j1987 or a hand–held tester to the
vehicle, and read off various data output from the
vehicle†...


