Toyota Corolla (E120) 2002–2008 Repair Manual / Diagnostics / Cruise control system / How to proceed with troubleshooting
Toyota Corolla (E120): How to proceed with troubleshooting
1 Vehicle brought to workshop

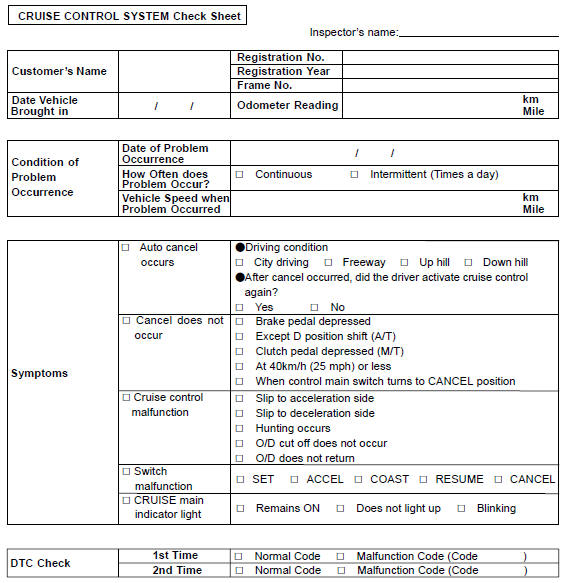
2 Customer problem analysis

3 Check and clear dtc

4 Problem symptom confirmation

5 Symptom simulation

6 Dtc check

7 Dtc chart

8 Problem symptoms table

9 Circuit inspection
10 Identification of problem
11 Parts inspection
12 Repair
13 Confirmation test
End
Customer problem analysis check


Other materials:
Circuit description
The o/d main switch (transmission control switch) is a momentary type switch.
When pressing the o/d main
switch, the o/d off indicator light lights up and the ecm prohibits shifting
into o/d, and when pressing it
once again, the o/d off indicator light goes off and the ecm allows shifting
in ...
Malfunction in fuel receiver gauge
Wiring diagram
Inspection procedere
1 Inspect fuel sender gage assy
Disconnect the connector fuel sender gauge.
check the float position between e and f and measure
the resistance between terminals 2 and 3 of the connector.
Check that the resistance value changes continuously.
S ...
Steering column
Service data
Torque specification
Power steering
Service data
Torque specification
: For use without sst ...