Toyota Corolla (E120) 2002–2008 Repair Manual / Diagnostics / ABS with EBD system / Open circuit in stop light switch
circuit / Circuit description
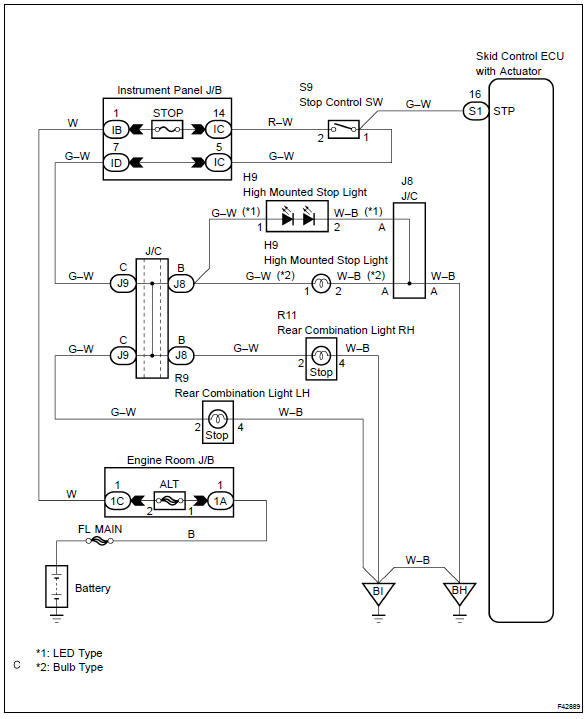
Toyota Corolla (E120): Circuit description

Wiring diagram


Other materials:
Engine immobilizer system
The vehicle’s keys have built-in transponder chips that prevent the engine
from starting if a key has not been previously registered in the vehicle’s on-board
computer.
Never leave the keys inside the vehicle when you leave the vehicle.
Vehicles without a smart key system: The indicator li ...
Front seats
Adjustment procedure
► Manual seat
1 Seat position adjustment lever
2 Seatback angle adjustment lever
3 Vertical height adjustment lever (driver’s side only)
► Power seat (driver’s side only)
1 Seat position adjustment switch
2 Seatback angle adjustment switch
3 Seat cush ...
Bluetooth® device registration status
1 Display the “Bluetooth* Setup” screen.
*: Bluetooth is a registered trademark of Bluetooth SIG, Inc.
2 Select the device.
3 Select “Device Info”.
4 Following screen is displayed:
1 Device Name
2 Change connection method
3 Bluetooth® Address
4 Display your telephone number
The n ...