Toyota Corolla (E120) 2002–2008 Repair Manual / Diagnostics / Electronic controlled automatic transaxle / Check mode procedure
Toyota Corolla (E120): Check mode procedure
1. Dtc check (check mode)
Hint
: hand–held tester only: compared to the normal mode, the check mode has more sensing ability to detect malfunctions. Furthermore, the same diagnostic items which are detected in the normal mode can also be detected in the check mode.
- Procedure for check mode using the hand–held tester.
- Check the initial conditions.
Battery positive voltage 11 v or more throttle valve fully closed transaxle in the p or n position a/c switch is off
- turn the ignition switch off.
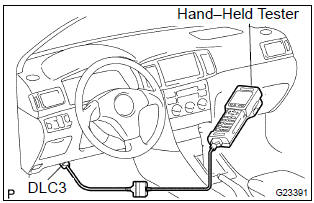
- Connect the hand–held tester to the dlc3.
- Turn the ignition switch to the on position.
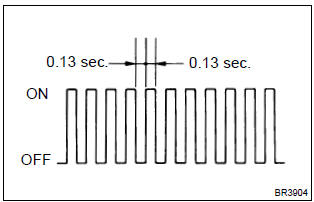
- Switch the hand–held tester from the normal mode to the check mode (check that the mil flashes).
Notice
: if the hand–held tester switches the ecm from the normal mode to the check mode or vice–versa, or if the ignition switch is turned from the on position to the acc or lock position during the check mode, the dtc and freeze frame data will be erased.
- Start the engine (mil goes off after the engine starts).
- Simulate the conditions of the malfunction described by the customer.
Notice
: leave the ignition switch in the on position until you have checked the dtcs, etc.
- After simulating malfunction conditions, use the
hand–held tester diagnosis selector to check the
dtcs and freeze frame data, etc.
Hint
: be sure not to turn the ignition switch off, as turning it off switches the diagnosis system from the check mode to the normal mode, which erases all the dtcs, etc.
- After checking the dtc, inspect the applicable circuit.
2. Dtc clear
- When using the obd ii scan tool or hand–held tester: clearing the dtcs.
- Connect the obd ii scan tool or hand–held tester to the dlc3.
- Turn the ignition switch to the on position.
- When operating the obd ii scan tool (complying with sae j1978) or hand–held tester to erase the codes, the dtcs and freeze frame data will be erased. (See the obd ii scan tool’s instruction book for operating instructions.)
- when not using the obd ii scan tool or hand–held tester: clearing the dtcs.
- Disconnecting the battery terminal or remove the efi and etcs fuses from the engine room j/b for 60 seconds or more.


Other materials:
System description
The ecm uses the signals from the throttle position sensor, air–flow meter
and crankshaft position sensor
to monitor the engagement condition of the lock–up clutch.
Then the ecm compares the engagement condition of the lock–up clutch with the
lock–up schedule in the
ecm memory to de ...
Overhaul
Hint:
installation is in the reverse order of the removal. But the
installation is indicated only when it has a
point.
In the rh side, work in the same procedure as in the lh side.
1. Remove front armrest assy lh
Using a screwdriver, remove the front armrest.
Hint:
tape the ...
Inspection procedure
Hint:
start the inspection from step 1 in case of using the hand–held tester and start
from step 2 in case of not
using the hand–held tester.
1 Read value of hand–held tester(front speed sensor)
Select the datalist mode on the hand–held tester.
check that there is no differe ...