Toyota Corolla (E120): Replacement
1. Remove front door scuff plate rh
- Using a screwdriver, remove the front door scuff plate rh.
Hint
: tape the screwdriver tip before use.
- Remove front door scuff plate lh
- Remove rear door scuff plate rh
- Using a screwdriver, remove the rear door scuff plate rh.
Hint
: tape the screwdriver tip before use.
- employ the same manner described above to the other side.
4. Remove rear door scuff plate lh
5. Remove cowl side trim board rh
- Remove the clip.
- using a screwdriver, remove the cowl side trim board rh.
Hint
: tape the screwdriver tip before use.
- employ the same manner described above to the other side.
6. Remove cowl side trim board lh
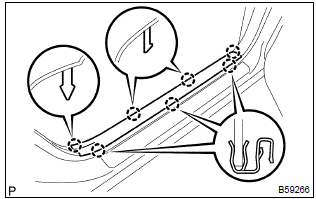
7. Remove front door opening trim rh
8. Remove front door opening trim lh
9. Remove rear door opening trim rh
10. Remove rear door opening trim lh
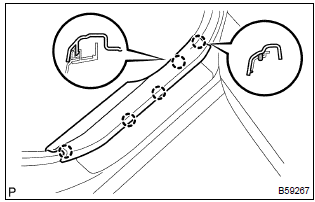
11. Remove center pillar garnish lower rh
- Pull the center pillar garnish lower rh upward to remove it.
- employ the same manner described above to the other side.
12. Remove center pillar garnish lower lh
13. Remove center pillar garnish rh

- Using a screwdriver, remove the shoulder anchor cover
cap.
Hint
: tape the screwdriver tip before use.
- remove the bolt and front seat outer belt shoulder anchor.
- remove the bolt and front seat outer belt floor anchor.

- Using a screwdriver, remove the center pillar upper garnish rh.
Hint
: tape the screwdriver tip before use.
- employ the same manner described above to the other side.
14. Remove center pillar garnish lh
15. Remove rear seat cushion assembly (, 72–8)
16. Remove rear seat back assy (fixed type rear seat)
17. Remove rear seat back assy (separated type rear seat)
18. Remove rear seat side cover rh (fixed type rear seat)

- Using a screwdriver, remove the rear seat side cover rh.
Hint
: tape the screwdriver tip before use.
- employ the same manner described above to the other side.
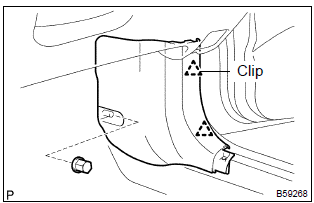
19. Remove rear seat side garnish lh (fixed type rear seat)
20. Remove room partition board lh (separated type rear seat)
- Remove the 2 clips and 2 built–in clips room partition board lh.
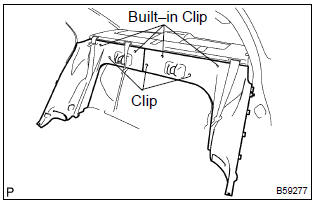
21. Remove room partition board rh
(separated type rear seat)
- remove the clip and 2 built–in clips room partition board rh.
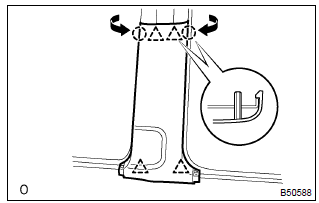
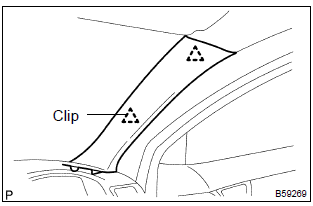
22. Remove roof side garnish inner rh
- Using a screwdriver, remove the roof side garnish inner
rh.
Hint
: tape the screwdriver tip before use.
- employ the same manner described above to the other side.
23. Remove roof side garnish inner lh
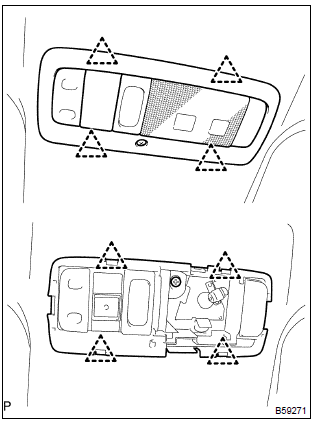
24. Remove package tray trim panel assy
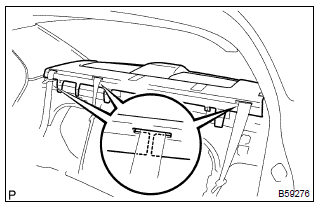
- Using a clip remover, remove the 7 clips.
- pull out the belt from the slit and then remove the package tray trim panel assembly.
25. Remove front pillar garnish rh
- Using a screwdriver, remove the front pillar garnish rh.
Hint
: tape the screwdriver tip before use.
- employ the same manner described above to the other side.
26. Remove front pillar garnish lh
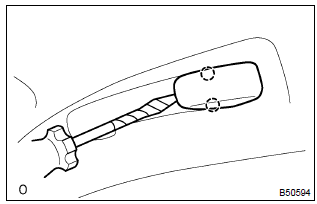
27. Remove rh visor assy
- Remove the 2 screws and rh visor assembly.
28. Remove lh visor assy
29. Remove map lamp assy (w/ sliding roof)
- Remove the screw.
- using a screwdriver, remove the map lamp lens and cover.
Hint
: tape the screwdriver tip before use.
- remove the screw.
- using a screwdriver, remove the glove box lamp assembly.
Hint
: tape the screwdriver tip before use.
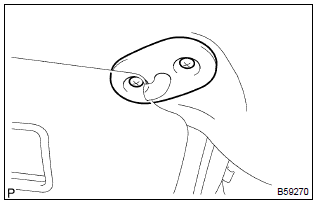
30. Remove room lamp assy no.1
- Using a screwdriver, remove the lens cover.
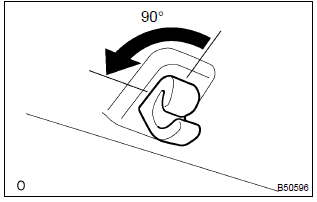
- using a screwdriver, remove the room lamp assembly no.1 As shown in the illustration.
31. Remove assist grip sub–assy
- Using a screwdriver, remove the 2 assist grip covers.
- remove the 2 screws and assist grip sub–assy.
32. Remove visor holder
- Remove the holder of the sun visor by turning it counterclockwise.
33. Remove sun roof opening trim moulding (w/ sliding roof)
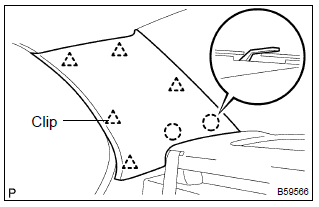
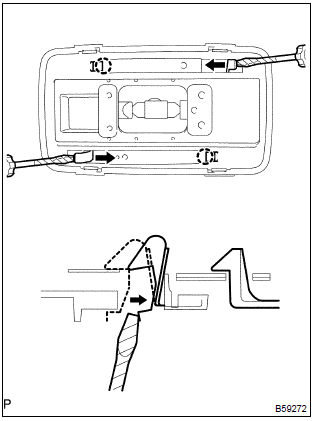
34. Remove roof headlining assy
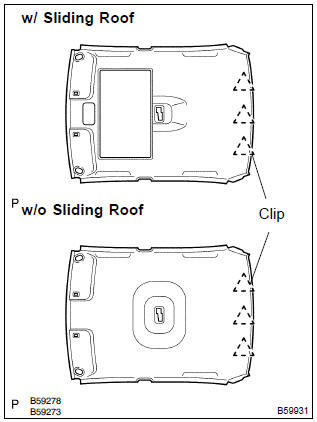
- Remove the 3 clips and roof headlining assembly.
35. Install roof headlining assy
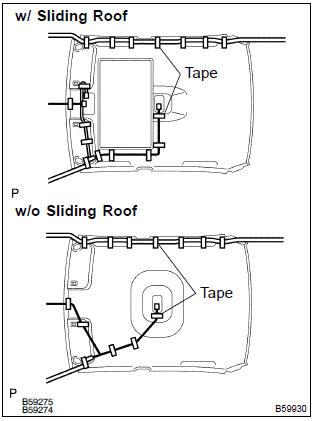
- Align the markings, and then install the wire harness with tape.
Hint
: be careful for dirt or foreign objects not to stick to the adhered part when peeling off the double–stick tape.
- attach the roof wire harness across the adhered part.
Notice
: roof wire harness should be attached securely.
- install the 3 clips.
36. Install room partition board rh (separated type rear seat)
37. Install room partition board lh (separated type rear seat)
38. Install rear seat side cover rh (fixed type rear seat)
39. Install rear seat side garnish lh (fixed type rear seat)
40. Install rear seat back assy (fixed type rear seat)
41. Install rear seat back assy (separated type rear seat)


Other materials:
Replacement
1. Work for preventing gasoline from spilling out
2. Remove front wheels
3. Remove engine under cover rh
4. Remove engine under cover lh
5. Drain coolant
6. Remove cylinder head cover no.2
Remove the 2 nuts, 2 clips and cylinder head cover.
7. Disconnect radiator hose inlet
&nb ...
Customization
Customizable features
Your vehicle includes a variety
of electronic features
that can be personalized to
suit your preferences. The
settings of these features
can be changed using the
multi-information display,
the audio system screen, or
at your Toyota dealer.
Customizing vehicle features
■ Chang ...
Radio broadcast cannot be received (bad reception)
Inspection procedure
1 Check if radio auto–search functions properly
Check if the radio auto–search functions properly.
Perform the auto–search of the radio and check that it functions
normally.
Standard: the radio auto–search functions properly.
2 Check optional ...